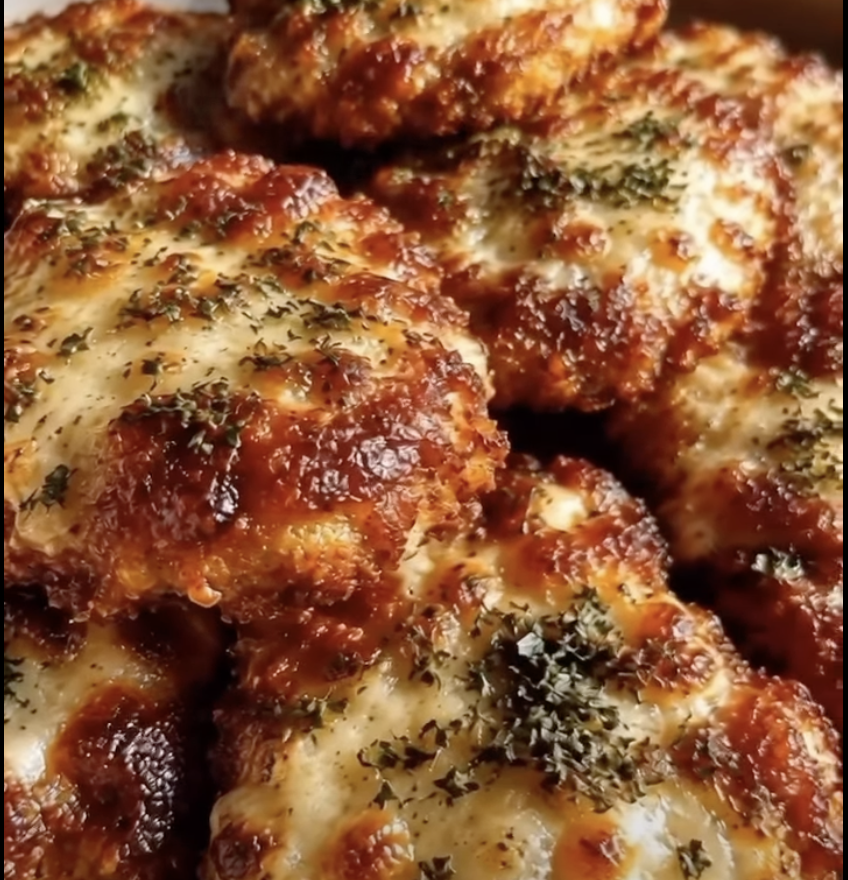
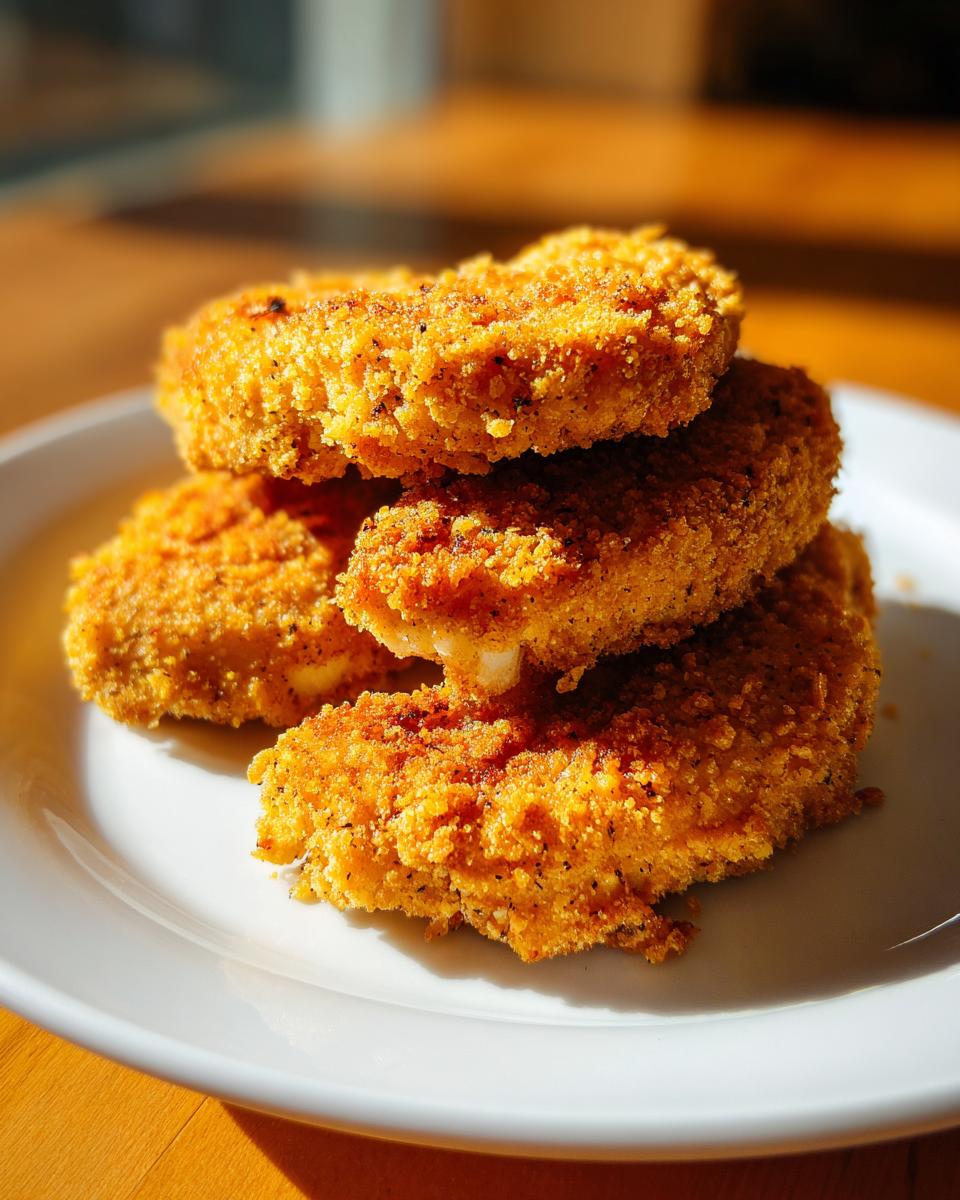
Okay, confession time: I love fried chicken, truly, deeply love it. But deep-frying? Ugh, the mess, the smell that haunts your kitchen for three days—no thank you! I spent *months* trying to crack the code, testing oven temperatures and breadcoat mixes, because I absolutely craved that crunch without the guilt. Guess what? I finally nailed it. These **Crispy Baked Chicken Tenders** have officially retired my deep fryer for good. Trust me when I say these are so unbelievably crispy, you’ll forget they ever saw an oven rack instead of a vat of hot oil. It’s pure magic, and it’s so much easier than you think!
Why You Will Make These Crispy Baked Chicken Tenders Again and Again
I keep coming back to this recipe for so many reasons. It’s ridiculously simple, which is key for weeknight dinners when you’re tired but still craving something satisfying. Plus, they feel way healthier since we skip the deep-fryer entirely. I swear, you get all the crunch without any of the fuss.
- They are genuinely oven-crispy—not that sad, soggy baked coating we all know.
- We’re using whole chicken breasts, so you get that awesome lean protein boost.
- The whole process, from chopping to baking, takes less than 40 minutes total!
If you’re looking for more great ideas using chicken breast, check out these easy chicken recipes for inspiration; honestly, though, this tender recipe is going straight to the top of your favorites list.
Essential Ingredients for Perfect Crispy Baked Chicken Tenders
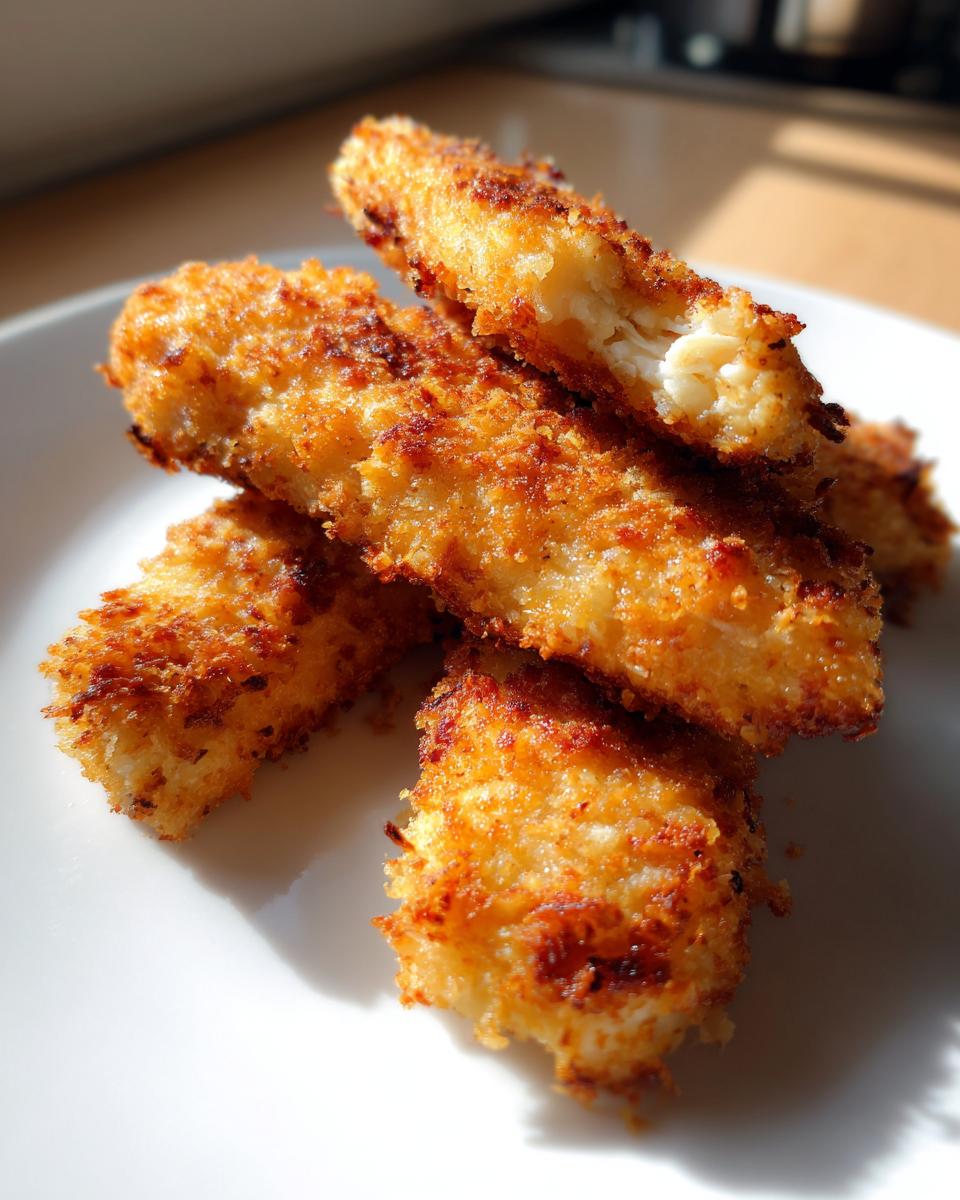
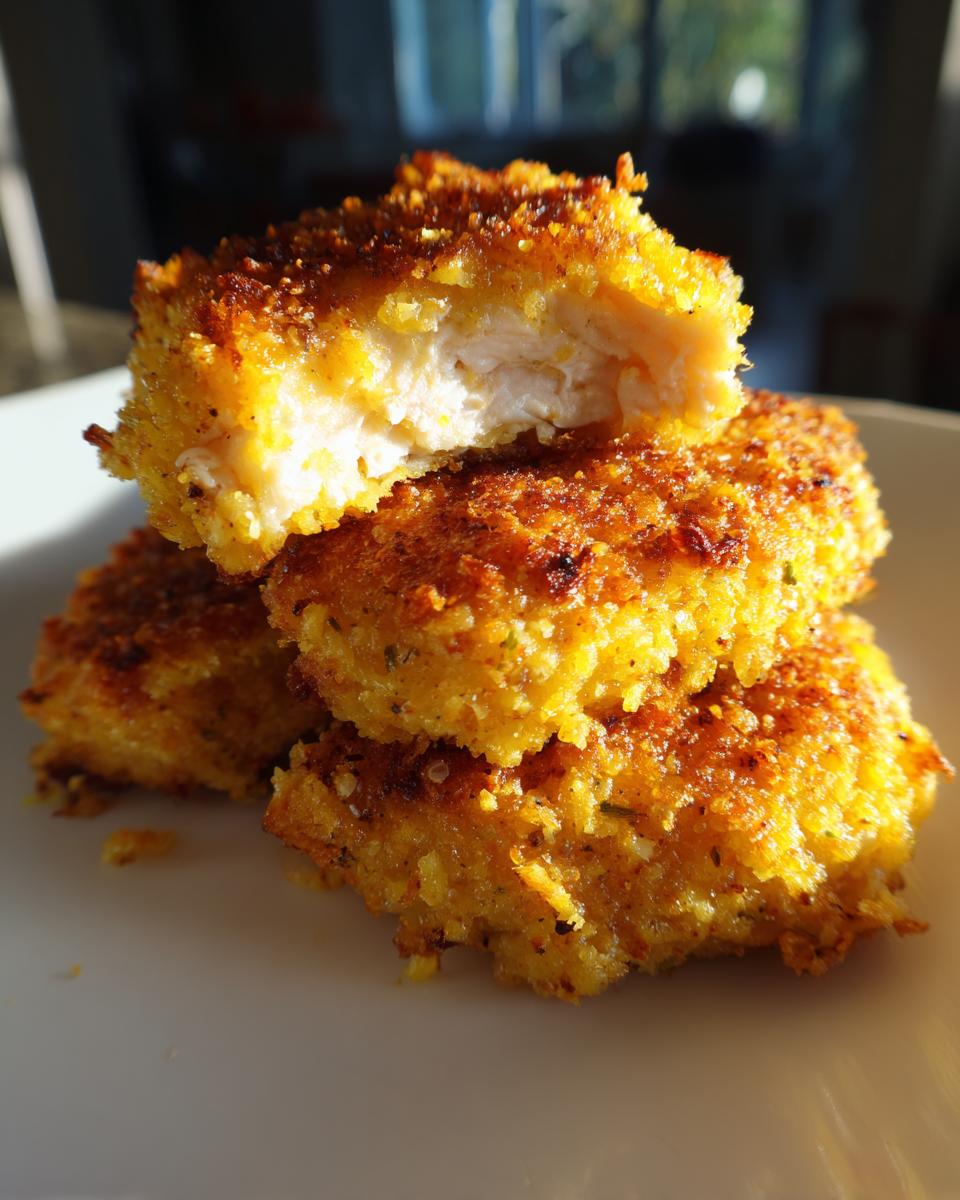
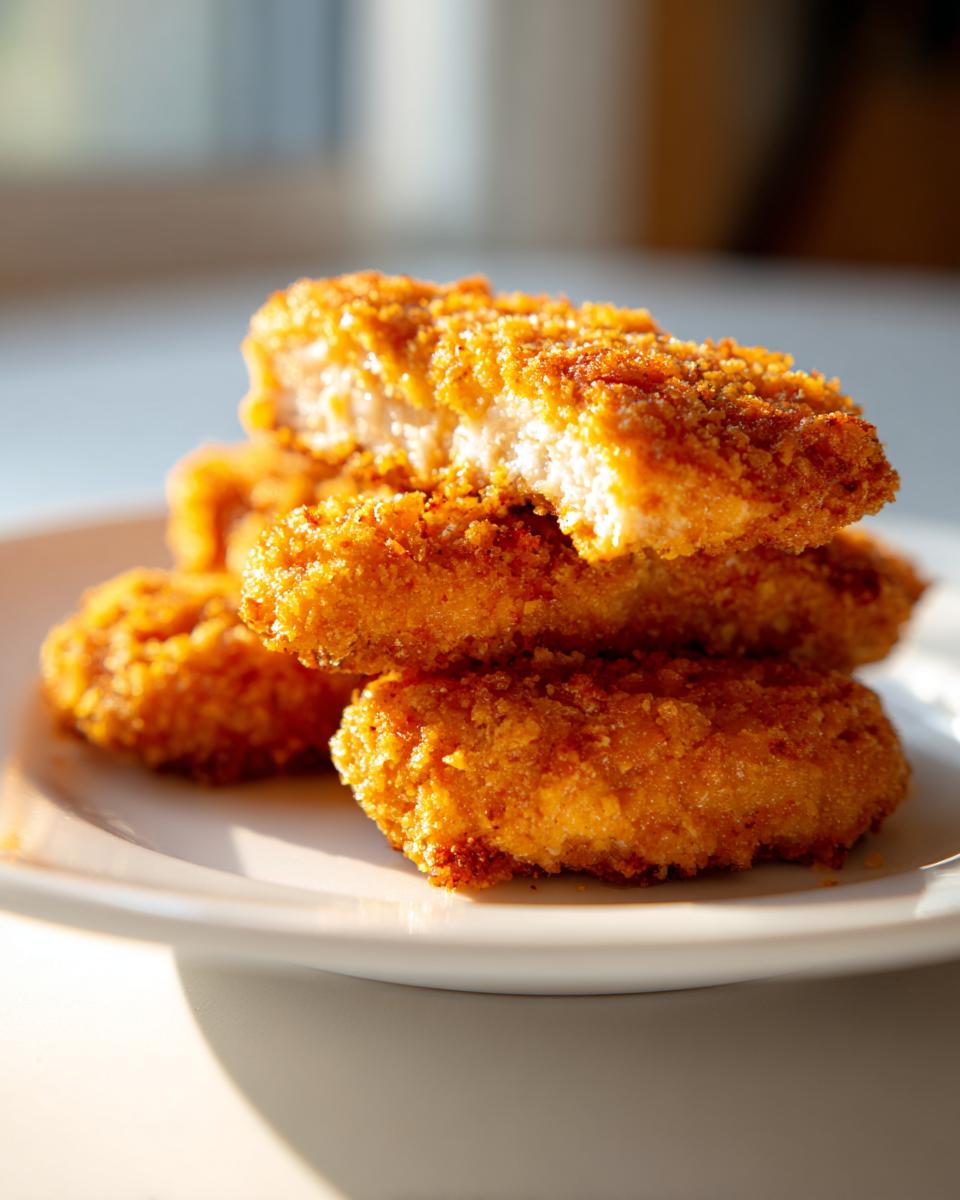
You only need a handful of things for this recipe, but the quality of the coating makes all the difference! We’re not using fancy batters here; we’re relying on the perfect trio of flour, egg, and my secret weapon: Panko breadcrumbs. You absolutely must use Panko for that incredible shatter when you bite in. And hey, if you’re feeling extra, toss in a quarter cup of grated Parmesan cheese into those breadcrumbs—it really boosts the savory factor!
Here’s what you need to pull together your dipping station:
- 1.5 pounds of boneless, skinless chicken breasts—make sure they are uniform!
- 1 cup all-purpose flour for that first light coat.
- 2 large eggs mixed with 1 tablespoon of water for the binder.
- 1.5 cups Panko breadcrumbs—non-negotiable for the crunch!
- Seasonings: 1 teaspoon salt, 0.5 teaspoon black pepper, 0.5 teaspoon garlic powder, and 0.25 teaspoon paprika.
- And don’t forget the cooking spray; we use it twice!
Getting your lean protein ready is the first step towards a great meal, so check out some lean protein meals for inspiration while you gather your supplies!
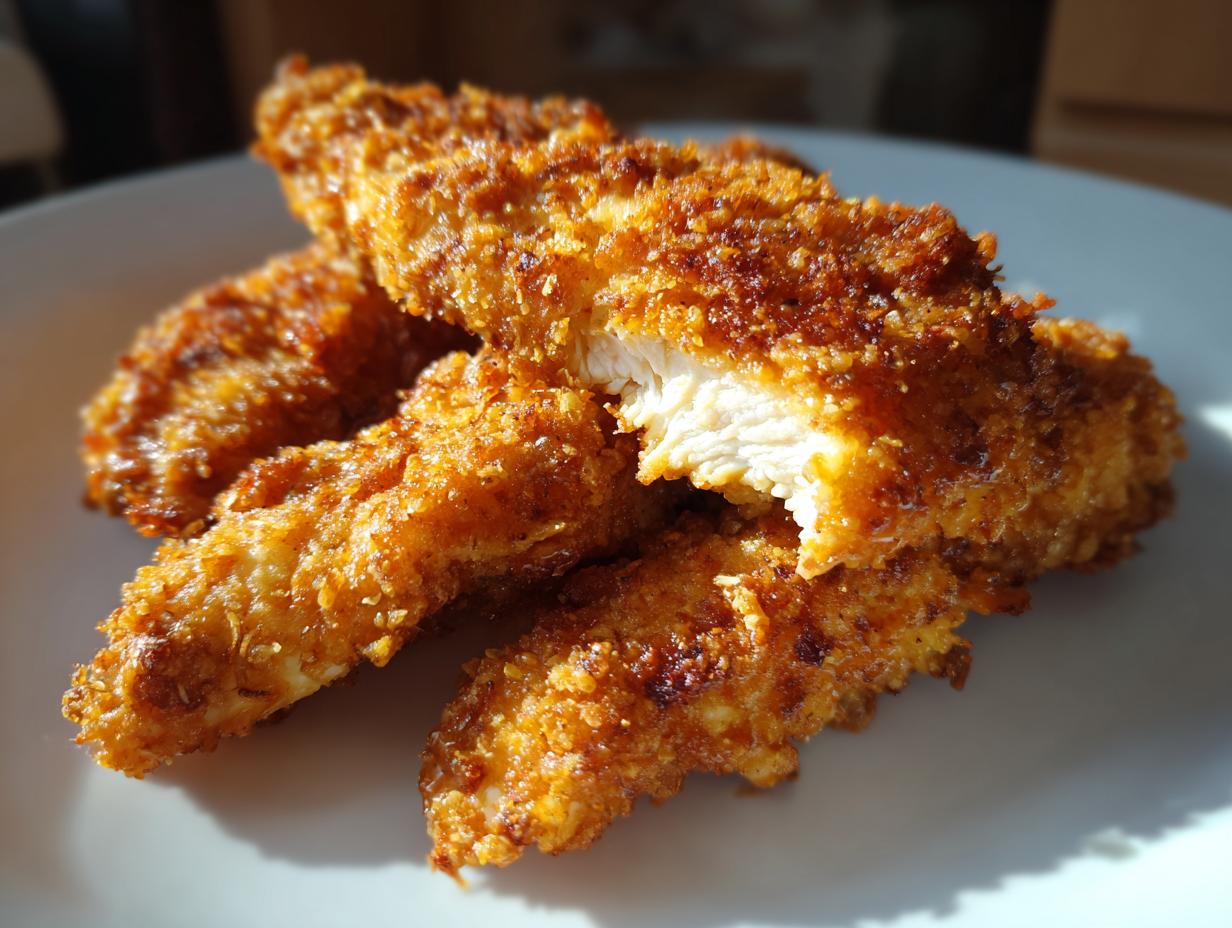
Step-by-Step Guide to Making Crispy Baked Chicken Tenders
This is where the magic happens, honestly! Making the best crispy baked chicken tenders is all about process—it’s less like cooking and more like setting up an assembly line. If you follow these steps precisely, you’re guaranteeing a perfect, golden crust every single time. I learned that keeping the dredging station neat is half the battle, and lining that pan properly makes cleanup a breeze. Plus, we never skip that final spray of oil; that’s the trick to that deep-fry look without the deep-fry mess!
For a great primer on keeping your oven game strong, this guide on crispy oven baked chicken tenders has some fantastic insights, but let’s jump right into *my* method.
Preparing the Oven and Chicken for Crispy Baked Chicken Tenders
First things first, you need heat! Crank that oven up to 400 degrees Fahrenheit (that’s 200 Celsius). We’re lining our baking sheet with parchment paper—this is non-negotiable for easy clean-up—and giving it a light coat of cooking spray. Next, take your 1.5 pounds of skinless chicken breasts. You want to slice these up into uniform tenders, aiming for about 1 inch thick. Uniformity is key; if some are chunky and some are skinny, they won’t cook evenly, and that’ll ruin your crispness timing!
Setting Up the Three-Step Dredging Station
Alright, line up three shallow dishes for our dredging ritual. Dish one gets all your flour. Dish two is for the egg wash—just whisk those two eggs with that tablespoon of water until they are nicely combined. Dish three holds the Panko, salt, pepper, garlic powder, and paprika. Remember, you need to press those breadcrumbs onto the chicken firmly so they stick! For anyone looking at clean eating recipes, this coating is surprisingly minimal.
The order is super important here. You dip the chicken first in the flour, then the egg, and then the Panko. Always shake off the excess flour after that first dip; you don’t want clumps of dry flour sticking to your egg wash, trust me!
Coating and Baking Your Crispy Baked Chicken Tenders
Once coated beautifully in that seasoned Panko, place the tender on your prepared sheet. And here’s my most important tip for authentic crunch: use the cooking spray again! Give the tops of the breaded tenders a light, even mist. This helps activate the crumbs and makes them golden brown. You need to make sure these little guys aren’t touching each other on the pan; give them some breathing room so the air can circulate and crisp up every side.
Bake them for about 18 to 22 minutes total. We have to flip them halfway through—always! That ensures both sides get that fantastic golden color. Keep an eye on the internal temperature; you’re aiming for 165 degrees Fahrenheit (74 Celsius). If you follow these steps, you’ll have healthy recipes that taste like a cheat meal!
Tips for Achieving Next-Level Crispy Baked Chicken Tenders
Look, getting decent baked chicken is easy, but getting truly crispy baked chicken tenders takes a couple of little secrets. First, if you try swapping Panko for regular breadcrumbs, you’ll be sad! Panko is flakier and lighter, which delivers that incredible crunch we want. Second, give those tenders space!
I cannot stress this enough: if they are touching on the baking sheet, they are going to steam each other instead of getting crispy. Pull out two sheets if you have to! My personal game-changer, though? That final minute spray of cooking spray right before they go in. It mimics frying oil without adding all that fat, coating the seasoning perfectly.
For those nights when you need food on the table fast, trust me; these fit right into stress-free weeknight dinners because the prep is so quick once you get the rhythm down!
Ingredient Notes and Substitutions for Crispy Baked Chicken Tenders
Let’s talk about tweaks, because sometimes we don’t have exactly what the recipe calls for, right? The chicken breasts work so well here simply because they are lean and they hold their shape wonderfully during the dredging and baking process. If you wanted to use chicken thighs? You absolutely could, but they have more fat, so they might cook up a little differently, maybe a bit softer.
For the flour, if you’re avoiding wheat, using a high-quality gluten-free all-purpose blend works just fine in the first dish. It might just need a touch more seasoning. And while I obsess over Panko, if you only have regular breadcrumbs, use them! Just know you’ll need to press them on a tiny bit harder to get that great surface area for crisping.
Serving Suggestions for Your Baked Chicken Tenders
Honestly, crispy baked chicken tenders are just glorified chicken strips, but fancy! That means they are begging for some killer dips. Skip the bottled ranch that tastes like shelf dust. I always have a big jar of my homemade honey mustard ready to go—the tang cuts through the coating beautifully. BBQ sauce is a classic, but if you want something lighter, even plain Greek yogurt mixed with a little lemon juice and dill is surprisingly fantastic.
If you’re turning these into a full meal, they pair perfectly with something quick, like a simple salad or maybe some of those amazing BBQ chicken quesadillas I made last week—just swap out the tortilla for a plate of these tenders instead! They are great hot, fresh out of the oven.
Storage and Reheating Crispy Baked Chicken Tenders
We never manage to eat them all, but don’t worry about leftovers! Place your extra crispy baked chicken tenders in an airtight container and stick them in the fridge. They’ll stay good for about three or maybe four days, max. Now, the important part: reheating! If you zap these in the microwave, they turn sad really fast, right? You must avoid the microwave!
To bring back that glorious crunch, I strongly recommend putting them back in a 400-degree oven for about 8 to 10 minutes. Better yet, if you have an air fryer, just toss them in there for about 4 minutes at 375°F. They come out perfectly crisp, just like they were fresh! If you are looking for more quick meal ideas for busy nights, check this out: 30-minute dinner ideas.
Frequently Asked Questions About Crispy Baked Chicken Tenders
I get so many questions about how to tweak this recipe, and honestly, I love hearing how everyone is customizing their own batch of crispy baked chicken tenders! Here are the top things people ask me most often.
How can I guarantee these become the crispiest baked chicken tenders possible?
Okay, this is my favorite question! To get that extra shatter, you need two non-negotiables: Panko breadcrumbs instead of the regular kind, and you absolutely must spray the tops with cooking spray *after* you have coated them. That little bit of extra fat hitting the high heat is what gives you that fantastic golden crust. Also, don’t overcrowd the pan; give them space!
Can I swap the chicken breasts for chicken thighs in this recipe?
You really can, but just be aware that chicken thighs are fattier than the lean breasts we used here. They might brown slightly differently and won’t hold their shape quite as rigidly after baking. If you use them, cut them to about the same thickness, and maybe drop the cooking time by 2-3 minutes, checking the temperature frequently. Check out these other chicken recipes for comparison!
What if I don’t have Panko? Can I use regular breadcrumbs for my baked chicken?
If Panko is out, regular breadcrumbs will work, but they won’t give you the same level of crunch we are aiming for with these **baked chicken tenders**. Regular crumbs are finer, so they tend to absorb moisture faster. If you have to use them, make sure you really press them onto the egg wash firmly, and maybe add a little extra paprika to the mix for color!
Nutritional Estimates for Crispy Baked Chicken Tenders
I always try to keep the nutrition as straightforward as possible, especially since this is a healthier swap for fried chicken! Just remember, these numbers are estimates based on the ingredients listed, so your mileage might vary depending on exact portion sizes or if you went heavy on that optional Parmesan cheese boost.
- Calories: 320
- Protein: 38g
- Fat: 8g (only 2g saturated!)
- Carbohydrates: 25g
- Sodium: 450mg
This is why I love this recipe—nearly 40 grams of protein for only 320 calories! How amazing is that? Always treat these figures as a good guideline rather than a strict fact sheet.
Share Your Experience Making These Crispy Baked Chicken Tenders
I poured my heart and so many test batches into getting these crispy baked chicken tenders absolutely perfect for you, and now it’s your turn! I really want to know what you think once you try them. Did the Panko shatter just right? Did your kids devour them before you could try them?
Please don’t be shy! Head down to the comments below and let me know how they turned out for you. If you tried my little Parmesan trick, tell me if you think it made a difference! And if you loved the recipe, give it a quick rating so other busy cooks know it’s a guaranteed winner. We can all learn from each other’s tweaks, so keep sharing those adventures in the kitchen!
If you want to keep this cooking journey going, you can always browse the latest posts on the blog—there’s always something new cooking over here!
PrintCrispy Baked Chicken Tenders

Simple recipe for making chicken tenders crispy without deep frying.
- Prep Time: 15 min
- Cook Time: 20 min
- Total Time: 35 min
- Yield: 4 servings 1x
- Category: Main Course
- Method: Baking
- Cuisine: American
- Diet: Low Fat
Ingredients
- 1.5 lbs boneless, skinless chicken breasts
- 1 cup all-purpose flour
- 2 large eggs
- 1 tablespoon water
- 1.5 cups panko breadcrumbs
- 1 teaspoon salt
- 0.5 teaspoon black pepper
- 0.5 teaspoon garlic powder
- 0.25 teaspoon paprika
- Cooking spray
Instructions
- Preheat your oven to 400 degrees Fahrenheit (200 degrees Celsius). Line a baking sheet with parchment paper and lightly coat with cooking spray.
- Cut the chicken breasts into uniform tender shapes, about 1 inch thick.
- Set up a dredging station with three shallow dishes. Place flour in the first dish.
- In the second dish, whisk the eggs and water together.
- In the third dish, mix the panko breadcrumbs, salt, pepper, garlic powder, and paprika.
- Dredge each chicken tender first in the flour, shaking off excess.
- Dip the floured tender into the egg mixture, letting excess drip off.
- Coat the tender thoroughly in the breadcrumb mixture, pressing lightly so the crumbs adhere.
- Place the coated tenders on the prepared baking sheet, ensuring they do not touch.
- Lightly spray the tops of the tenders with cooking spray for extra crispness.
- Bake for 18 to 22 minutes, flipping halfway through, until the internal temperature reaches 165 degrees Fahrenheit (74 degrees Celsius) and the coating is golden brown.
Notes
- For extra flavor, add 1/4 cup grated Parmesan cheese to the breadcrumb mixture.
- Serve immediately with your favorite dipping sauce.
Nutrition
- Serving Size: 4 tenders
- Calories: 320
- Sugar: 1
- Sodium: 450
- Fat: 8
- Saturated Fat: 2
- Unsaturated Fat: 6
- Trans Fat: 0
- Carbohydrates: 25
- Fiber: 1
- Protein: 38
- Cholesterol: 105
Keywords: baked chicken tenders, crispy chicken, healthy chicken, baked chicken, chicken recipe