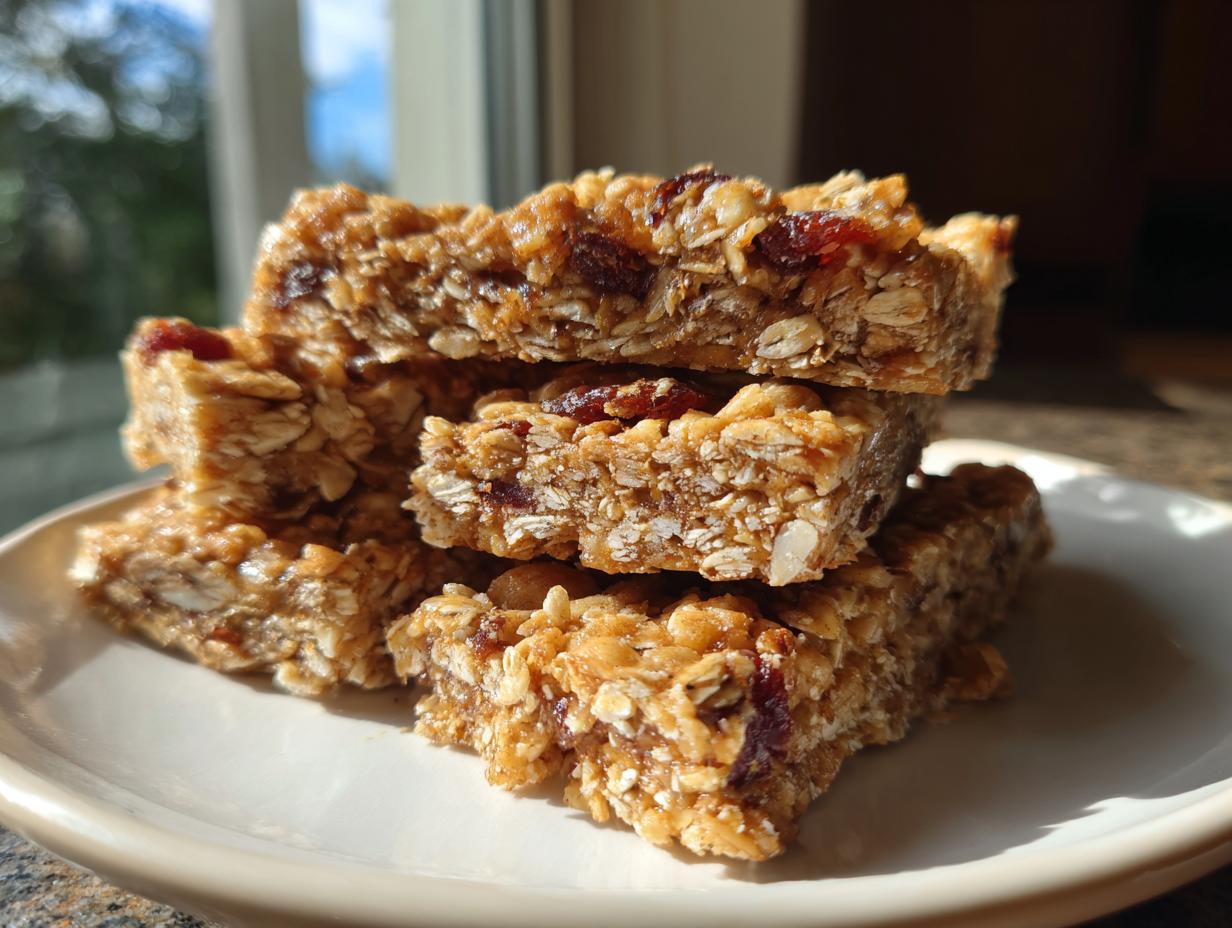
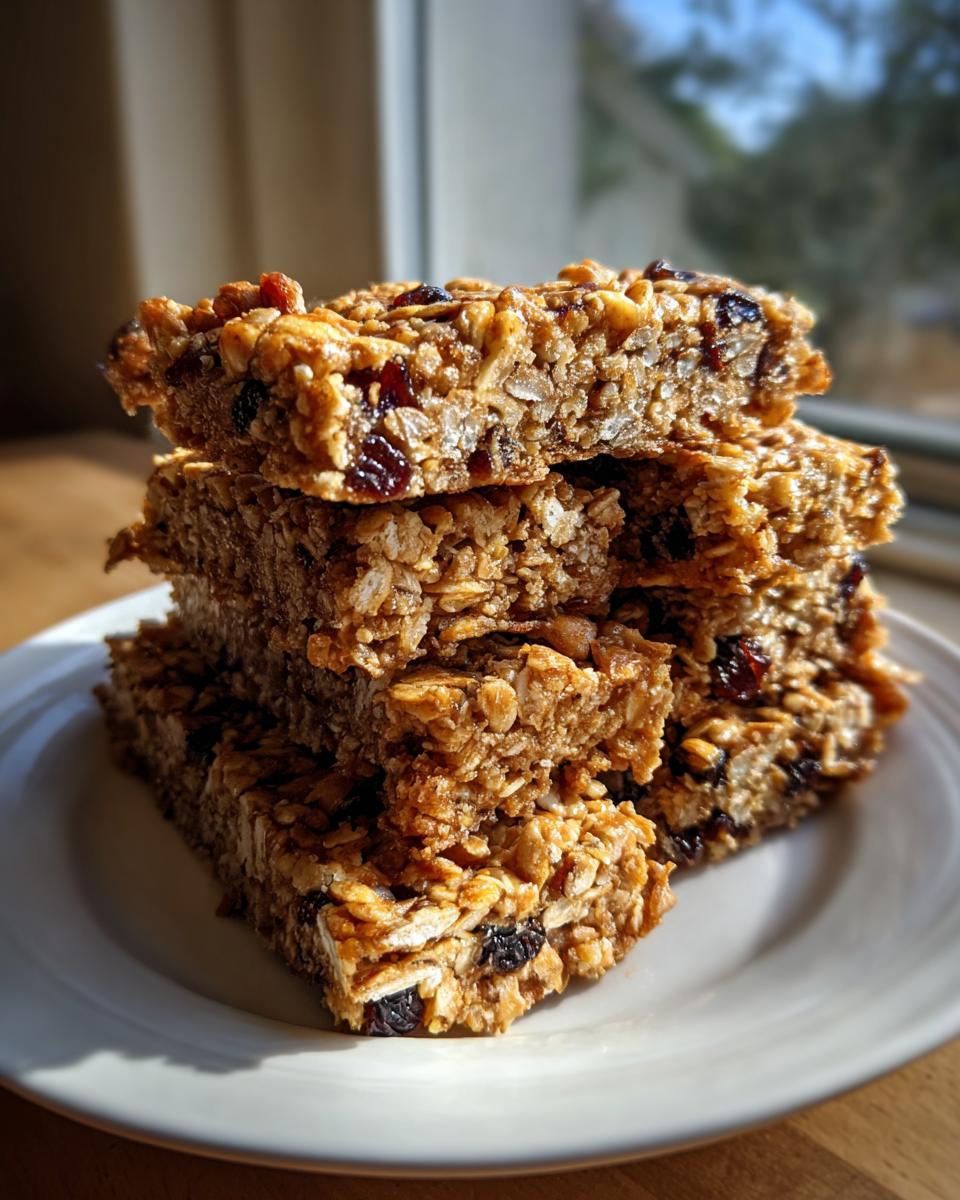
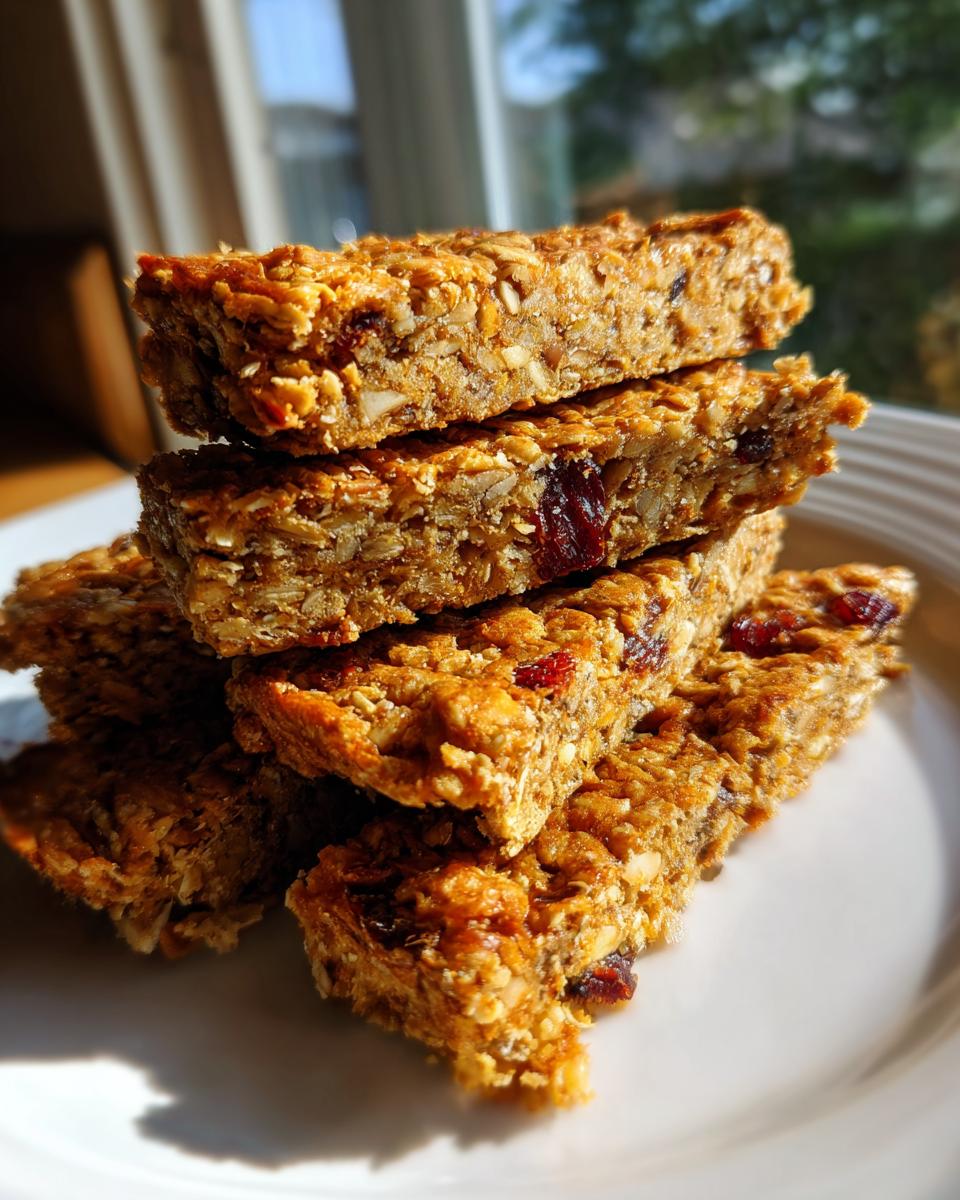
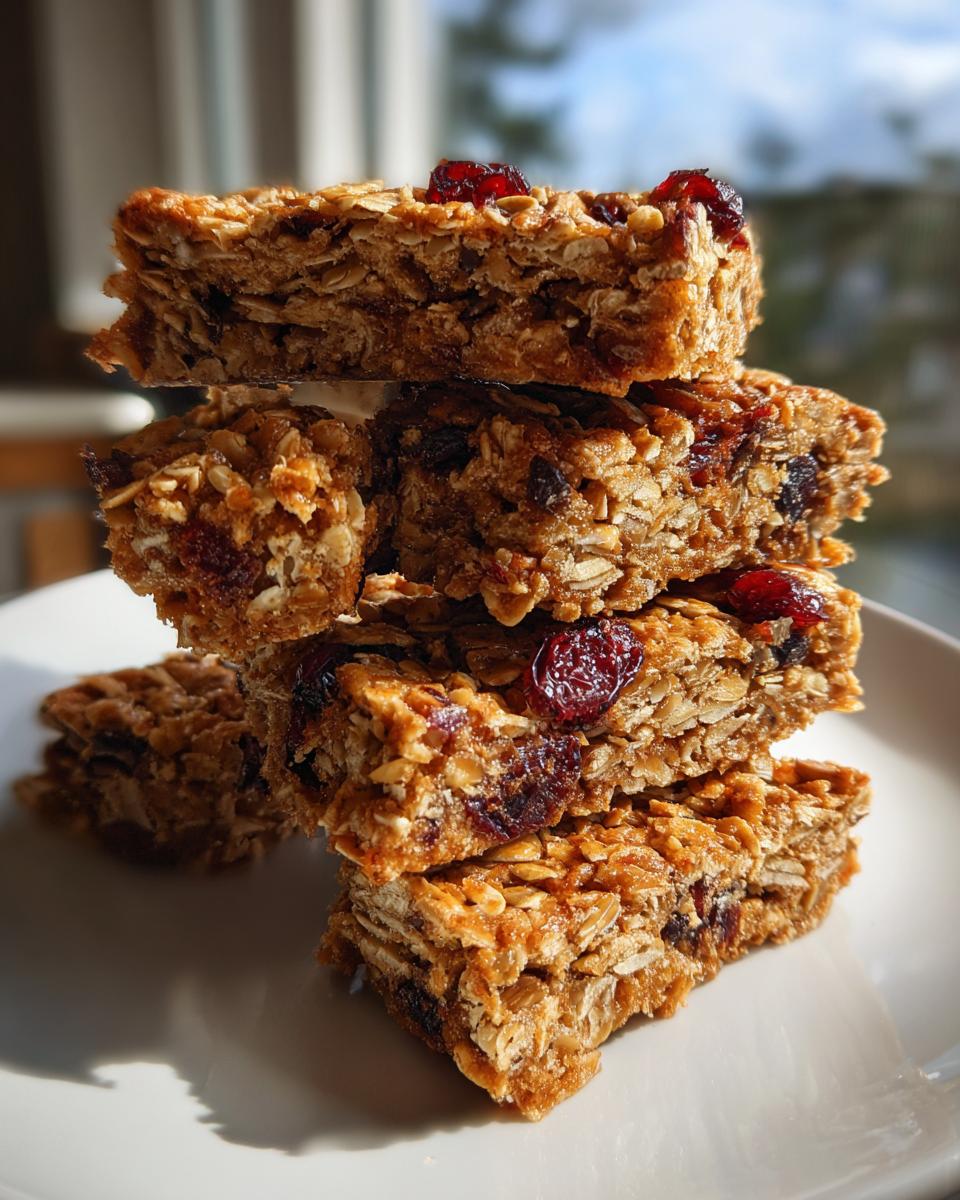
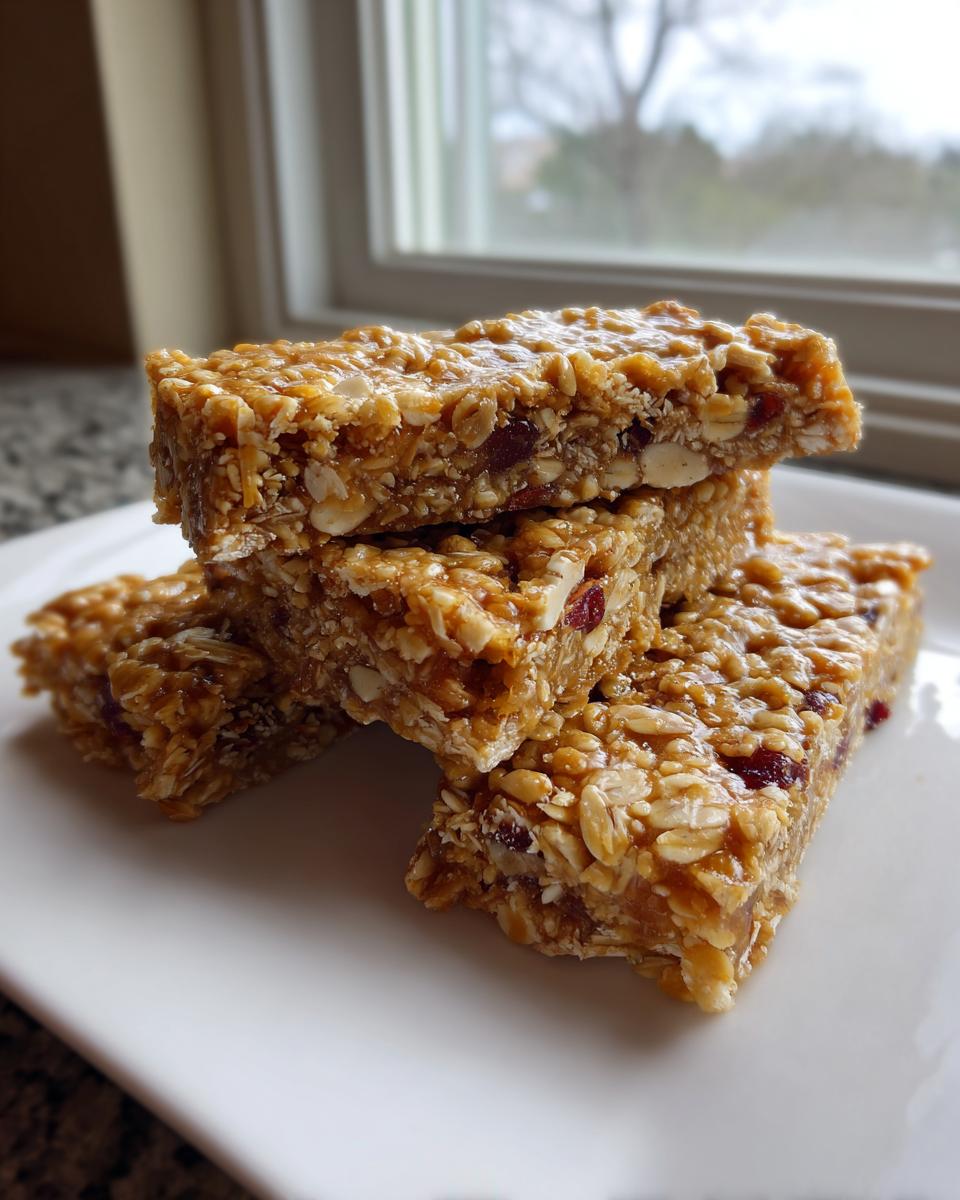
You know those days where you’re running out the door for a hike or just stuck in back-to-back meetings, and suddenly your stomach starts rumbling? Traditional snacks are either too fussy or full of stuff I can’t pronounce! That’s why I perfected these Easy Homemade Granola Bars. Seriously, these are the absolute best because they are super chewy—none of that cardboard crunchiness—and they take almost zero effort. I’m talking mixing bowl, one small pot, and done! We throw in whatever dried fruit we have on hand, and they hold together perfectly. I always make a double batch just to have that perfect, portable snack ready for whenever life gets busy. You can find some other great ideas for nutritious fresh snacks right here!
Why You Will Love These Easy Homemade Granola Bars
Honestly, I keep making these because they hit every snack requirement perfectly. They are just so satisfying!
- They achieve that perfect, comforting chewy texture—not dry or crumbly!
- Setup is ridiculously fast; you’ll be done mixing in under 15 minutes.
- You control every single thing that goes into them, skipping weird preservatives.
- They are incredibly customizable; if you hate raisins, toss them out!
- They taste exactly like the good store-bought ones, just fresher and better.
I find that having these on hand makes my mornings so much smoother, honestly.
Gathering Ingredients for Your Easy Homemade Granola Bars
Okay, the beauty of these Easy Homemade Granola Bars is their simplicity. We aren’t dealing with a massive grocery list here, which is why I love them for a quick afternoon bake! Everything needed usually lives in my pantry already. Remember, don’t stress too much about the exact nuts or fruit right now; we’ll chat about swapping things out later! For now, let’s look at what makes the structure work so perfectly. If you’re looking for a different base recipe, check out my technique for homemade granola recipe first!
Dry Ingredients for Easy Homemade Granola Bars
We need a good base layer for that satisfying chewiness. Make sure your oats are the standard rolled kind, not the instant stuff!
- 2 cups rolled oats
- 1 cup mixed nuts and seeds (whatever you like—almonds, sunflower seeds, you name it!)
- 1/2 cup dried fruit, chopped up a little (raisins or tart cranberries work great)
Wet Binders for Perfect Easy Homemade Granola Bars
This is where that glorious chew comes from! You absolutely need smooth nut butter here; chunky stuff makes the bars fall apart everywhere. Smooth is the way to go!
- 1/2 cup peanut butter or almond butter (smooth version!)
- 1/3 cup honey or maple syrup (your choice for sweetness)
- 1/4 cup melted coconut oil
- 1 teaspoon vanilla extract
- 1/4 teaspoon salt
Step-by-Step Instructions for Easy Homemade Granola Bars
Alright, this is the fun part—turning all that measured goodness into actual snack bars! Don’t rush the pressing part; that’s my number one tip for getting that perfect density in these Easy Homemade Granola Bars. If you want even more fun ideas for breakfast that doesn’t take all morning, check out these easy breakfast and brunch recipes.
Preparation and Mixing Dry Elements for Easy Homemade Granola Bars
First things first, get that oven humming! Preheat it to 350°F (175°C) right away. Grab your 8×8 inch pan and line it completely with parchment paper. Make sure the paper hangs over the sides! This overhang is your built-in handle later, trust me. Now, in your biggest bowl, toss in the rolled oats, your mixed nuts and seeds, and those dried fruits we talked about. Just give it a quick, gentle stir to make sure the fruit isn’t all stuck together in one spot.
Creating the Binding Syrup and Combining Mixtures
Time for the glue! Put your nut butter, honey (or maple syrup), and coconut oil into a little saucepan. Keep the heat low—we just want everything to melt together into a shiny, smooth pool. Don’t let it boil or bubble up, that’s not what we want here! Once it looks silky, pull it off the heat immediately and stir in that vanilla and salt. Pour that warm, gorgeous wet mixture right over your big bowl of dry ingredients. Mix, mix, mix! You need to make sure every single oat flake gets hugged by that sweet, sticky syrup.
Baking and Cooling Your Easy Homemade Granola Bars
Now, transfer the entire coated mixture into your lined baking pan. This is important: use the flat bottom of a glass or a sturdy spatula and press! Really compact it down tight. The tighter you press, the firmer your Easy Homemade Granola Bars will be when they are done. Bake for about 20 to 25 minutes until the edges look just slightly golden. When they come out, you absolutely have to let them cool completely in the pan on a rack. If you try to cut them hot, they will turn into glorious, sticky crumbs. Be patient; once they are fully cool, it’s easy to lift the whole slab out and slice them up perfectly!
Tips for Success When Making Easy Homemade Granola Bars
Even though these are super easy bars, there are just a few little things that separate a ‘good’ bar from the genuinely perfect, chewy slice you bite into. I learned these tricks the hard way when my first batch ended up scattering all over the counter! Follow these tips, and you’ll be making perfect Easy Homemade Granola Bars every single time.
First up: the pressing step. I cannot stress this enough. When you put the mixture into the pan, you need to attack it with firm, even pressure. Think of packing snow for a snowball—you want it solid! This compacting locks the binder in place around all the oats and nuts. If you skip this, you end up with that sad, crumbly texture when you try to eat it later. Make sure you check out some slimmed-down favorites for more easy recipe inspiration!
Next, cooling is mandatory before cutting. You *must* let them cool completely, preferably on a wire rack so air circulates underneath. If you try to slice them when they are even slightly warm, they’ll just squish. If you are in a huge rush after they cool to room temperature, pop the whole pan into the fridge for about 30 minutes. A good chill makes cutting these bars unbelievably clean. You get those sharp, perfect edges!
Also, check your binder ratio when melting it. If your melted nut butter and syrup mixture seems way too thick before you pour it over the dry stuff, don’t panic! Just add about a teaspoon of extra oil or syrup until it flows nicely. We want it coating everything easily, not clumped up like thick peanut butter straight from the fridge. That slight liquid quality helps everything stick together beautifully when it cools down.
Finally, watch the edges while it bakes. Since the edges cook faster than the middle, keep an eye out for light golden brown—that’s the goal. If the edges are dark brown but the center looks pale, pull it out! The residual heat will finish setting the middle, and you avoid having bars that are crisp on the outside and somehow still gooey in the dead center when you cut them later.
Ingredient Notes and Substitutions for Easy Homemade Granola Bars
I totally get it—sometimes you’re halfway through gathering ingredients for these Easy Homemade Granola Bars and realize you are totally out of honey, or maybe you have a nut allergy on your hands. Don’t worry! This recipe is super adaptable as long as you remember one core rule: the binder mixture needs to equal roughly 1 cup of sticky liquid goodness. That’s what holds the whole thing together.
If you are aiming for healthier recipes overall, these are a great start because you choose what sweeteners make it in. Here are a few simple swaps I’ve made over the years that still give me chewy, delicious bars.
For the nut butter, this recipe works great with almond butter just as well as peanut butter. If you need to go totally nut-free—which happens a lot, right?—sunflower seed butter is a fantastic substitute. Just note that sunflower seed butter can sometimes be a bit thicker, so you might need an extra tiny drizzle (like a teaspoon) of coconut oil in the melted binder to make sure everything coats evenly.
When it comes to the sweetener, maple syrup is a one-to-one swap for honey, so that’s easy! If you are trying to cut back on refined sugars even more, you could look into using agave nectar, but agave is sweeter, so you might need slightly less of it, maybe starting a tablespoon shy of the 1/3 cup listed. Honestly, though, the honey really gives these Easy Homemade Granola Bars that classic flavor profile we are aiming for.
Changing up the dry bits is the easiest part! If you aren’t a fan of almonds, go for pecans or walnuts. Swap out the raisins for dried apricots or cherries—just make sure whatever dried fruit you use is roughly the same total volume (about 1/2 cup). You can even add different seeds, like flax seeds or chia seeds, mixed in with your oats. Just keep the oats measurement the same so you maintain that sturdy backbone for your bars.
Storing and Keeping Your Easy Homemade Granola Bars Fresh
Okay, now that you’ve made the absolute best Easy Homemade Granola Bars—and you probably ate half of them already—we need to talk about keeping the rest pristine! Nothing is worse than reaching for a snack bar later in the week only to find it’s gone hard or dusty. The good news is these are pretty sturdy!
Because we used coconut oil and a nice coating of syrup/butter mixture, they are happy sitting out on the counter for a little while. I always go for the airtight container method first. Transfer them once they are totally cool—and I mean stone-cold—into a container with a tight lid. This keeps the air out, which is the enemy of chewiness!
You can easily keep these bars on the counter at room temperature for about a week. I usually place a layer of parchment paper between the layers of bars just to make sure they don’t stick together later on, especially if your kitchen is warm. If you’re making a massive batch and you know you won’t get through them in seven days, popping them into the fridge is a great next step.
Cold will make them much firmer, so maybe let them sit out for 10 minutes before grabbing one, but they firm up nicely and last longer this way! If you’re planning your fresh weekly meal prep, this is your go-to make-ahead snack. They hold together beautifully after chilling, which is helpful if you need super clean cuts!
Variations on These Easy Homemade Granola Bars
Just when you think these Easy Homemade Granola Bars can’t get any better, we realize they are basically a blank canvas waiting for a little personality! I love keeping the base recipe the same but changing up the fun little mix-ins to suit the season or whatever mood I’m in. It’s so easy to personalize snacks.
Since we are sticking to that fantastic chewy base, these additions mix right into the dry ingredients along with the oats, or you can mix them right into the warm binder mixture. Have fun with these ideas—I’ve included some thoughts that would be perfect for when the weather starts getting cool! Don’t forget to look at these fall and holiday treat ideas for seasonal spice suggestions!
The Chocolate Chip Upgrade: If you need instant happiness, add about a half cup of mini chocolate chips. My trick is to mix them in with the dry ingredients like normal, but then, *after* you spread the mixture into the pan, sprinkle another small handful right on top. That way, you get melted goodness inside and little chunks of chocolate sitting on the surface, which looks way prettier!
Spice It Up: Want a deeper, warmer flavor profile without changing the main ingredients? Add about a teaspoon of ground cinnamon along with your salt and vanilla extract. If you are feeling really ambitious, a tiny pinch of ground cardamom or even a dash of pumpkin pie spice makes these taste like a cozy morning treat. It pairs amazingly well with pecans instead of almonds!
A Little Protein Boost: Sometimes I need something with a little more staying power, especially if I’m eating this for breakfast instead of just a quick snack. You can add about 1/4 cup of your favorite vanilla or unflavored protein powder right in with the dry oats. Watch your binder mixture, though! Protein powder loves to soak up moisture, so if you add powder, you might need that extra teaspoon of coconut oil we talked about to keep the mixture from looking too dry when you toss it all together.
Remember, the key here is just folding things in gently so you don’t crush all those oats. Keep the total volume of mix-ins under about 1.5 cups total, or else your bars might feel a little too chunky to hold together well when cut!
Frequently Asked Questions About Easy Homemade Granola Bars
I get so many wonderful questions about these bars! It’s amazing how many people are looking for that perfect, easy way to make quick snacks at home. If you’re still struggling with binding or texture, chances are it’s one of these common snags that we can fix right now to make sure your next batch of Easy Homemade Granola Bars is perfect.
These are fantastic for parties too, so check out these crowd-pleasing appetizers and snack ideas for your next get-together!
Why are my homemade granola bars crumbly?
Oh, crumbly bars are the worst! They happen for two main reasons, usually. The first is the binder ratio. If you cooked the syrup mixture too long and it got too thick before adding it, or if you added too many dry ingredients, it just won’t stick in the pan. Make sure you measure that honey and oil carefully!
The second, and most common reason, is not pressing nearly hard enough! Remember how I stressed packing them down tight? If you just lightly spread the mixture in the pan, the oats and nuts don’t lock together. You need to use a heavy glass or your knuckles and press down until the surface is really compacted. That pressure is what keeps them from shattering when you cut them!
Can I make these Easy Homemade Granola Bars without baking?
Yes, you totally can skip the oven time, though the texture will change slightly! Baked bars get a little crisp on the edges and dry out just *that* little bit, which helps them set up nicely. If you go no-bake, they will stay chewier throughout, which some people actually prefer!
To make these a no-bake recipe: just melt down all your wet ingredients as directed, mix them with the dry, press them *super* firmly into the prepared pan, and then skip baking entirely. Instead, pop that pan straight into the refrigerator. You need them to chill for at least two hours, or even better, overnight, before attempting to cut them. Chilling is non-negotiable for no-bake versions because the fats solidify, acting like your binder in place of the heat from the oven.
Storing and Keeping Your Easy Homemade Granola Bars Fresh
I always aim to bake these on a Sunday so I have snacks ready for the whole week. Keeping these Easy Homemade Granola Bars fresh is really straightforward, but a couple of tricks help them stay perfectly chewy longer.
As I mentioned before, as long as they are completely cool, just stack them in an airtight container. I recommend layering them with parchment paper squares between the layers. If you skip the paper, they will eventually fuse together into one giant, delicious granola slab, which is annoying when you just want one bar!
At room temperature, you’re safe for about a week. If your kitchen is hot or humid, or if you know you won’t touch them for maybe ten days, pop them in the fridge. It keeps the coconut oil firm and the binder tight. Whenever I do my fresh weekly meal prep, I always make sure half this batch goes into the fridge!
Variations on These Easy Homemade Granola Bars
The real fun starts when you start customizing these! They are so forgiving, which is why I love them so much. You can turn these simple Easy Homemade Granola Bars into whatever flavor you’re craving at the moment.
My kids always demand chocolate chips, which is easy enough to do. Just throw in about a half cup of those mini chips with the dry stuff. Another thing I adore when it’s chilly outside is adding half a teaspoon of ground cinnamon to the wet mixture when I add the vanilla. It warms up the whole flavor profile beautifully—it’s just a little something nice you can do!
I also like adding seeds that I didn’t have in the initial mix. Maybe you only had sunflower seeds in the main mix, but you could toss in a couple of tablespoons of pumpkin seeds or even hemp hearts on top right before baking. They toast up nicely and add a little extra crunch without messing up the chewiness inside. Don’t forget to peek at some fall and holiday treat ideas for inspiration on spices!
Estimated Nutritional Snapshot for Easy Homemade Granola Bars
Now, nobody is counting obsessively when these bars are around, but it’s smart to know what you’re fueling up with! Since these are homemade, these numbers are just estimates based on the ingredients listed, particularly if you use peanut butter versus almond butter. Always adjust if you use a different sweetener or tons of added chocolate chips!
- Serving Size: 1 bar
- Calories: 220
- Sugar: 12g
- Fat: 11g
- Carbohydrates: 28g
- Protein: 6g
For more ideas on controlling what goes into your fuel, check out these calorie-smart recipes for inspiration!
PrintEasy Homemade Granola Bars

Simple recipe for making chewy granola bars at home.
- Prep Time: 15 min
- Cook Time: 25 min
- Total Time: 40 min
- Yield: 12 bars 1x
- Category: Snack
- Method: Baking
- Cuisine: American
- Diet: Vegetarian
Ingredients
- 2 cups rolled oats
- 1 cup mixed nuts and seeds
- 1/2 cup dried fruit (raisins, cranberries)
- 1/2 cup peanut butter or almond butter
- 1/3 cup honey or maple syrup
- 1/4 cup melted coconut oil
- 1 teaspoon vanilla extract
- 1/4 teaspoon salt
Instructions
- Preheat your oven to 350°F (175°C). Line an 8×8 inch baking pan with parchment paper, leaving an overhang.
- In a large bowl, mix the rolled oats, nuts, seeds, and dried fruit.
- In a small saucepan over low heat, combine the nut butter, honey (or maple syrup), and coconut oil. Stir until smooth and fully melted. Remove from heat and stir in the vanilla extract and salt.
- Pour the wet mixture over the dry ingredients. Mix well until everything is evenly coated.
- Press the mixture firmly and evenly into the prepared baking pan. Use the bottom of a glass or a spatula to compact it tightly.
- Bake for 20 to 25 minutes, or until the edges are lightly golden brown.
- Let the bars cool completely in the pan on a wire rack. This is important for them to set.
- Once cool, lift the bars out using the parchment paper overhang. Cut into desired bar sizes.
Notes
- For firmer bars, chill them in the refrigerator for 30 minutes before cutting.
- Store the finished bars in an airtight container at room temperature for up to one week.
Nutrition
- Serving Size: 1 bar
- Calories: 220
- Sugar: 12g
- Sodium: 80mg
- Fat: 11g
- Saturated Fat: 3g
- Unsaturated Fat: 8g
- Trans Fat: 0g
- Carbohydrates: 28g
- Fiber: 3g
- Protein: 6g
- Cholesterol: 0mg
Keywords: granola bars, homemade, easy, snack bars, baked oats, no-bake alternative