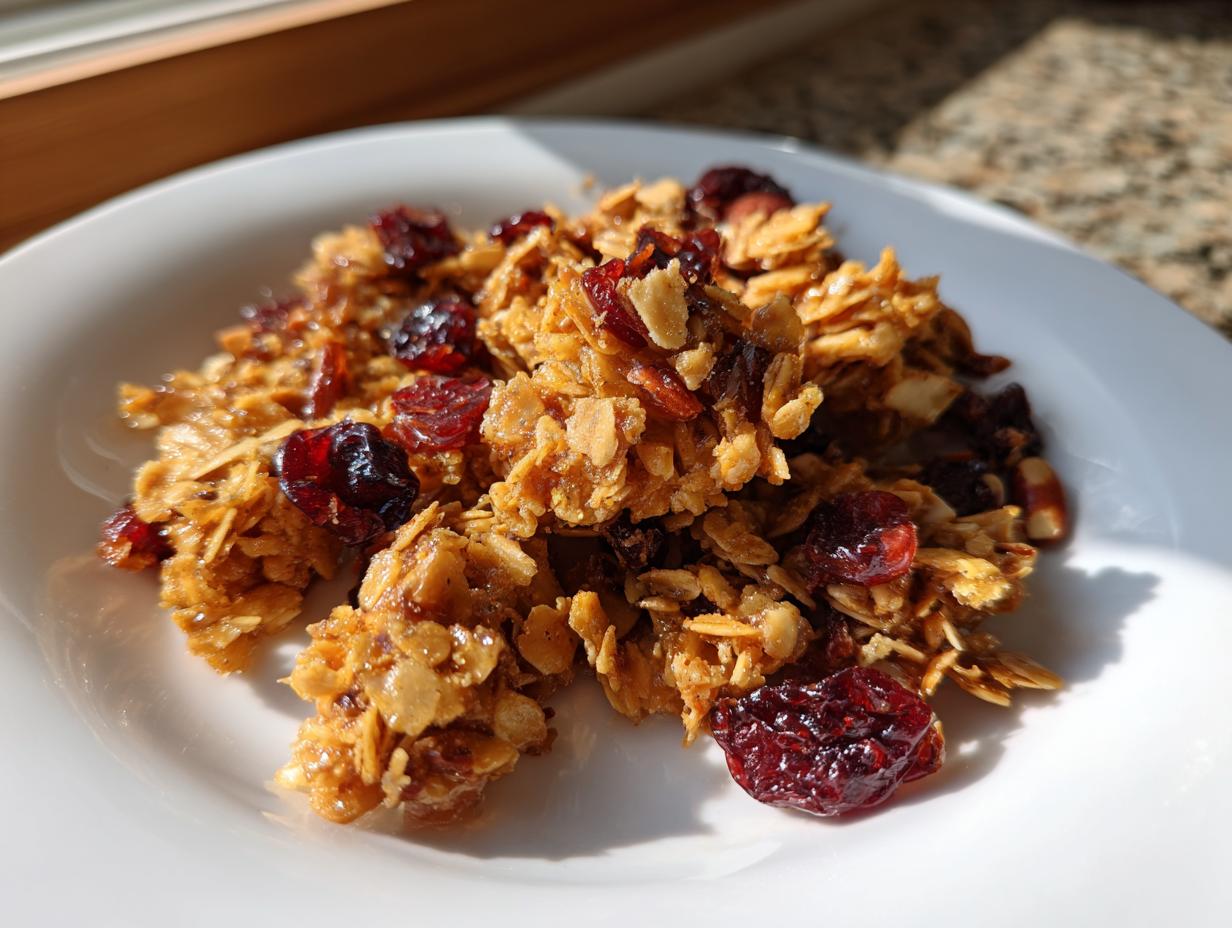
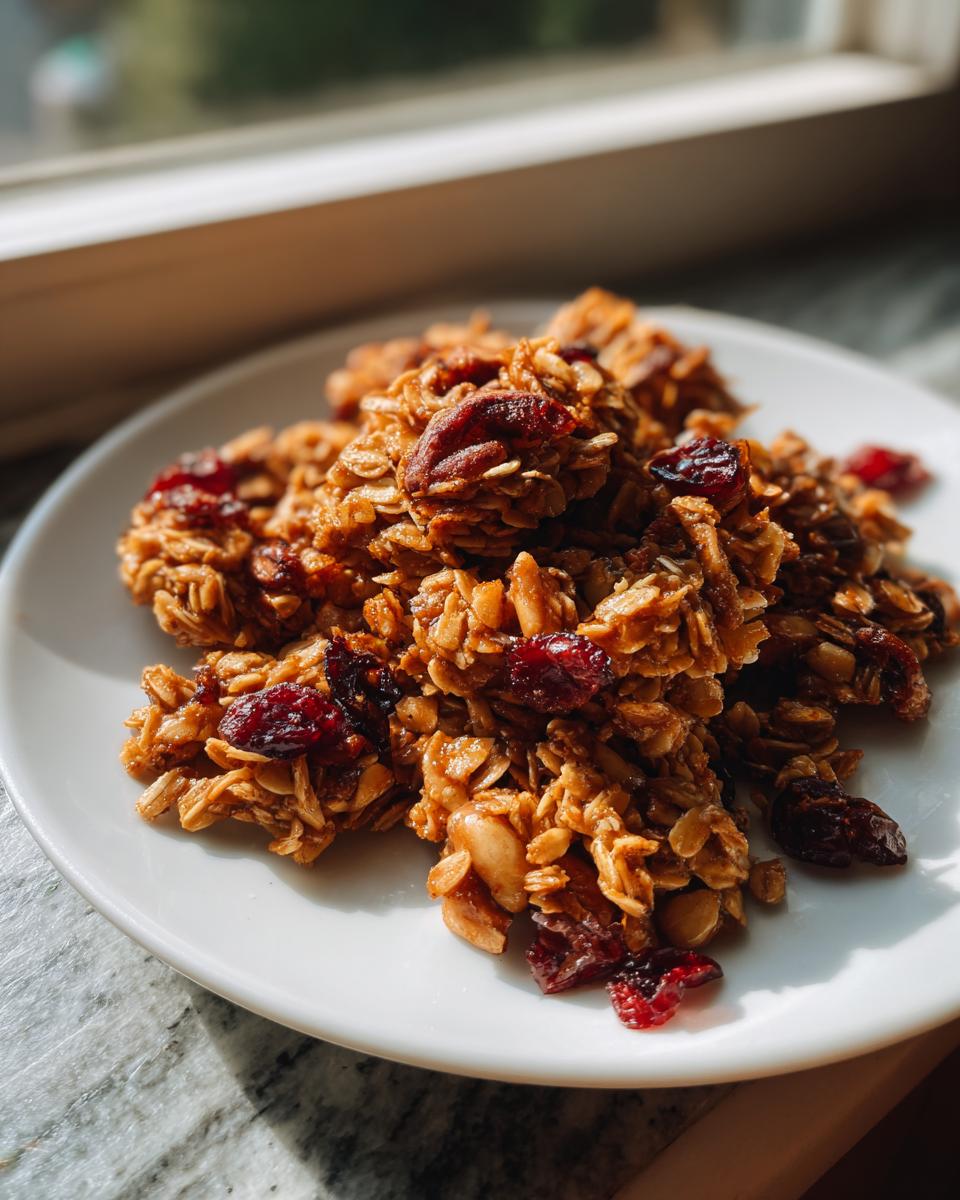
Ugh, I used to spend way too much money on those big plastic tubs of cereal only to find them stale by the third morning! That’s when I decided I needed to take back my mornings and figure out how to make truly Crunchy Homemade Granola that actually lasted. I mean, seriously, the stuff from the store is always too sweet or too dusty. My version is different; it’s crisp, perfectly toasted, and I control every single speck. Trust me, once you bake a batch fresh, you’ll never look back. You can find tons of other breakfast ideas over here at this awesome breakfast hub!
Why This Recipe Makes the Best Crunchy Homemade Granola (E-E-A-T)
The biggest difference between my granola and what you pull off a shelf is the shatter factor! When you mix your own binding agents, you control the outcome. This isn’t just breakfast; it’s chewy, toasty joy. I’ve spent so much time dialing this in, and I think it shows in every bite of this Crunchy Homemade Granola. You’re going to love how simple it is to get results that taste like they came from a bakery.
Here’s why this recipe always wins:
- Cluster Magic: We use just the right ratio of sticky syrup and oil so you get those big, delightful clumps, not just loose flakes.
- Flavor Control: You decide how much cinnamon hits the mix, or if you want to amp up the vanilla. Totally flexible!
- Freshness Guarantee: Everything goes into the oven at its peak, which gives you that unbeatable fresh-toasted taste.
My little piece of baking advice? Don’t skimp on the quality of your oats. Whole rolled oats, not instant ones, are the only way you’ll achieve that deep, hearty crunch. For more fantastic recipes, check out my guide to great homemade granola!
Ingredients for Perfect Crunchy Homemade Granola
Okay, let’s talk supplies! The secret to getting this Crunchy Homemade Granola right starts right here, before we even preheat the oven. We break things down into three simple groups: the dry stuff, the sticky binder, and the post-bake goodies. Keep these ratios right—especially that oil and maple syrup—and you’re halfway to granola heaven.
For the main body of the mix, you’ll need:
- Four big cups of rolled oats. Please, just use old-fashioned rolled oats—none of that instant stuff!
- One cup of mixed nuts. I usually throw almonds, pecans, and a few walnuts in there, and I chop them up roughly myself so they stick together better when baking.
- Half a cup of unsweetened shredded coconut. This toasts up so nicely and adds such a great texture.
Now, for the essential wet binder that coats everything and guarantees that crunch later on:
- Half a cup of real maple syrup. This is key for flavor and sticking.
- A quarter cup of a neutral oil, like vegetable or canola. This fat content is vital for a crisp, not chewy, result.
- One teaspoon of vanilla extract for that warm undertone.
- Just some simple spices: half a teaspoon of ground cinnamon and a quarter teaspoon of salt to balance the sweetness.
The absolute crucial rule for this recipe is to leave the dried fruit out for now! We are tossing in one cup of raisins or cranberries *after* it comes out of the oven. If you bake them, they turn hard as little rocks! For more great tips on quick meals, check out this guide to easy meal prep egg cups.
Step-by-Step Instructions for Crunchy Homemade Granola
Alright, here is where the magic happens and we turn those plain oats into golden crunch! Don’t rush this process; the timing is everything if you want that perfect texture. Remember, we are aiming for a beautiful, crisp texture, not soft, chewy oats. Keep your eye on the clock and your ears open for that lovely subtle smell of toasting nuts.
Preparing the Dry and Wet Components
First things first, preheat your oven to 300°F—we are doing low and slow here. Line a big baking sheet with parchment paper; this just makes cleanup a breeze later! In your big bowl, toss together all those lovely dry bits—oats, nuts, the coconut. In a small separate dish, whisk your wet binder ingredients vigorously. You need that oil, syrup, vanilla, cinnamon, and salt fully combined so there are no puddles of syrup sitting around.
Baking for Maximum Crunch in Your Crunchy Homemade Granola
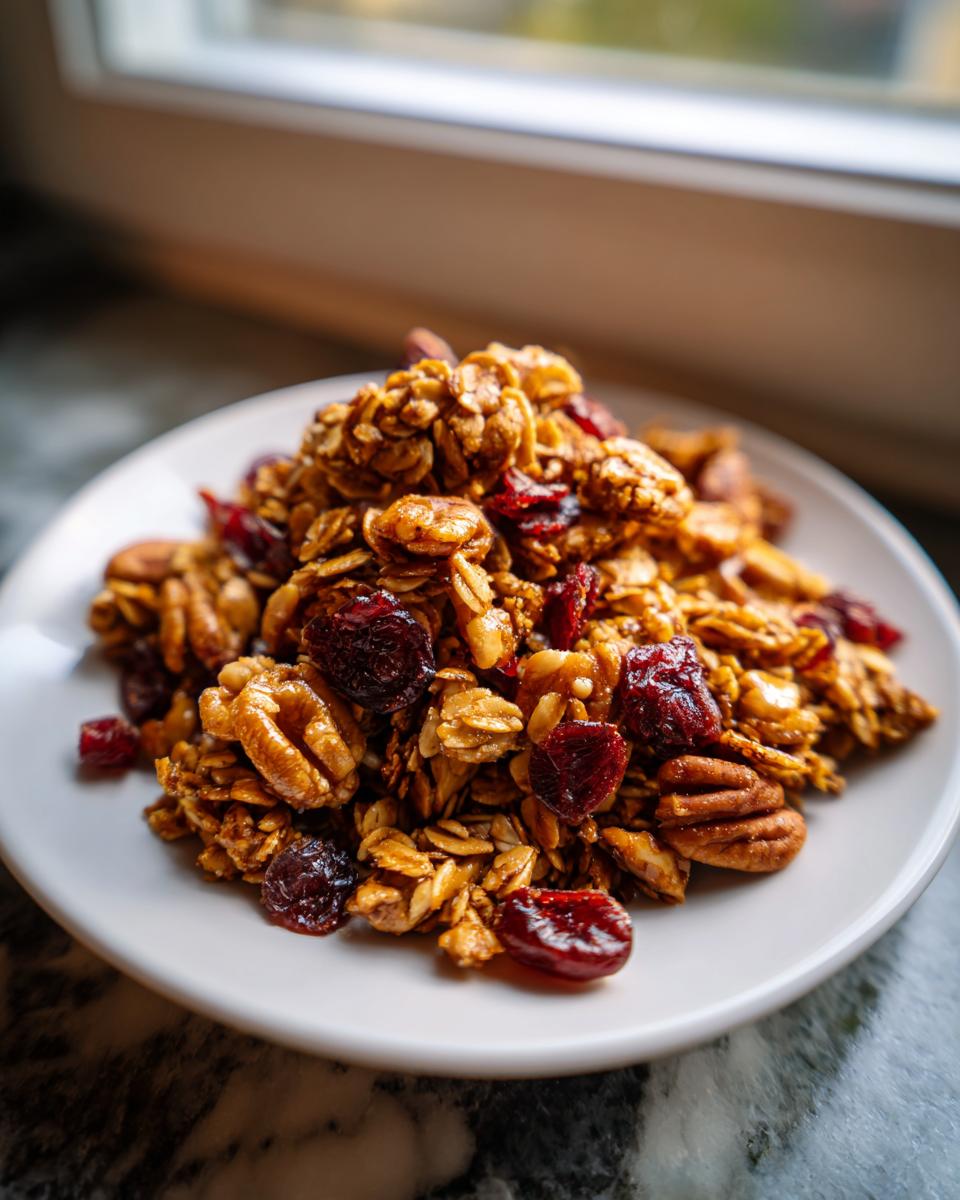
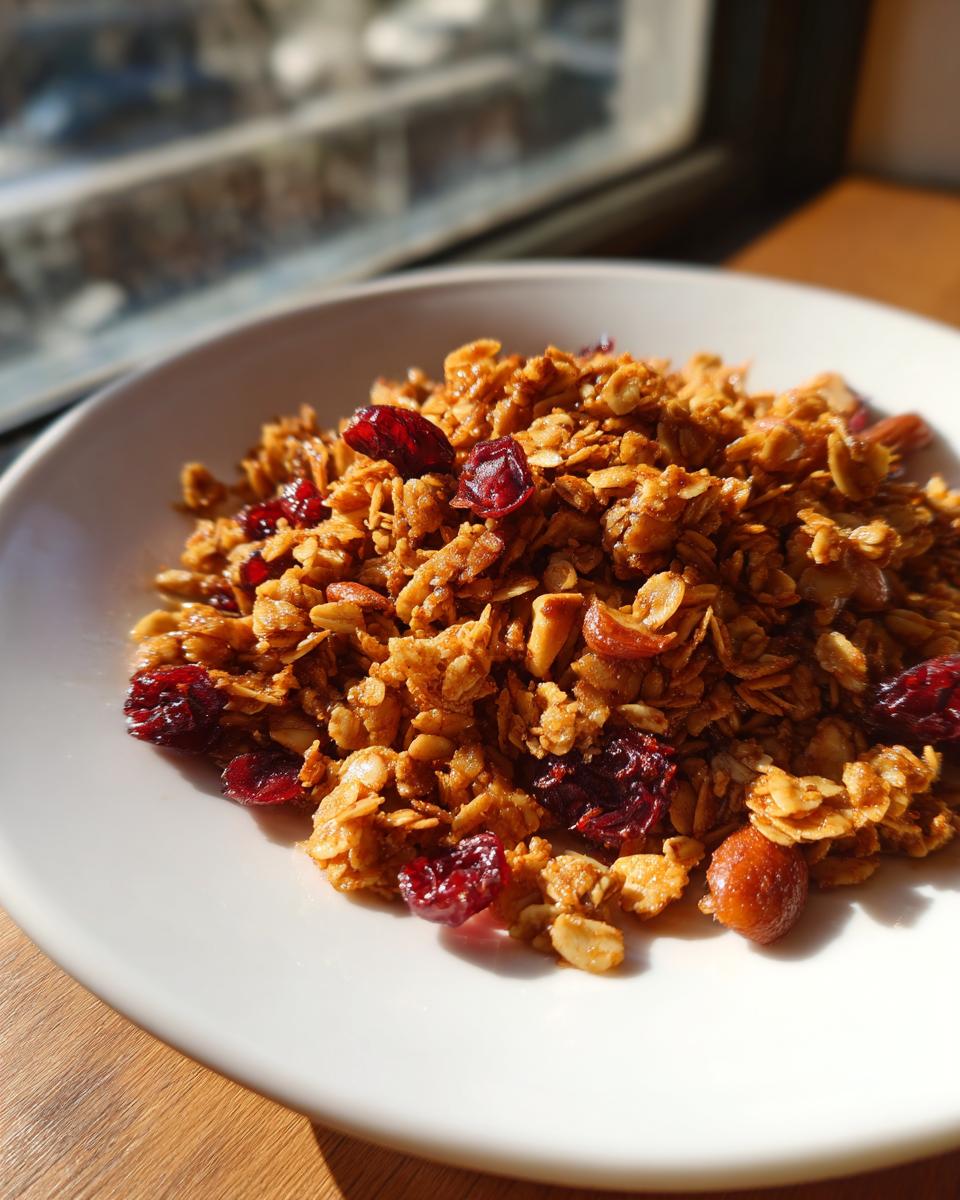
Pour that wet mixture over the dry stuff and stir, stir, stir! Make sure every single oat flake gets coated. Now, spread it out super evenly on your lined sheet. Here’s a pro tip for getting those amazing clusters: press the mixture down gently with the back of a spatula. You don’t want to mash it flat, just compact it a bit. Bake for a total of 30 minutes, but set a timer to stir it right at the 15-minute mark to keep things from burning. That 300°F temperature is your friend for a beautiful, shatteringly crisp finish. After it comes out, let it cool completely undisturbed on that hot pan—that’s when the true crunch of your Crunchy Homemade Granola locks in. You can grab some inspiration for what to eat with it over at this quick breakfast spot!
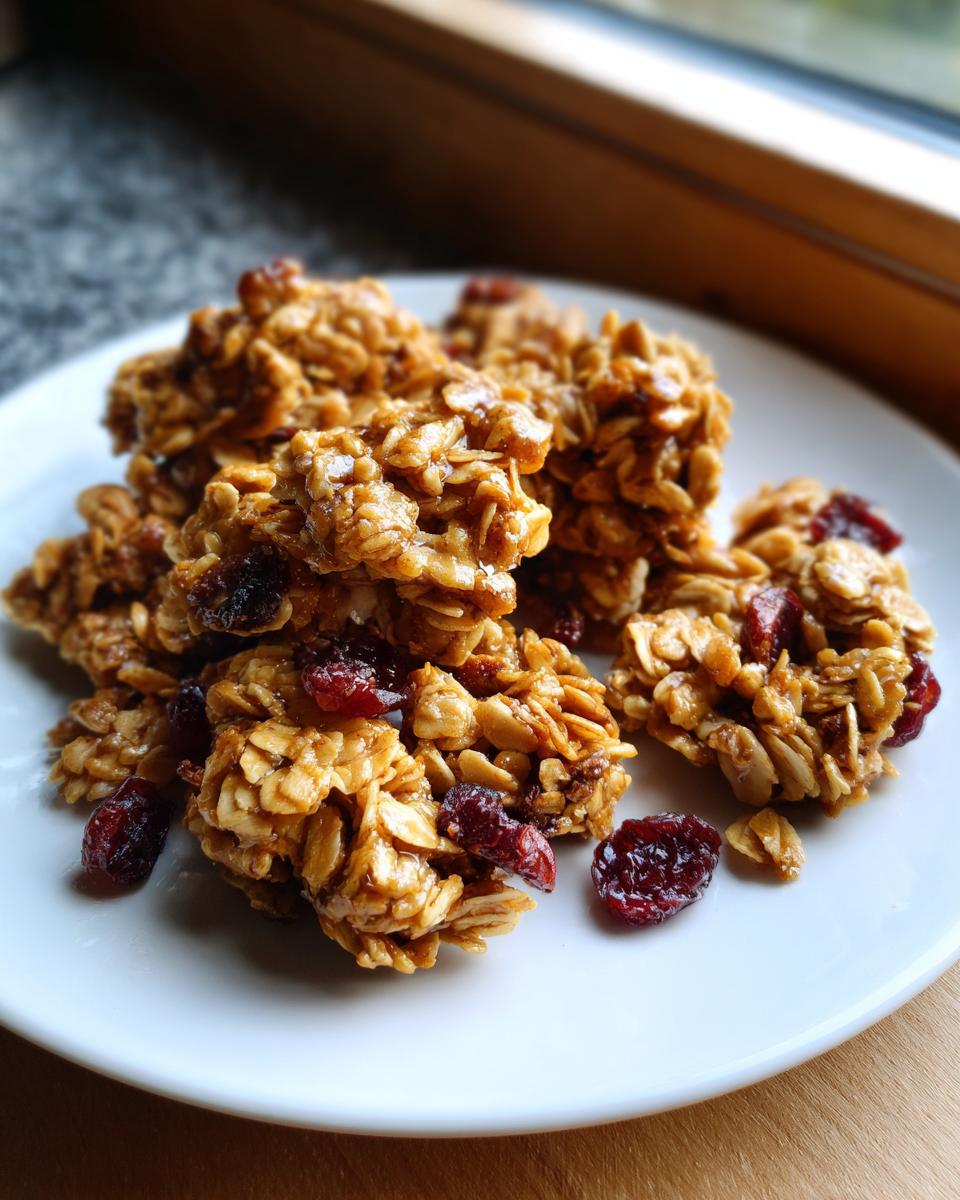
Once it’s totally cool—and I stress totally cool—only then do you stir in your dried fruit. If you try to mix it in hot, the fruit gets all sticky and melts into the rest of your beautiful batch. Once the fruit is mixed in, store it right away in an airtight container so humidity doesn’t ruin your hard work!
Tips for Achieving Ultimate Crunch in Homemade Granola
We’re aiming for foolproof Crunchy Homemade Granola here, so listen up! I’ve got three non-negotiable tips that separate the amazing batches from the slightly disappointing, still-a-bit-chewy ones. Getting this right means you never have to buy that expensive stuff again.
First off, if your nuts seem a little dull, take the extra five minutes to toast them briefly before you mix them in with the oats. This deepens their flavor immensely and prevents them from steaming up the oats later. Secondly, every oven is different, right? If your house runs perpetually cold, don’t be afraid to bake the granola for an extra 5 to 10 minutes after that first 30-minute mark. Just watch it like a hawk so the edges don’t scorch!
Finally, and this is the one people always mess up: Cooling! You absolutely must let it cool *completely* spread out on that hot baking sheet without touching it. Humidity is the enemy of crispness, and that residual heat finishing the baking process is what sets the crunch. For more brilliant home cooking insights, take a peek at my general recipe blog!
Ingredient Substitutions for Crunchy Homemade Granola
Sometimes we look in the pantry and realize we’re missing something, or maybe you just need to make this recipe dairy-free or nut-free for a friend. No panic needed! This Crunchy Homemade Granola is sturdy enough to handle a few swaps, but you have to be smart about it.
Can you swap the maple syrup? Sure! Honey works great, but watch out—it tends to make things slightly stickier, so your clusters might be a bit softer. Brown rice syrup is another option if you want less intense flavor. If you have a nut allergy lurking around, this is easy to fix. Ditch the one cup of mixed nuts and use an equal amount of seeds instead—pumpkin seeds and sunflower seeds give a fantastic substitute crunch!
Just remember that changing the binder slightly changes the final texture, so you might need to babysit the bake time by an extra five minutes if you swap out the syrup. This recipe is so forgiving, which is why I love it!
Serving Suggestions for Your Homemade Granola
Now that you have this incredible, crisp batch of Crunchy Homemade Granola, it’s time to eat it! Sure, you can eat it straight out of the jar—I totally do that when I’m supposed to be cleaning the kitchen—but it shines brightest when you pair it with other things.
My absolute favorite way is layered in a parfait glass with thick Greek yogurt and maybe a swirl of berry jam. It’s also fantastic sprinkled generously over baked apples or pears if you want a warm, comforting dessert. And don’t forget a simple breakfast bowl; just add your favorite milk! You can find tons of inspiration for pairing your new granola over here at my breakfast ideas pinboard. It’s just so versatile!
Storing Your Crunchy Homemade Granola Properly
Don’t let all that hard work go to waste! The biggest enemy for Crunchy Homemade Granola is moisture, so storage is non-negotiable, my friend. Keep it in a truly airtight container—a mason jar with a tight lid or one of those snap-top plastic tubs works perfectly.
You’ll want to keep the container in a cool, dark cupboard, far away from the stove or dishwasher steam. If you store it right, this beautiful batch should stay perfectly crunchy for at least two or three weeks. Seriously, keep it dry, and it stays amazing!
Frequently Asked Questions About Crunchy Homemade Granola
I get so many messages asking about tweaking this recipe, so I figured I’d put the most common questions right here. It’s important to me that everyone feels confident making their own perfect batch of Crunchy Homemade Granola!
When is my granola actually crunchy?
This is the number one secret people miss! Your granola might still feel a little soft or sticky when you pull it out of the oven. Don’t panic and don’t stick it back in for longer! The real crispness happens during the cooling phase. You have to let it sit completely undisturbed on that baking sheet until it’s room temperature—and I mean *cold*. That’s when it sets up that beautiful, satisfying snap. Don’t rush the cool down!
If you’re looking for more breakfast inspiration that’s just as easy, check out the ideas over at this easy breakfast section.
Why isn’t my granola clumping like yours?
Ah, the elusive cluster! Nine times out of ten, this happens because of the oil-to-syrup ratio, or you didn’t press the mixture down enough before baking. Make sure you are using real maple syrup and not pancake syrup—pancake syrup is mostly corn syrup and doesn’t bind the same way. Also, remember in Step 5, I told you to press it down firmly? That gentle compaction helps the wet ingredients glue the oats together as they bake.
Can I use honey instead of maple syrup in this Crunchy Homemade Granola?
You absolutely can! Honey is a fantastic substitute, but be aware that it handles heat a little bit differently than maple syrup. Honey tends to caramelize a bit faster, so you might find your granola gets a deeper color quicker. It can also sometimes result in a slightly stickier, chewier texture rather than the super crisp snap we are aiming for. If you try it, keep a really close eye on it after the 20-minute mark!
How can I make this sugar-free?
Sweeteners are tricky here because they provide both the flavor and the crunch binder! If you need to cut the sugar, you’ll need to replace that binder volume. You can try using a zero-calorie baking syrup replacement, but you might have to slightly increase the fat (oil) content to compensate for the lost stickiness. Just know that going completely sugar-free might make it impossible to get those big, perfect clusters of Crunchy Homemade Granola, as sugar is what hardens during the cooling process.
Estimated Nutritional Snapshot
I know sometimes we want to know what exactly we are eating for breakfast, especially when we are whipping up big batches like this one! So, based on the standard measurements I shared in the recipe, here’s a rough look at what you’re getting in about a half-cup serving of this homemade goodness.
It’s important to remember that these numbers are just estimates. If you swap out your pecans for something fattier, or use honey instead of maple syrup, the totals will shift a little bit. I always say you should treat these figures as a starting point!
- Serving Size: 1/2 cup
- Calories: About 250 per serving
- Total Fat: Around 12 grams
- Protein: High-quality 7 grams!
- Carbohydrates: Roughly 35 grams
- Fiber: A nice boost of 5 grams
- Sugar: Around 12 grams (that’s the natural kind from the fruit and maple!)
- Cholesterol: Zero, which is great news!
See? A pretty balanced start to your morning—lots of good fats from the nuts and fiber from those oats. Remember, this is just an estimate, but it should give you a good baseline for planning your snacks!
PrintCrunchy Homemade Granola
A simple recipe for making crisp, flavorful granola at home.
- Prep Time: 10 min
- Cook Time: 30 min
- Total Time: 40 min
- Yield: About 6 cups 1x
- Category: Breakfast
- Method: Baking
- Cuisine: American
- Diet: Vegetarian
Ingredients
- 4 cups rolled oats
- 1 cup mixed nuts (almonds, pecans, walnuts)
- 1/2 cup unsweetened shredded coconut
- 1/2 cup maple syrup
- 1/4 cup vegetable oil
- 1 teaspoon vanilla extract
- 1/2 teaspoon ground cinnamon
- 1/4 teaspoon salt
- 1 cup dried fruit (raisins, cranberries) – added after baking
Instructions
- Preheat your oven to 300 degrees Fahrenheit. Line a large baking sheet with parchment paper.
- In a large bowl, combine the rolled oats, mixed nuts, and shredded coconut.
- In a separate small bowl, whisk together the maple syrup, vegetable oil, vanilla extract, cinnamon, and salt.
- Pour the wet mixture over the dry ingredients. Stir well until everything is evenly coated.
- Spread the granola mixture in a single layer on the prepared baking sheet. Press it down lightly if you prefer larger clusters.
- Bake for 30 minutes, stirring halfway through to prevent burning.
- Remove from the oven and stir in the dried fruit.
- Let the granola cool completely on the baking sheet. It will become crunchy as it cools.
- Store in an airtight container.
Notes
- For extra flavor, toast the nuts lightly before adding them to the oat mixture.
- Adjust the amount of maple syrup if you prefer a less sweet granola.
- If you want a very crunchy texture, bake for an additional 5 to 10 minutes, watching carefully.
Nutrition
- Serving Size: 1/2 cup
- Calories: 250
- Sugar: 12
- Sodium: 80
- Fat: 12
- Saturated Fat: 2
- Unsaturated Fat: 10
- Trans Fat: 0
- Carbohydrates: 35
- Fiber: 5
- Protein: 7
- Cholesterol: 0
Keywords: granola, homemade, oats, breakfast cereal, crunchy, nuts, dried fruit