
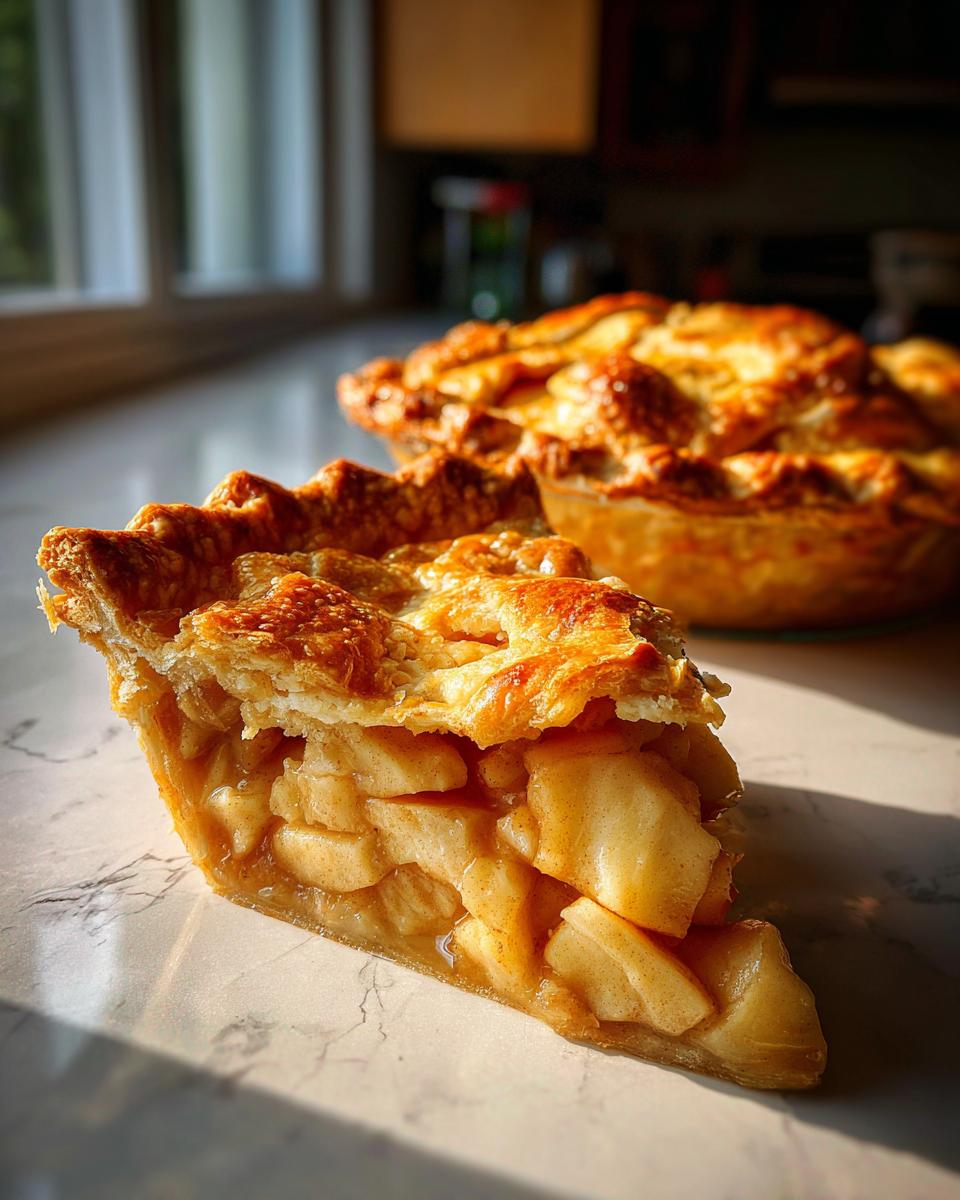
Oh, the smell! Seriously, is there anything that screams ‘cozy home’ more than the aroma of a freshly baked apple pie? It’s like a warm hug for your senses, isn’t it? This isn’t just any pie, folks; we’re talking about the *Classic Apple Pie*, the kind that never goes out of style. I remember my grandma pulling one of these out of the oven every Sunday, and honestly, it was the highlight of my week. That perfectly flaky crust giving way to sweet, slightly tart apples? Pure magic! I’ve spent years perfecting this recipe, tweaking it just enough to make sure every bite is just right.
Why You’ll Love This Classic Apple Pie
Trust me, this isn’t just another apple pie recipe. It’s the one you’ll keep coming back to, I guarantee it! Here’s why it’s going to be your new go-to:
- It’s surprisingly easy! Seriously, even if you’re new to pie-making, this recipe is totally doable.
- That flaky crust, though! We’re talking layers of buttery goodness that just melt in your mouth.
- Perfectly balanced flavor. Not too sweet, not too tart – the apples are just right, like they were made for each other.
- The ultimate crowd-pleaser. Bring this to any gathering, and you’ll be the star of the show, no doubt about it.
- Always appropriate! Whether it’s a holiday feast, a Sunday dinner, or just a Tuesday craving, this pie fits the bill.
- The smell alone is worth it! Your kitchen will smell like pure happiness while it bakes.
Ingredients for the Perfect Classic Apple Pie
Alright, let’s talk ingredients! This is where the magic really starts. For a truly classic apple pie, you want good quality stuff, and here’s what you’ll need:
- 1 recipe for a 9-inch double-crust pie pastry (use your favorite or a good store-bought one if you’re in a bind!)
- About 3 pounds of Granny Smith apples (that’s usually around 8 medium ones). Peel ’em, core ’em, and then slice them about 1/4 inch thick.
- 3/4 cup of granulated sugar.
- 2 tablespoons of all-purpose flour – this helps thicken up those delicious juices.
- 1 teaspoon of ground cinnamon – because, well, it’s apple pie!
- 1/4 teaspoon of ground nutmeg – just a hint to make it extra cozy.
- 1 tablespoon of fresh lemon juice. This brightens everything up and stops the apples from browning too much.
- 2 tablespoons of unsalted butter, cut into little pieces to dot all over the filling.
- And for that beautiful golden top: 1 large egg, beaten, for the egg wash, plus 1 tablespoon of granulated sugar to sprinkle on top.
When picking your apples, Granny Smiths are my go-to because they hold their shape and have that perfect tartness to balance the sweet. You can mix in a Fuji or Honeycrisp for a little extra sweetness if you like!
Oh, and if you’re feeling adventurous, you should absolutely check out my Apple Pie with Cinnamon Tortilla recipe sometime – it’s a fun twist!
Equipment Needed for Your Classic Apple Pie
Okay, so to make this amazing apple pie, you’ll need a few trusty kitchen pals. Grab your favorite 9-inch pie plate – the deep-dish kind is even better! You’ll also want a rolling pin for that beautiful crust, a couple of mixing bowls (one for the apples, maybe one for dry ingredients), and a good set of measuring cups and spoons. Don’t forget a sharp knife and a peeler for those apples, and a baking sheet to catch any drips. Easy peasy!
Step-by-Step Guide to Making Classic Apple Pie
Alright, let’s get this pie in the oven! Rolling out dough can sometimes feel like a wrestling match, but we’ll get through it together. This is where the real magic happens, transforming simple ingredients into pure comfort food.
Preparing the Pie Crust
First things first, let’s get that bottom crust ready. Lightly flour your surface, and carefully roll out half of your pie dough into a circle about 12 inches across. Don’t stress if it’s not perfectly round, nobody’s judging! Gently drape this into your 9-inch pie plate. I like to leave a little overhang, then trim and crimp the edges to make them look pretty. Then, roll out the second bit of dough for the top crust, aiming for about an 11-inch circle. This one’s going over the apples!
Oh, and if you ever want to try something totally different, my Strawberry Pop-Tart Pie is a fun project for another day!
Creating the Perfect Apple Filling
Now for the star of the show – those gorgeous apples! In a big bowl, toss your sliced apples with the 3/4 cup of sugar, the flour, cinnamon, and nutmeg. Give it a good, gentle mix so everything is coated evenly; you want those spices to cling to every single slice. Then, pour this apple mixture right into your prepared bottom crust. Sprinkle that lemon juice over the top – it’s amazing how it wakes up the apple flavor! Finally, dot the butter pieces all over the apples. Those little bits of butter will melt and make the filling extra luscious as it bakes.
Baking Your Classic Apple Pie to Perfection
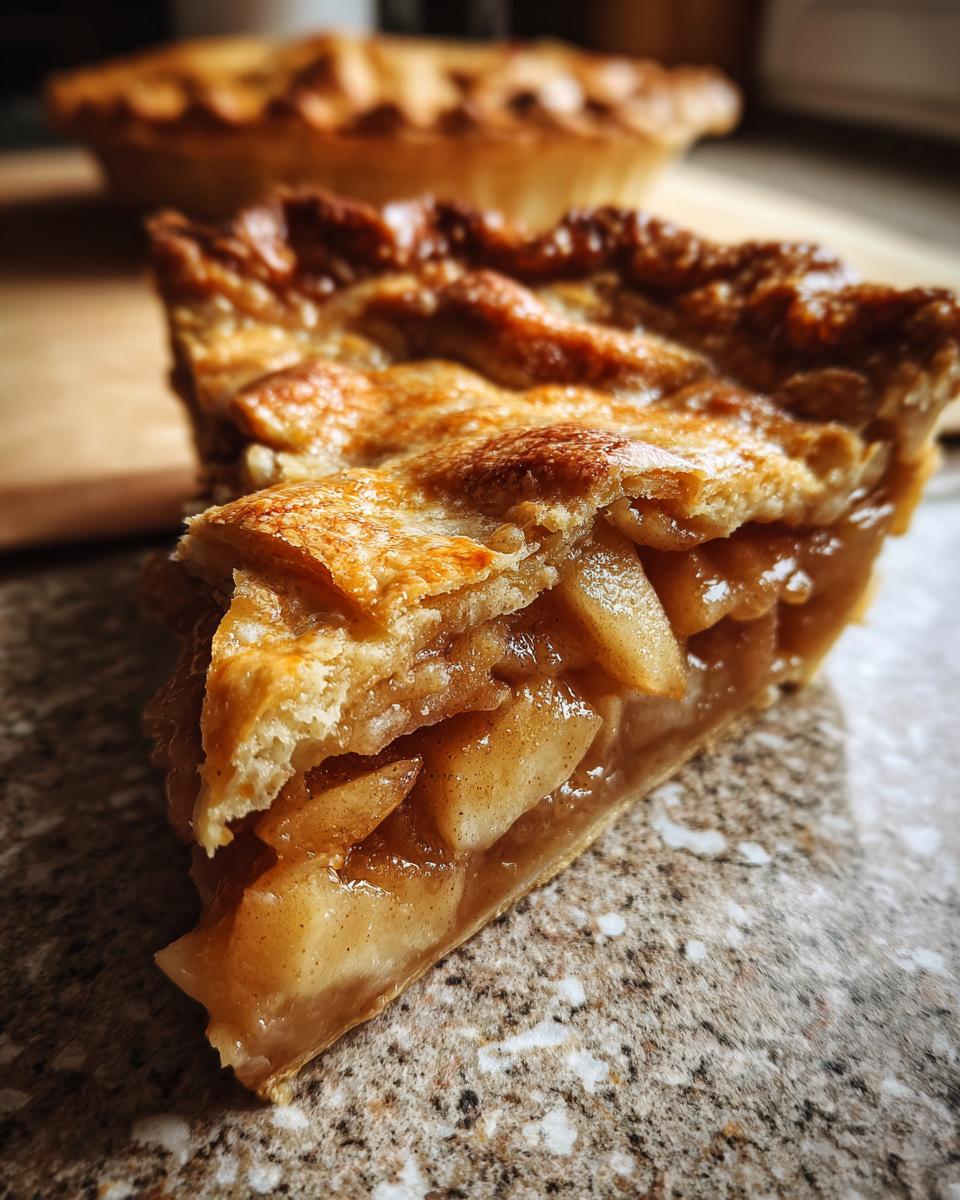
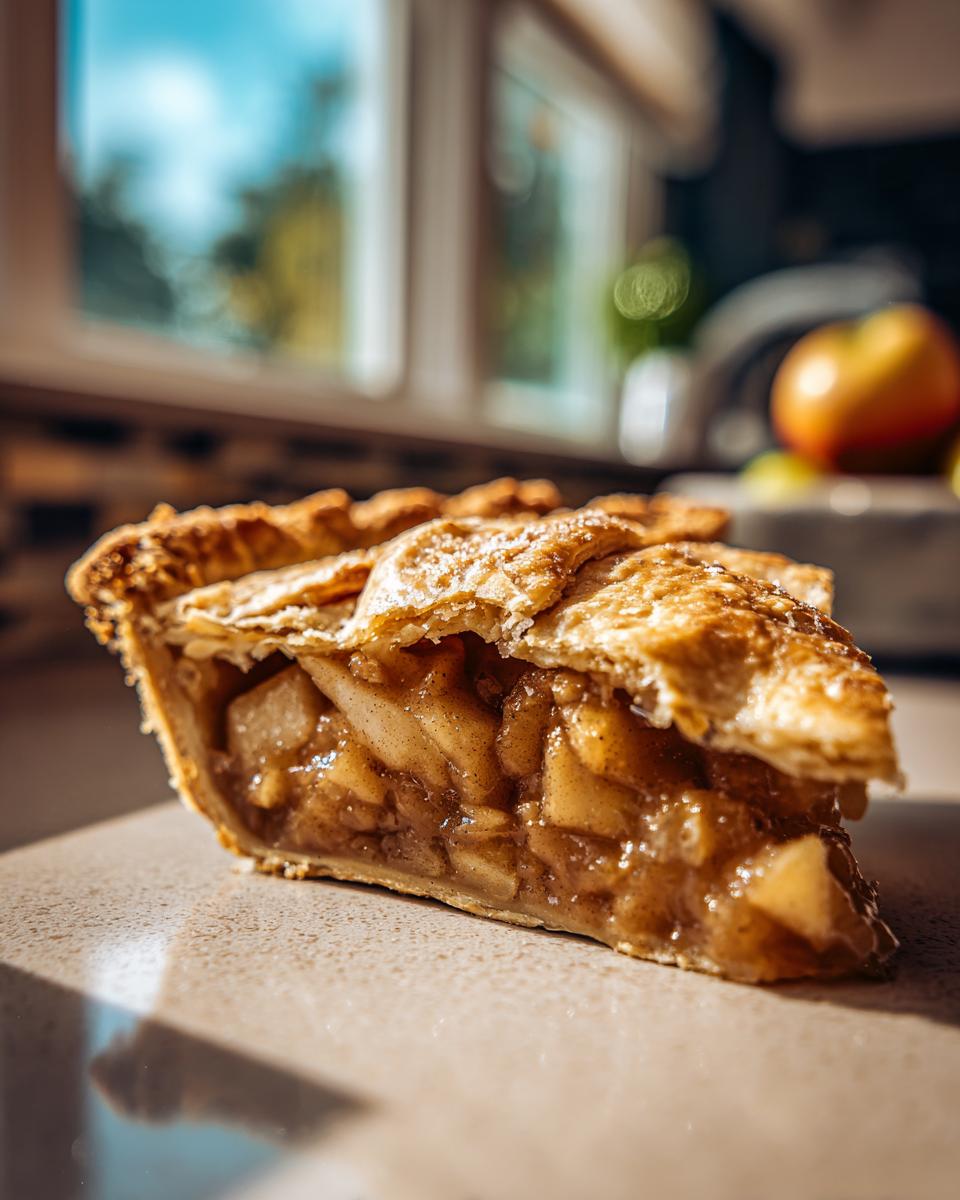
Here comes the fun part! Pop that pie into a preheated oven at 425 degrees F (220 degrees C) for about 15 minutes. This high heat helps set the crust right away. Then, lower the oven temperature to 375 degrees F (190 degrees C) and let it bake for another 35 to 45 minutes. Keep an eye on it! If the crust starts looking a little *too* golden before the filling is bubbly, just loosely tent it with some foil. You’re looking for a beautifully golden brown crust and filling that’s happily bubbling away through those vents you cut. It smells heavenly at this point, doesn’t it? Once it’s out, let it cool on a wire rack for at least 2 to 3 hours. I know, I know, resisting the urge to slice into it is the hardest part, but trust me, this step is crucial for the filling to set properly so you don’t end up with a soupy mess!

Tips for the Best Classic Apple Pie
Alright, you’ve got the recipe and the steps, but let me share a few little secrets that I think really elevate this Classic Apple Pie from good to absolutely amazing. These are the things I do every single time!
First off, when it comes to apples, you really can’t beat Granny Smith for that classic tart-sweet balance that tastes incredible once baked. But don’t be afraid to mix in a sweeter apple like a Fuji or Honeycrisp – it adds another layer of flavor you’ll love. For my flaky crust, the trick honestly is keeping everything COLD, especially the butter and water. I even pop my rolling pin in the freezer for a bit! And if you’re worried about a soggy bottom (I used to be!), try blind baking the bottom crust for about 10 minutes before adding the filling. Just poke it with a fork, crimp the edges, and bake it until it’s *just* starting to turn golden. It makes a world of difference!
Also, if you’re looking for another fun apple recipe, you’ve gotta try my Cottage Cheese Apple Pie sometime – it’s surprisingly delicious!
Serving and Storing Your Delicious Apple Pie
Now that your beautiful pie has cooled and the filling has set, it’s time for the best part: enjoying it! This Classic Apple Pie is absolutely divine served warm, especially with a scoop of vanilla ice cream that melts into those juicy apples. Whipped cream is always a winner too, or even a drizzle of caramel sauce if you’re feeling fancy! If you happen to have any leftovers (which is rare in my house!), just pop them into an airtight container. They’re good at room temperature for a day or so, or in the fridge for up to 3-4 days. To reheat, just pop a slice in a warm oven for a few minutes until it’s nice and cozy again.
Frequently Asked Questions about Classic Apple Pie
Got questions about making the perfect apple pie? I’ve totally got you covered! Here are some things folks often ask me:
What are the best apples for pie?
Oh, this is a big one! For a classic apple pie, you really want apples that hold their shape and have a good balance of sweet and tart. Granny Smith are my absolute favorite because they have that perfect tang. But don’t shy away from mixing in a sweeter apple like a Fuji or Honeycrisp. It adds a little extra depth and sweetness that’s just lovely!
Can I use store-bought pie crust?
Absolutely! Listen, life gets busy, and sometimes convenience is key. If you need to use store-bought pie crust, go for it! Just make sure you get the kind that’s meant for a 9-inch double-crust pie. It’ll still turn out delicious, though I do think homemade crust has a little something extra special. You can always try my Apple Pie with Cinnamon Tortilla sometime if you want to get creative with crusts!
How do I prevent my apple pie from being too watery?
This is a common worry, and I totally get it! The two biggest tricks are using the right kind of apples (like the tart ones I mentioned that hold their shape) and making sure you use enough flour or cornstarch to thicken the filling. Tossing the apples with about 2 tablespoons of flour usually does the trick for this size pie. Also, remember that crucial cooling step – letting the pie sit for a good few hours after baking is super important for the juices to thicken up properly.
My crust is browning too fast! What should I do?
Don’t panic! This happens more often than you think. If you see the edges of your crust getting too dark before the filling is bubbly and cooked through, just grab a sheet of aluminum foil. Loosely tent the pie with it – I usually just make a ring around the edge of the pie, or cover the whole thing if needed. This protects the crust from getting too much direct heat while the inside finishes baking. Easy fix!
Nutritional Information (Estimated)
Just a little note here: this information is an estimate, and your pie’s nutrition facts might be a little different depending on exactly what you use and how you make it. But generally, one slice of this yummy Classic Apple Pie is about:
- Calories: 350
- Fat: 18g (with about 10g saturated)
- Carbohydrates: 45g
- Protein: 3g
- Sugar: 30g
- Fiber: 4g
Classic Apple Pie

A traditional apple pie recipe with a flaky crust and sweet apple filling.
- Prep Time: 30 min
- Cook Time: 50 min
- Total Time: 80 min
- Yield: 8 servings 1x
- Category: Dessert
- Method: Baking
- Cuisine: American
- Diet: Vegetarian
Ingredients
- 1 recipe pastry for a 9-inch double-crust pie
- 3 pounds Granny Smith apples (about 8 medium), peeled, cored, and sliced 1/4 inch thick
- 3/4 cup granulated sugar
- 2 tablespoons all-purpose flour
- 1 teaspoon ground cinnamon
- 1/4 teaspoon ground nutmeg
- 1 tablespoon lemon juice
- 2 tablespoons unsalted butter, cut into small pieces
- 1 large egg, beaten (for egg wash)
- 1 tablespoon granulated sugar (for sprinkling)
Instructions
- Preheat your oven to 425 degrees F (220 degrees C).
- On a lightly floured surface, roll out one half of the pastry dough into a 12-inch circle. Carefully transfer it to a 9-inch pie plate. Trim and crimp the edges as desired.
- In a large bowl, combine the sliced apples, 3/4 cup sugar, flour, cinnamon, and nutmeg. Toss gently to coat the apples evenly.
- Pour the apple mixture into the prepared pie crust. Sprinkle the lemon juice over the apples. Dot the top with the small pieces of butter.
- Roll out the second half of the pastry dough into an 11-inch circle. Place it over the apple filling. Trim and crimp the edges to seal. Cut several slits in the top crust to allow steam to escape.
- Brush the top crust with the beaten egg wash and sprinkle with the remaining 1 tablespoon of sugar.
- Bake for 15 minutes at 425 degrees F (220 degrees C).
- Reduce the oven temperature to 375 degrees F (190 degrees C) and continue baking for another 35-45 minutes, or until the crust is golden brown and the filling is bubbly. If the crust starts to brown too quickly, you can loosely tent it with aluminum foil.
- Let the pie cool on a wire rack for at least 2-3 hours before slicing and serving. This allows the filling to set properly.
Notes
- For a richer flavor, you can add a pinch of ground cloves to the apple mixture.
- If you prefer a softer crust, you can brush the bottom crust with a little melted butter before adding the filling.
- Serve warm with vanilla ice cream or whipped cream for an extra treat.
Nutrition
- Serving Size: 1 slice
- Calories: 350
- Sugar: 30g
- Sodium: 200mg
- Fat: 18g
- Saturated Fat: 10g
- Unsaturated Fat: 8g
- Trans Fat: 0g
- Carbohydrates: 45g
- Fiber: 4g
- Protein: 3g
- Cholesterol: 30mg
Keywords: apple pie, classic apple pie, homemade apple pie, fruit pie, dessert, baking