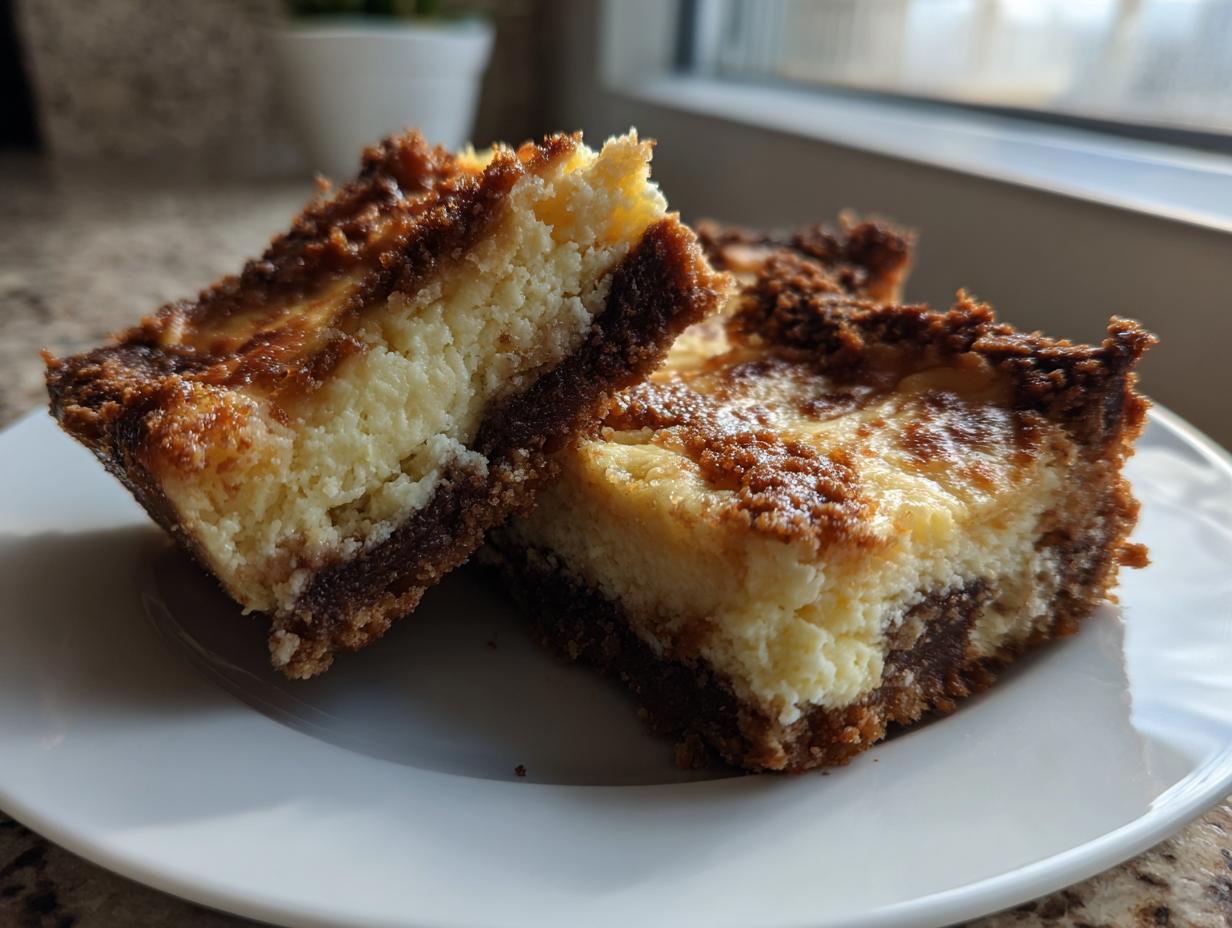
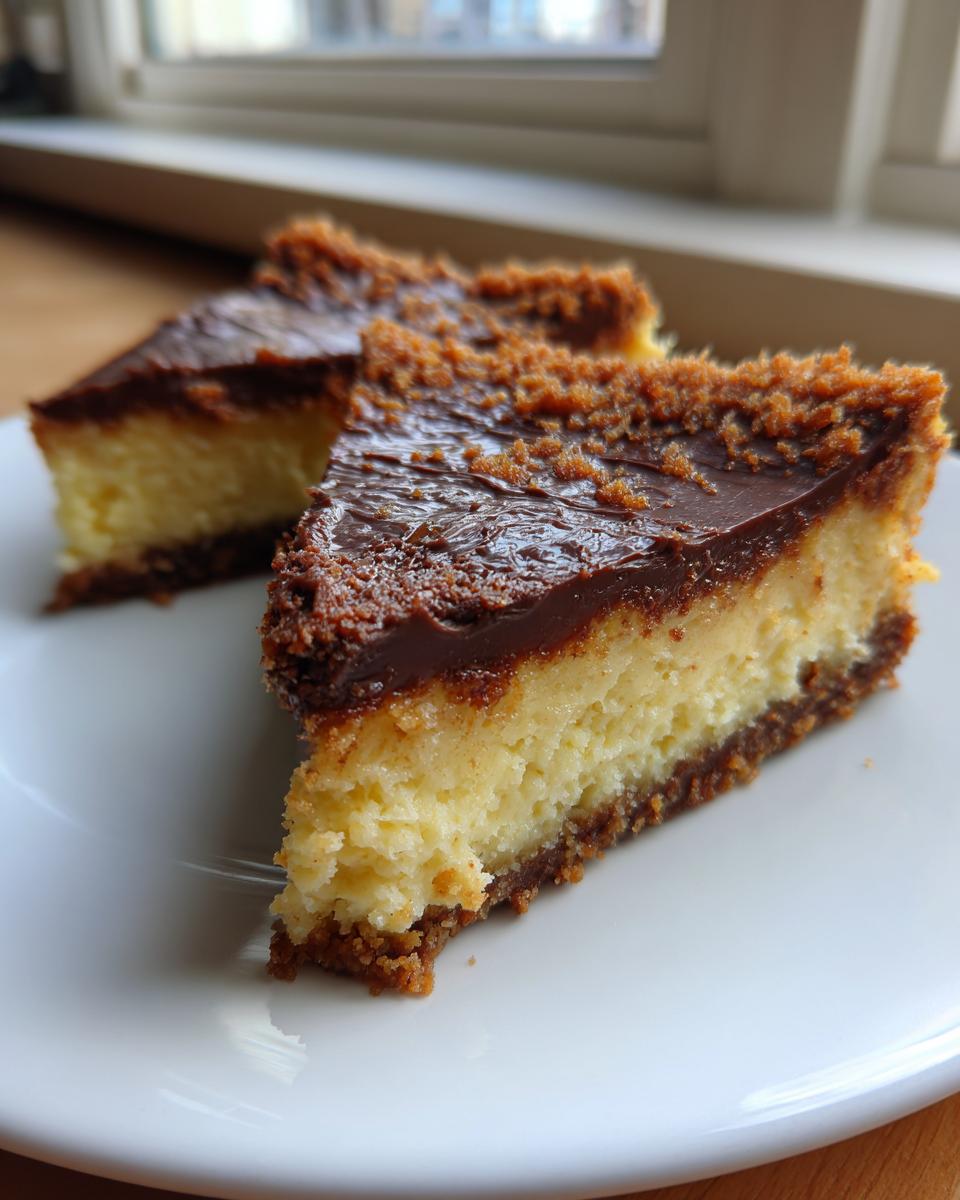
There’s just something magical about cheesecake, right? That creamy, dreamy texture, that slight tang – it’s pure bliss. But sometimes, making a whole cheesecake feels like a big production. That’s why I absolutely adore these Easy Cheesecake Bars. Seriously, they’re a lifesaver when a craving hits hard but I don’t have hours to spend. I remember whipping these up for a last-minute get-together, and everyone raved, shocked I’d made them so quickly. They’ve become my go-to sweet treat, perfect for potlucks, movie nights, or just because!

Why You’ll Love These Easy Cheesecake Bars
These aren’t just any cheesecake bars; they’re your new best friend in the dessert world! Here’s why you’ll be making them again and again:
- Super Speedy: We’re talking way less fuss than a full-blown cheesecake. You can have them mixed up and baking before you know it.
- Incredibly Simple: No fancy techniques here! Even if you’re new to baking, you’ll nail these. The instructions are straightforward and forgiving.
- Dreamy Texture: That perfect balance of a crumbly crust and a smooth, creamy filling? Oh yeah, these bars have it down. They’re just *so* good.
- Totally Versatile: Serve them plain, top them with fresh berries, a drizzle of chocolate, or some caramel. They’re a blank canvas for whatever deliciousness you’re craving!
- Crowd-Pleaser Guaranteed: Seriously, who doesn’t love cheesecake? These bars are always a hit, no matter the occasion. People always ask for the recipe!
- Great for Make-Ahead: Got guests coming? Make these the day before! They actually taste even better after chilling. Less stress on party day!

Gather Your Ingredients for Easy Cheesecake Bars
Alright, let’s get our goodies together for these amazing easy cheesecake bars! The beauty of this recipe is it uses pretty standard pantry staples, which is always a win in my book. Having everything measured out and ready to go makes the whole process super smooth. Trust me, when you’re excited to bake, you don’t want to be digging through cupboards halfway through!
You’ll need the usual suspects for the crust: all-purpose flour, a little bit of granulated sugar for sweetness, a pinch of salt to balance everything out, and of course, good old unsalted butter. Make sure that butter is softened – it makes all the difference for getting that nice crumbly texture. For the star of the show, the creamy filling, grab two blocks of cream cheese. Again, make sure they’re softened; this is key to avoiding lumps! We’ll also use more granulated sugar, two large eggs (room temperature is best, it helps everything combine smoothly!), and a splash of pure vanilla extract. That vanilla really makes the cheesecake flavor pop!
Step-by-Step Guide to Making Easy Cheesecake Bars
Alright, let’s dive into making these Easy Cheesecake Bars! It’s honestly so simple you’ll wonder why you ever made full-sized cheesecakes. The whole process is laid out so you can easily follow along, and the results are just *chef’s kiss*! We’ve got a delicious crust and a super creamy filling waiting for you. Let’s get baking!
Preparing the Crust for Your Easy Cheesecake Bars
First things first, get that oven preheating to 350°F (175°C). Grab an 8×8 inch baking pan and line it with parchment paper, making sure you leave a little bit hanging over the sides. This is my secret weapon for lifting them out later! In a bowl, just mix your flour, 1/2 cup of sugar, and salt. Then, cut in that softened butter until it looks like coarse crumbs. Press this mixture nice and even into the bottom of your pan. Pop it into the oven for just 10 minutes to get it toasty. Remove it and let it cool while we make the yummy filling.
Creating the Creamy Cheesecake Filling
Now for the magic! In a separate big bowl, beat together your softened cream cheese and the other 3/4 cup of sugar. Make sure it’s nice and smooth – no one likes lumpy cheesecake! Then, add your eggs, one at a time, mixing well after each one. This is important for a smooth texture. Finally, stir in the vanilla extract. If you look closely, you’ll notice I don’t over-mix here once the eggs are in. Overmixing can actually lead to cracks, and we want these bars to look as perfect as they taste!
Assembling and Baking Your Easy Cheesecake Bars
Okay, time to bring it all together! Gently pour that glorious cream cheese filling right over your slightly cooled crust. Spread it out evenly so you get that perfect layer. Now, carefully place the pan back into the oven to bake for about 30-35 minutes. You’re looking for the edges to be set and firm, but the very center will still be a little jiggly. That’s exactly what you want – it means they’ll be perfectly creamy, not dry! Like this apple pie recipe, patience is key during baking!
Cooling and Chilling for Perfect Bars
This next part is crucial for the best texture and for making them easy to cut. Let the bars cool completely right in the pan on a wire rack. Seriously, don’t rush this! Once they’re totally cool, it’s time to chill them. Pop them in the fridge for at least 2 hours. This step firms them up perfectly, making them super easy to lift out and cut into neat squares. Trust me, the chill time is worth it, just like patient cooling on these blueberry zucchini bars!

Tips for the Best Easy Cheesecake Bars
Okay, so you’ve made these amazing easy cheesecake bars, and you want them to be absolutely perfect every single time, right? I totally get it! A few little tricks up my sleeve really make them shine. First off, for both the crust and the filling, make sure your butter and cream cheese are truly softened. I know I mentioned it, but it’s so important for getting that super smooth filling without any lumps. If you’re in a rush, you can cut the cream cheese into small cubes to soften it faster. Also, when you’re mixing the filling, try not to over-beat after you add the eggs. Just mix until they’re incorporated; too much air can lead to cracks, and we want smooth tops!
When it comes to cutting them neatly, that chill time is your best friend. Once they’re fully cooled and chilled, a super sharp knife works wonders. Wipe the knife clean between cuts – it makes a huge difference! For extra clean lines, you can even run your knife under hot water and dry it off before each cut. It’s like magic! If you happen to get a few cracks, don’t sweat it. Just pile on some fresh fruit, like a yummy topping for soup (okay, maybe not soup, but you get the idea!), or a drizzle of chocolate. Nobody will even notice, and they’ll still taste divine. Making these ahead of time, just like these healthy banana muffins, is honestly the way to go!
Ingredient Notes and Substitutions
So, let’s chat about these ingredients for the easy cheesecake bars. For the cream cheese, full-fat is definitely the way to go for that classic creamy texture. Light or Neufchâtel just won’t give you the same rich result, but if you absolutely must, just know the texture might be a little softer. For the butter, unsalted is my preference because it lets me control the saltiness, but if you only have salted butter, just skip the little pinch of salt in the crust. Easy peasy! Remember, softened is key for both the butter and cream cheese – it really makes a difference. If I’m ever in a pinch for time and need to soften butter quickly, I’ll cut it into small cubes and let it sit on the counter for about 20 minutes, or use the microwave on the defrost setting for just a few seconds at a time. And for the vanilla? Pure vanilla extract makes a world of difference compared to imitation. You can also totally add a teaspoon of lemon zest to the cream cheese filling if you like a little extra zing – it’s a fantastic way to brighten things up, almost like in these zucchini cookies where a little citrus really lifts the flavor!
Serving and Storing Your Cheesecake Bars
These strawberry pop tart pie bars are fantastic all on their own, but they also love a little company! I love topping them with fresh berries or a drizzle of chocolate sauce. For storing, pop any leftovers into an airtight container in the fridge. They stay delicious for about 3 days like this. Honestly, they often disappear before that!
Frequently Asked Questions About Easy Cheesecake Bars
Got questions about these delightful easy cheesecake bars? I’ve got you covered! Here are some common curiosities I get about this recipe, with all the answers you need.
Can I make these cheesecake bars ahead of time?
Absolutely! These bars actually taste even better after they’ve had a chance to chill properly. I often make them the day before I need them. Just make sure they’re completely cooled, then cover them tightly with plastic wrap or pop them into an airtight container and stash them in the fridge. They’ll be perfectly ready to go whenever that craving strikes or guests arrive!
Why are my cheesecake bars cracking?
Oh, the dreaded crack! Don’t worry, it happens to the best of us. Usually, cheesecake cracks because the eggs were overmixed, or the cake was baked at too high a temperature for too long. Overmixing incorporates too much air, which expands and then collapses. A slight jiggle in the center when you take them out is a good thing! If you’re really worried about cracks, try to keep your ingredients at room temperature and mix just until combined. A little crack is just a sign of a well-loved homemade dessert, like these pumpkin cheesecake truffles!
Can I add toppings or mix-ins to these easy cheesecake bars?
Yes, yes, and YES! The beauty of these bars is how versatile they are. For toppings, fresh berries like raspberries or blueberries are amazing, a drizzle of chocolate ganache or caramel sauce is always a winner, or even a sprinkle of some festive edible glitter! For mix-ins, you can gently fold in about 1/2 cup of mini chocolate chips or some chopped nuts into the cream cheese filling before baking.
How do I get those super clean cuts for my cheesecake bars?
For the cleanest cuts, make sure your bars are thoroughly chilled – at least 2 hours in the fridge! Use a large, sharp knife. For extra neatness, dip your knife in hot water and wipe it dry between each cut. This little trick really helps the knife glide through the cheesecake smoothly without dragging, giving you those perfect, professional-looking bars every time!
Estimated Nutritional Information
Just a heads-up, the nutrition numbers for these easy cheesecake bars are estimates! They can totally change depending on the exact brands of ingredients you use, like the fat content in your cream cheese. But generally, you’re looking at around 250 calories, 15g of fat, and 25g of carbs per bar. It’s a sweet treat, and totally worth it!
PrintEasy Cheesecake Bars
Simple and delicious cheesecake bars perfect for any occasion.
- Prep Time: 20 min
- Cook Time: 45 min
- Total Time: 65 min
- Yield: 16 bars 1x
- Category: Dessert
- Method: Baking
- Cuisine: American
- Diet: Vegetarian
Ingredients
- 1 cup all-purpose flour
- 1/2 cup granulated sugar
- 1/4 teaspoon salt
- 1/2 cup unsalted butter, softened
- 2 (8 ounce) packages cream cheese, softened
- 3/4 cup granulated sugar
- 2 large eggs
- 1 teaspoon vanilla extract
Instructions
- Preheat your oven to 350°F (175°C). Line an 8×8 inch baking pan with parchment paper, leaving an overhang on the sides.
- In a medium bowl, combine the flour, 1/2 cup sugar, and salt. Cut in the softened butter with a pastry blender or your fingers until the mixture resembles coarse crumbs. Press this mixture evenly into the bottom of the prepared pan to form the crust.
- Bake the crust for 10 minutes. Remove from oven and let it cool slightly.
- In a separate large bowl, beat the softened cream cheese and 3/4 cup sugar until smooth.
- Beat in the eggs one at a time, mixing well after each addition. Stir in the vanilla extract.
- Pour the cream cheese mixture evenly over the baked crust.
- Bake for 30-35 minutes, or until the edges are set and the center is slightly jiggly.
- Let the bars cool completely in the pan on a wire rack.
- Once cooled, use the parchment paper overhang to lift the cheesecake out of the pan. Cut into bars.
- Chill the bars for at least 2 hours before serving.
Notes
- For a richer flavor, you can add a teaspoon of lemon zest to the cream cheese mixture.
- These bars can be stored in an airtight container in the refrigerator for up to 3 days.
Nutrition
- Serving Size: 1 bar
- Calories: 250
- Sugar: 20g
- Sodium: 150mg
- Fat: 15g
- Saturated Fat: 9g
- Unsaturated Fat: 6g
- Trans Fat: 0g
- Carbohydrates: 25g
- Fiber: 1g
- Protein: 4g
- Cholesterol: 50mg
Keywords: cheesecake bars, easy cheesecake, dessert bars, no-bake cheesecake, simple cheesecake, cream cheese dessert