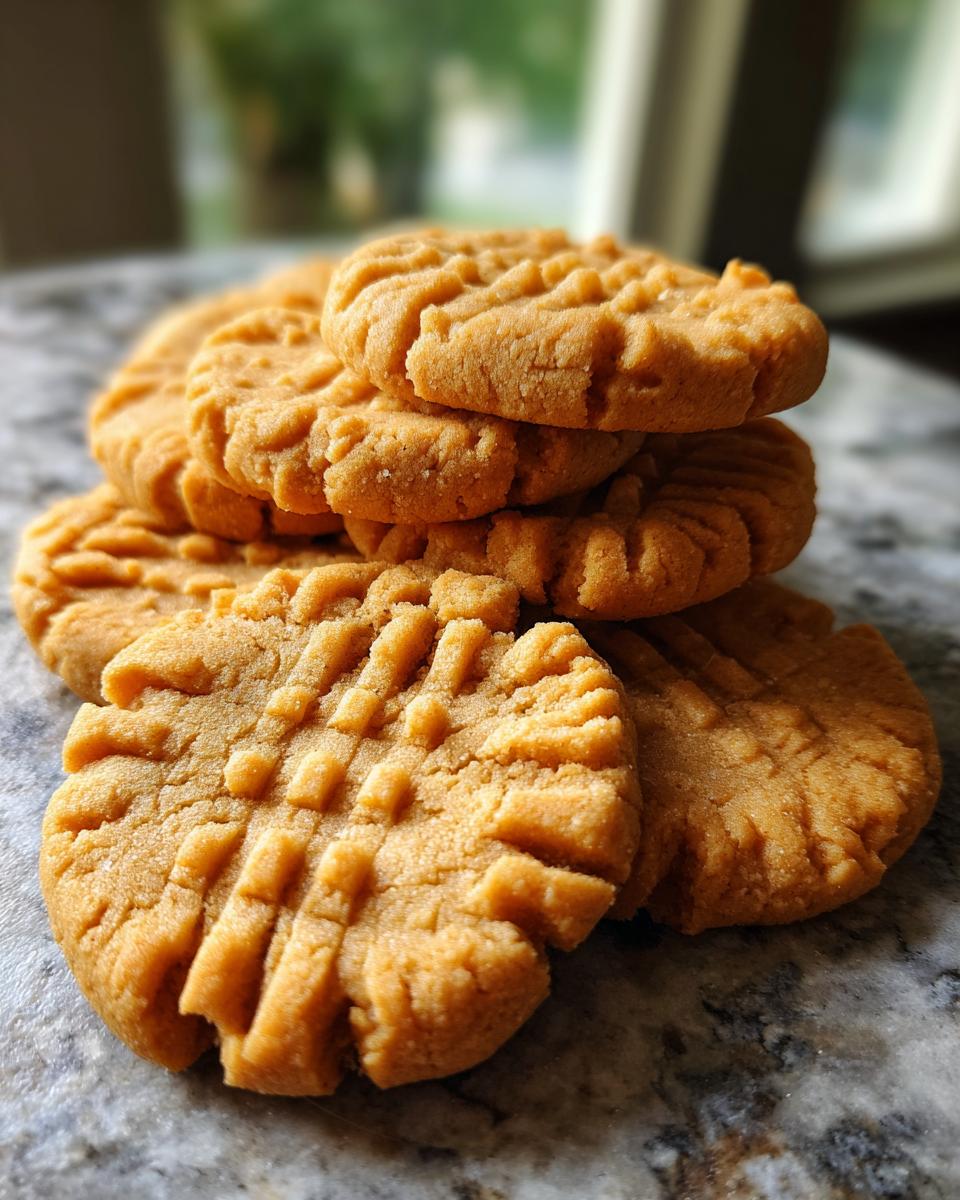
Oh my goodness, remember those iconic Nutter Butter cookies? That buttery peanut butter flavor and that *super* distinct shape – they were always a guaranteed win in my lunchbox or on a road trip. Well, I’ve spent way too much time in the kitchen (it’s a tough job, but someone’s gotta do it!), tinkering and tasting, to bring you the absolute best Homemade Copycat Nutter Butters. Seriously, making these at home is surprisingly simple and so incredibly rewarding. I remember digging into a bag of them as a kid, and now, seeing my own kids’ faces light up when they bite into a fresh batch? Pure magic! You’re going to love how easy this recipe is and how spot-on the flavor is. Get ready to bring back some serious childhood joy!

Why You’ll Love These Homemade Copycat Nutter Butters
Seriously, these cookies are a game-changer! You get that exact nostalgic peanut butter flavor you remember, maybe even a little *more* intense because we’re making them with love right at home. And don’t worry about the shape – this recipe is surprisingly straightforward, even for beginners. Plus, there’s just *something* so satisfying about pulling a batch of these perfect little peanut shapes out of the oven yourself. They’re a guaranteed hit with kids and adults alike, bringing back all those fun childhood memories with every bite!
Gather Your Ingredients for Homemade Copycat Nutter Butters
Okay, the first step to cookie greatness is making sure you’ve got everything ready to go! For these amazing Homemade Copycat Nutter Butters, you’ll want to grab your favorite creamy peanut butter – the kind you’d happily eat with a spoon, you know? We’re also using both unsalted butter, but make sure it’s softened! That means letting it sit out on the counter for a bit so it’s nice and pliable, not melty. Oh, and grab your light brown sugar, but pack it down into the measuring cup. Trust me, the quality of your peanut butter and butter really makes a difference here, so go for the good stuff! It’s worth it for that authentic flavor.
- 1 cup (2 sticks) unsalted butter, softened
- 1 cup granulated sugar
- 1 cup packed light brown sugar
- 2 large eggs
- 1 teaspoon vanilla extract
- 1/2 cup creamy peanut butter (for the dough!)
- 2 1/2 cups all-purpose flour
- 1 teaspoon baking soda
- 1/2 teaspoon salt
- 1/4 cup milk
- And another 1/4 cup of peanut butter for shaping – this little bit is what makes that classic Nutter Butter look!
Essential Equipment for Making Homemade Copycat Nutter Butters
Alright, to get these Nutter Butter cookies just right, you won’t need anything super fancy, but a few key tools really make the process a breeze. You’ll definitely want some sturdy mixing bowls and a good electric mixer – either a stand mixer or a hand mixer works great for creaming that butter and sugar. Oh, and a good measuring cup and spoons are a must! For shaping, a fork will be your best friend, along with a small bowl for that little bit of extra peanut butter. And of course, baking sheets and parchment paper are essential for perfectly baked cookies!
Step-by-Step Guide to Homemade Copycat Nutter Butters
Alright, let’s get down to business and make these amazing cookies! It might seem like a few steps, but trust me, it’s totally do-able and way fun, especially when you get to the shaping part. Here’s how we make these Homemade Copycat Nutter Butters come to life.
Creaming Butter and Sugars
First things first, we need to cream our butter and sugars together. Get that softened butter and both the granulated and brown sugar into your mixing bowl. Beat them on medium speed until the mixture is nice and light and looks fluffy, almost like pale yellow whipped cream. This step is super important because it whips air into the dough, which gives our cookies that perfect texture. It shouldn’t feel gritty anymore!
Incorporating Wet Ingredients
Now, let’s add the wet stuff! Beat in your eggs one at a time, making sure each one is fully mixed in before you add the next. Then, stir in that vanilla extract and, of course, the star of the show – that creamy peanut butter for the dough. Give it a good mix until everything is smooth and cheerful.
Combining Dry Ingredients
In a separate, smaller bowl, just whisk together your flour, baking soda, and salt. Give it a good whisk so everything is evenly distributed. This makes sure our cookies rise evenly and have the right balance of flavor. It’s like a little pre-party for the dry stuff!
Alternating Dry and Wet Mixtures
Time to bring it all together! We’re going to add the dry ingredients to the wet mixture gradually. Start by adding about a third of the dry stuff and mix it in on low speed. Then, pour in about half of the milk and mix again. Keep going like this, alternating between the dry ingredients and the milk, and you want to finish with the dry ingredients. Don’t overmix here – stop as soon as you don’t see any more flour streaks. Overmixing makes tough cookies, and we definitely don’t want that! We don’t want cookies getting too tough before we even get to our keto flourless fudge cookies.
Chilling the Dough
This is a crucial step, so don’t skip it! You’ll want to cover that dough and pop it into the fridge for at least an hour. I usually let mine chill for a bit longer, maybe two hours, because it makes the dough so much easier to handle. When it’s chilled, it’s firmer and less sticky, which is a lifesaver when we start shaping these into those classic peanut shapes. It stops them from spreading too much in the oven, too!
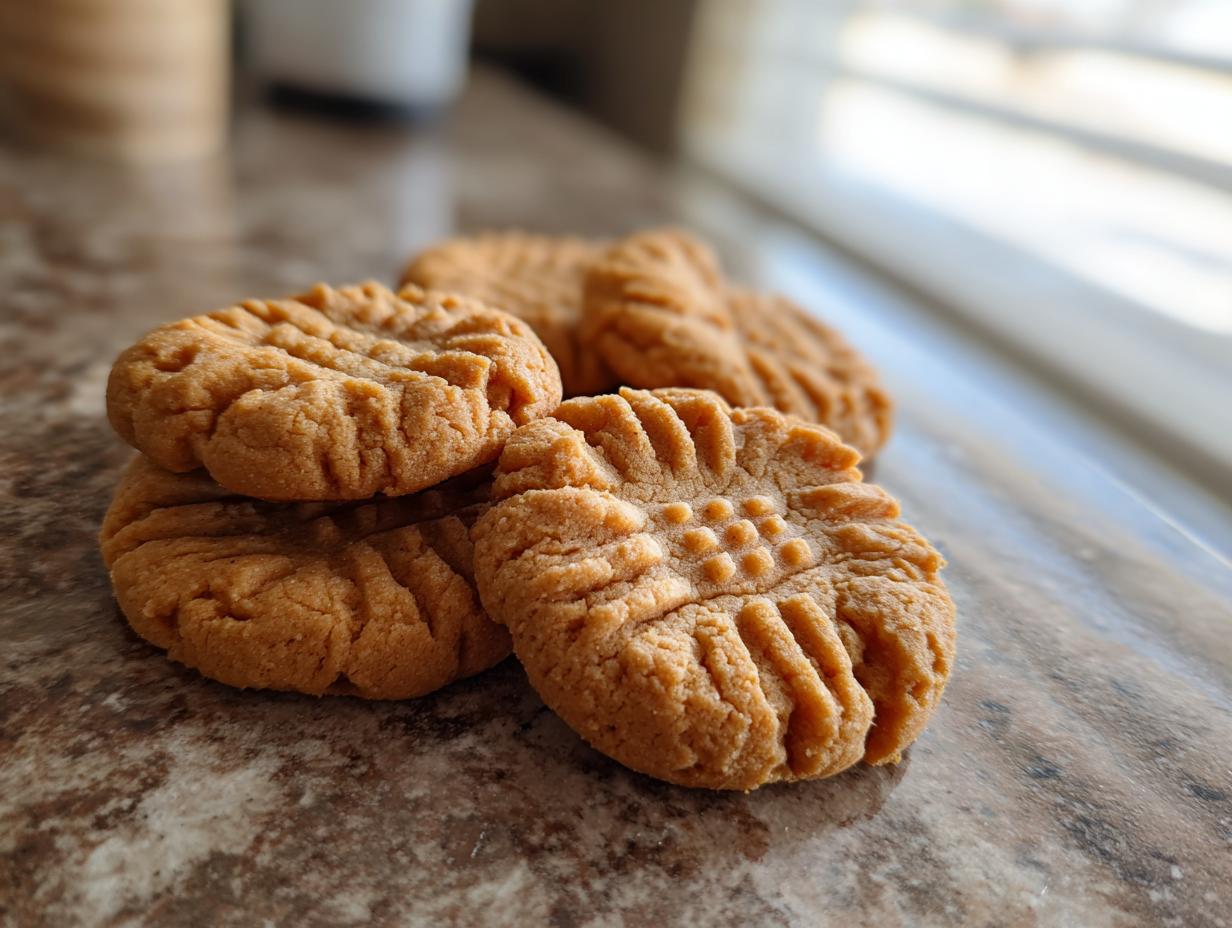
Shaping the Iconic Nutter Butter Form
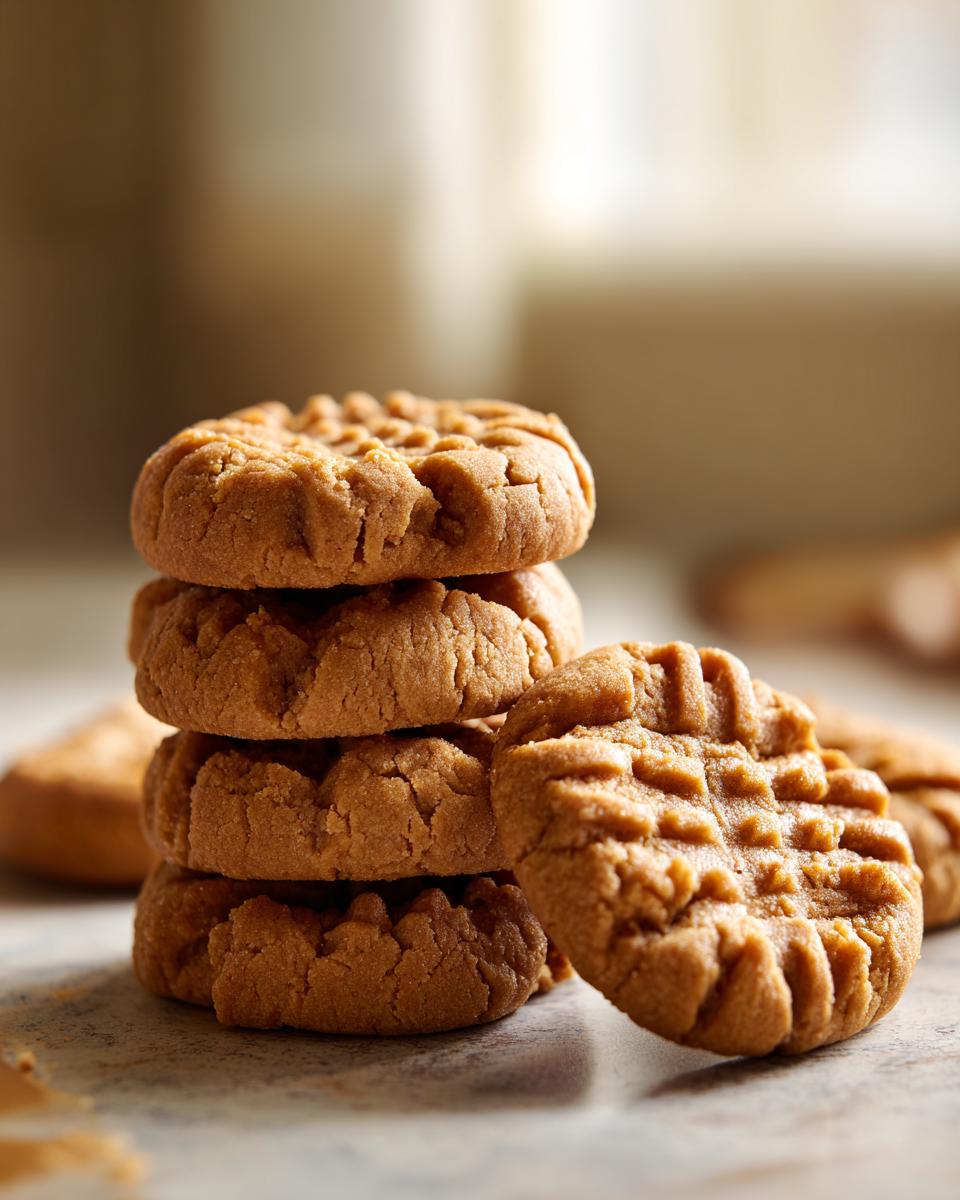
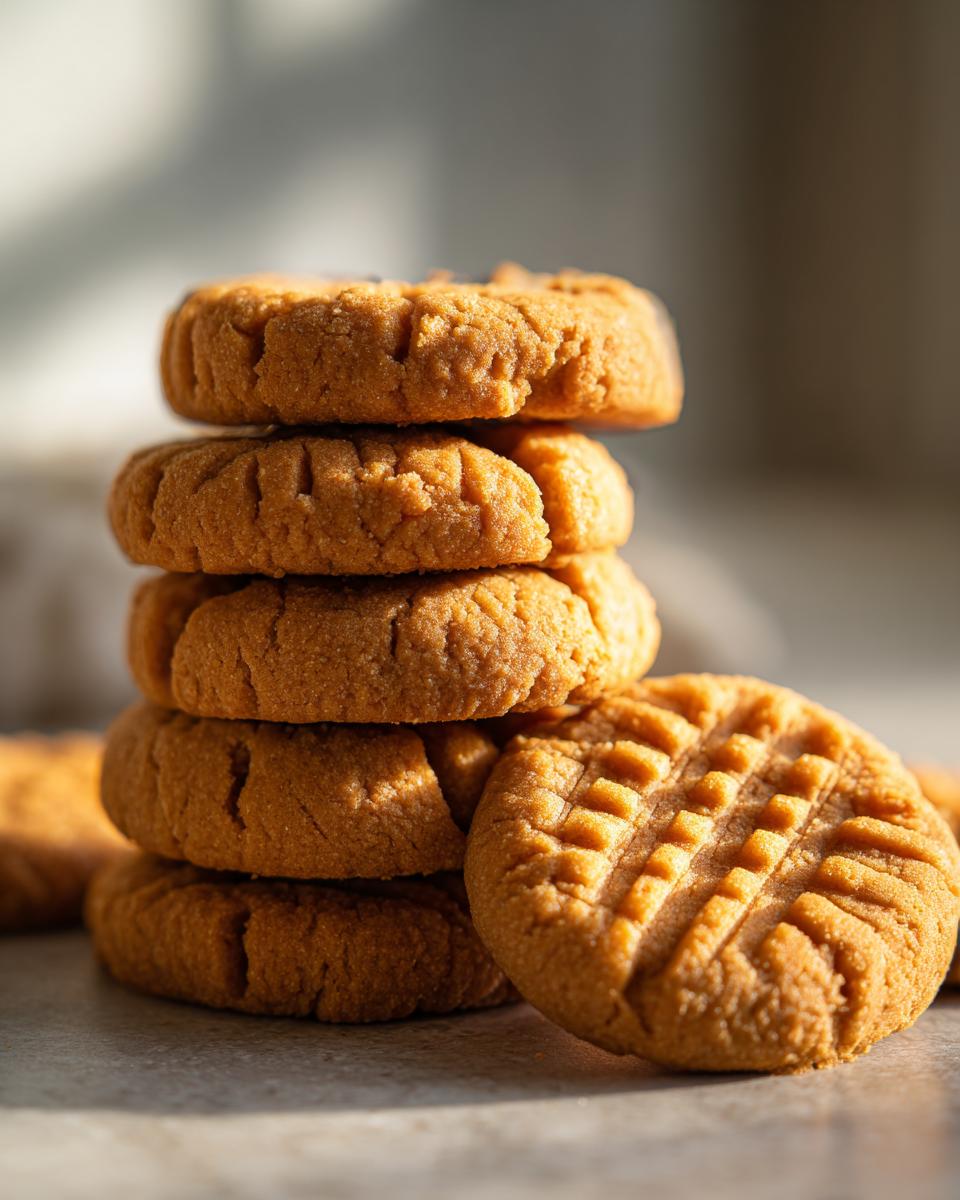
Okay, this is the fun part where they really start to look like Nutter Butters! Grab about a tablespoon of the chilled dough and roll it into a 1-inch ball. Then, gently flatten the ball a little. Now, for that signature shape: grab a fork, dip the tines into that reserved 1/4 cup of peanut butter, and press a nice line right down the center of the cookie. Then, gently pinch the sides of the cookie in towards that center line to create that classic peanut shape. They don’t have to be perfect; the little imperfections are charming! You can even press the edges in a little more if you want a more pronounced peanut look. Just play with it!
Baking to Golden Perfection
Once your oven is preheated to 350°F (175°C) and your baking sheets are lined with pretty parchment paper (this makes cleanup a dream!), carefully place your shaped cookies onto them, leaving a little space between each. Bake for about 10 to 12 minutes. You’re looking for the edges to be just lightly golden brown. If you like your cookies a little crispier, you can leave them in for another minute or two, but keep a close eye on them – these little guys can go from perfect to burnt really fast!
Cooling and Setting
After they come out of the oven, let the cookies hang out on the baking sheets for a few minutes. They’ll still be a bit soft. Then, carefully transfer them to a wire cooling rack to cool completely. Letting them cool all the way is important; it helps them firm up and get that perfect cookie texture. Plus, you can’t resist eating them warm, but they’re best stored once they’re totally cool!
Tips for Nutter Butter Cookie Success
Alright, let’s talk secrets to making these Homemade Copycat Nutter Butters absolutely perfect every single time! First off, don’t skimp on the chilling time for the dough. I know it’s tempting to dive right in, but that hour (or two, like I usually do!) in the fridge makes all the difference. It firms up the dough so it’s WAY easier to shape and stops those cookies from spreading into sad, shapeless blobs in the oven. Remember to use that 1/4 cup of peanut butter for shaping – it gives the dough just enough extra goodness and makes the fork-and-pinch shaping process so much smoother. And for the shaping itself, don’t stress about perfection! Those little homemade quirks actually make them extra charming. If you want them a bit crispier, just nudge that baking time up by a minute or two, but keep a close eye! My tip? If your dough starts to get a little too soft while you’re shaping, pop it back in the fridge for a few minutes. It’s kind of like how my secretly healthy zucchini brownies need that chilling time to firm up before slicing!
Ingredient Notes and Substitutions
Let’s chat about these ingredients for a sec! For the main dough, any creamy peanut butter works wonderfully. If you’re a fan of a more intense peanut flavor, go for a natural peanut butter that you’ve stirred well. Just an fyi, natural peanut butters can sometimes make the dough a little softer, so you might need a touch more chilling time. My absolute favorite is the classic creamy jif style though! As for the flour, all-purpose is perfect, but if you’ve got a craving for something a bit different, you could try using half all-purpose and half whole wheat for a nuttier taste, though it might make them a tiny bit denser. These little tweaks can make batches of cookies almost as fun as my healthy chocolate chickpea truffles!
Storing and Reheating Your Homemade Copycat Nutter Butters
Alright, so you’ve made a glorious batch of these Homemade Copycat Nutter Butters (or maybe you’ve got a secret stash you’re hoarding!). To keep them tasting just as amazing, store them in an airtight container at room temperature. They’ll stay perfectly yummy for a good 4-5 days, but honestly, they usually disappear way before that! If you happen to have more patience than I do and end up with extra, you can totally freeze them. Just layer them between parchment paper in a freezer-safe container. To reheat, just pop a cookie or two on a microwave-safe plate for about 10-15 seconds. They come out warm and a little chewy, like they just came out of the oven!
Frequently Asked Questions about Homemade Copycat Nutter Butters
Got questions about whipping up these delightful Homemade Copycat Nutter Butters? I totally get it! Baking is all about the details, and sometimes you just need a little extra guidance. Here are a few things people often ask:
Can I use natural peanut butter in this recipe?
Oh, great question! You absolutely *can* use natural peanut butter. Just remember that natural peanut butters can sometimes be a bit runnier after you stir them, so your dough might feel a touch softer. If that happens, just pop it back in the fridge for an extra 15-20 minutes to firm up a bit before you start shaping. The flavor will still be fantastic, maybe even a bit more intense!
Why is my cookie dough crumbly?
A crumbly dough can happen for a couple of reasons! It might be that your butter was too cold when you started creaming, or maybe it’s a bit dry in your kitchen. Don’t worry, it’s usually an easy fix! Try adding a little bit more milk, just a teaspoon at a time, and mixing until the dough just comes together. Be careful not to add too much, or your cookies might spread too much. Sometimes, also, if the dough is *too* cold, it can feel crumbly. Let it sit out for just a few minutes to soften slightly.
How do I get the signature Nutter Butter shape right?
Getting that iconic peanut shape is actually pretty fun! The trick is to make sure your dough is well-chilled, which makes it easier to handle. I like to roll the dough into a little ball, then flatten it slightly with my palm. Then, dip a fork into that extra 1/4 cup of peanut butter – just the tines, not the whole fork! – and press a line down the middle. After that, gently pinch the sides inwards towards that center line. It doesn’t have to be perfect; those little imperfections give them homemade charm! It’s kind of like how I shape my keto Philly Cheesesteak rolls – a little bit of shaping goes a long way!
Can I make these ahead of time?
Yes, definitely! You can make the dough a day or two in advance and keep it tightly wrapped in the refrigerator. When you’re ready to bake, just let it sit out for about 10-15 minutes to make it a little more pliable for shaping. The baked cookies also store well in an airtight container for several days, so you can totally prep ahead for a party or just have them ready for snacking!
Estimated Nutritional Information
So, you might be wondering about the nitty-gritty of what’s in these delicious Homemade Copycat Nutter Butters per cookie. While every kitchen and ingredient can vary a bit, I’ve put together some estimates for you. Generally, one perfectly shaped cookie comes in around 150 calories, with about 8 grams of fat, 17 grams of carbohydrates, and 3 grams of protein. Remember these are just ballpark figures, but they give you a good idea! It’s always fun to see what goes into making our favorite treats.
Share Your Homemade Copycat Nutter Butters!
Okay, you made them, right?! I’m dying to hear how your Homemade Copycat Nutter Butters turned out! Did you nail that iconic shape? Were they as delicious as you remembered (or even better!)? Please, please, please leave a comment below and tell me all about your baking adventure. And if you snapped any photos – seriously, show them off! Tag me on social media so I can see your amazing peanut-shaped creations. You can even check out my baking journey and see if you spot any of your cookie masterpieces!
PrintHomemade Copycat Nutter Butters
Make your own Nutter Butter cookies at home with this easy recipe.
- Prep Time: 25 min
- Cook Time: 12 min
- Total Time: 1 hour 37 min
- Yield: 36 cookies 1x
- Category: Dessert
- Method: Baking
- Cuisine: American
- Diet: Vegetarian
Ingredients
- 1 cup (2 sticks) unsalted butter, softened
- 1 cup granulated sugar
- 1 cup packed light brown sugar
- 2 large eggs
- 1 teaspoon vanilla extract
- 1/2 cup creamy peanut butter
- 2 1/2 cups all-purpose flour
- 1 teaspoon baking soda
- 1/2 teaspoon salt
- 1/4 cup milk
- 1/4 cup peanut butter for shaping
Instructions
- Cream together the butter and sugars until light and fluffy.
- Beat in the eggs one at a time, then stir in the vanilla extract and peanut butter.
- In a separate bowl, whisk together the flour, baking soda, and salt.
- Gradually add the dry ingredients to the wet ingredients, alternating with the milk, beginning and ending with the dry ingredients. Mix until just combined.
- Chill the dough for at least 1 hour.
- Preheat your oven to 350°F (175°C). Line baking sheets with parchment paper.
- Roll the dough into 1-inch balls. Flatten each ball slightly.
- Dip a fork into the 1/4 cup peanut butter and use it to press a line down the center of each cookie, then press the sides to create the peanut shape.
- Bake for 10-12 minutes, or until the edges are lightly golden.
- Let the cookies cool on the baking sheets for a few minutes before transferring them to a wire rack to cool completely.
Notes
- For a stronger peanut flavor, use crunchy peanut butter in the dough.
- You can adjust the baking time slightly to achieve your desired level of crispness.
Nutrition
- Serving Size: 1 cookie
- Calories: 150
- Sugar: 12g
- Sodium: 75mg
- Fat: 8g
- Saturated Fat: 3g
- Unsaturated Fat: 5g
- Trans Fat: 0g
- Carbohydrates: 17g
- Fiber: 1g
- Protein: 3g
- Cholesterol: 15mg
Keywords: Nutter Butter, copycat recipe, peanut butter cookies, homemade cookies, easy cookies, dessert recipe