Oh my gosh, you guys, forget the stuff in those plastic tubs! Seriously, once you try making fresh dip at home, you just can’t go back. I’m talking about the fluffiest, creamiest, brightest hummus you’ll ever taste. This is truly my go-to **Homemade Hummus Recipe**, and I mean it when I say it’s the easiest and freshest dip you will ever whip up. I make this automatically every time we have friends over—it disappears so fast I usually double the batch without thinking!
It takes maybe ten minutes max, and the flavor just explodes compared to anything store-bought. Trust me, this recipe is going to become your signature appetizer, too.
Why This Homemade Hummus Recipe Stands Out (E-E-A-T)
Okay, let’s be real for a second: store-bought hummus is fine in a pinch, but it tastes…flat. This **Homemade Hummus Recipe** is totally different. The flavor is bright, zesty from the fresh lemon, and silky smooth. It just sings in comparison!
The best part? You are ten minutes away from this dip. Ten minutes! There’s no soaking, no cooking, just toss everything in the processor and go. That speed makes it my secret weapon for last-minute entertaining.
If I could give you one piece of serious advice, it would be about the tahini. Don’t cheap out here! The quality of your tahini *makes* or breaks this dip. Get the really good, runny kind where the oil naturally separates on top. It gives the hummus this incredible depth and richness you just can’t get otherwise.
Quick Prep Time for Your Homemade Hummus Recipe
You heard me right—only ten minutes, total. That means you can decide right when people come over that you *need* fresh dip, and boom, you have it. There’s zero oven time involved, which is a huge win during the summer when you don’t want to turn the stove on. This **Homemade Hummus Recipe** is the definition of fast and fresh!
It’s honestly faster to make this than it is to drive to the store and buy a tub, and the taste difference is massive. Perfect for busy weeknights when you need something healthy and delicious fast.
Essential Ingredients for the Best Homemade Hummus Recipe
The beauty of this **Homemade Hummus Recipe** is that it relies on just a handful of powerhouse ingredients. You probably have most of this stuff sitting in your pantry already. Every element plays a huge role in getting that authentic, silky texture, so try not to mess with the core four: chickpeas, tahini, lemon, and garlic!
When you gather your components, pay attention to how they’re prepped. For example, you need one 15-ounce can of chickpeas, but they absolutely must be rinsed and thoroughly drained. Don’t let that canned liquid hang around—it’ll make your hummus watery! We also need a robust dash of good olive oil, just a tablespoon of minced garlic, and a quarter teaspoon of salt to make those flavors pop. If you’re looking for fresh inspiration on eating well, check out some of these clean eating recipes while you gather your supplies.
Ingredient Notes and Substitutions for Homemade Hummus Recipe
Now for the real secrets! If you want your hummus to be unbelievably smooth—I mean, restaurant-level creamy—you have to peel your chickpeas. Yes, it’s tedious, but I promise it is worth the effort. Just pinch the skin off once they’re rinsed; it makes a massive difference in preventing that slightly grainy texture. It’s my personal trick to elevating this **Homemade Hummus Recipe**!
As for the lemon juice? Freshly squeezed is non-negotiable for me. Bottled lemon juice loses that bright vibrancy when it sits, and that zestiness fights the richness of the tahini. If you are truly desperate and all you have is bottled, go half the amount first and taste it before adding more. Also, don’t skip the salt, even though it seems like a small amount; healthy fats need salt to really taste phenomenal.
Step-by-Step Instructions for Your Homemade Hummus Recipe
Getting this **Homemade Hummus Recipe** perfect is all about the process in the food processor. Don’t rush the initial breakdown! First step is simple: throw in your rinsed and drained chickpeas, the gorgeous tahini, your fresh lemon juice, that tiny bit of garlic, the olive oil, and the salt. Get everything comfy in there.
Now, hit the start button! You need to process this mixture until it stops looking like separate chunky ingredients and starts turning into a real, thick paste. It’s going to look kind of dry and pasty at first, and this is where you need to stop and scrape down the sides, maybe pushing everything back toward the blades. Do this a couple of times. If you’re ever looking for something fast to serve alongside this amazing dip, check out these easy dinner recipes!
This is the crucial moment for texture, so listen closely! With the processor running—do not stop it—you slowly drizzle in that cold water. One tablespoon at a time is the mantra here. If you dump it all in, you’ll regret it immediately because the hummus will turn thin and soupy. We want gradual hydration!
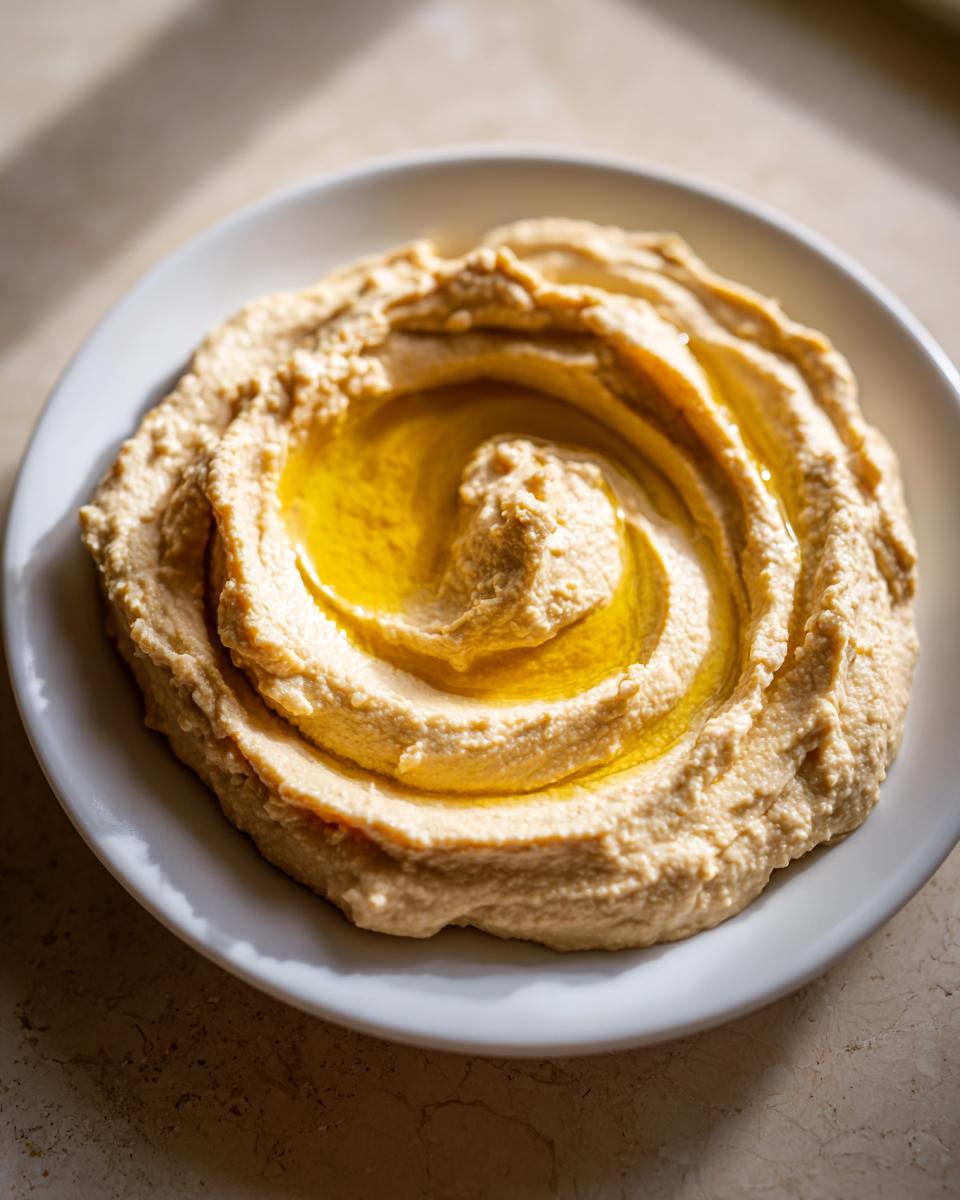
Keep adding that water, tablespoon by tablespoon, until it switches from that thick paste consistency to that dreamy, smooth, spreadable texture we crave. Once it looks right, stop the machine, give it a good taste. Does it need a little more salt? Another squeeze of lemon to brighten it up? Adjust it now before serving up your beautiful dip.
Achieving Peak Smoothness in Your Homemade Hummus Recipe
I cannot stress this enough: you have to let the machine work. Don’t just pulse it a few times and call it a day. You need sustained blending time for the tahini and the olive oil to properly emulsify with the chickpea base. This creaming action is what makes the **Homemade Hummus Recipe** so silky instead of gritty.
If you try to trick the processor by adding too much liquid at once, you’ll break the emulsion, and you’ll never get that beautiful, airy look. Patience here is gold! Give it five full minutes of processing time—stopping to scrape down the sides as needed—and you will be rewarded with the creamiest hummus possible, hands down.
Tips for Success with Your Homemade Hummus Recipe
Even though this **Homemade Hummus Recipe** is super simple, there are a few little baker’s tricks I’ve picked up over the years that really take it from great to absolutely unforgettable. These aren’t in the basic steps, but they are my personal keys to fluffy, impressive hummus every single time!
First, I touched on this before, but let’s really talk about the water. Use ICE-COLD water, seriously ice cold! The sudden chill as the processor is running helps the mixture whip up lighter and fluffier. It keeps the temperature down and helps create tiny air bubbles, giving you that lovely cloud-like texture. If you run out of regular cold water, you can use a spoonful or two of the chickpea liquid—the aquafaba—instead. That stuff is magical for binding things!
Secondly, don’t be shy with the garlic, but use it wisely. If you’re prepping this ahead of time to serve four hours later, mince the garlic and toss it in with everything else. But if you want a milder, fresher hit of garlic without the intense burn, try this: mince the garlic clove, put it in about a teaspoon of your lemon juice, and let it sit for five minutes *before* adding it to the processor. It mellows it out just a touch. It’s a subtle tweak, but big things come in small packages!
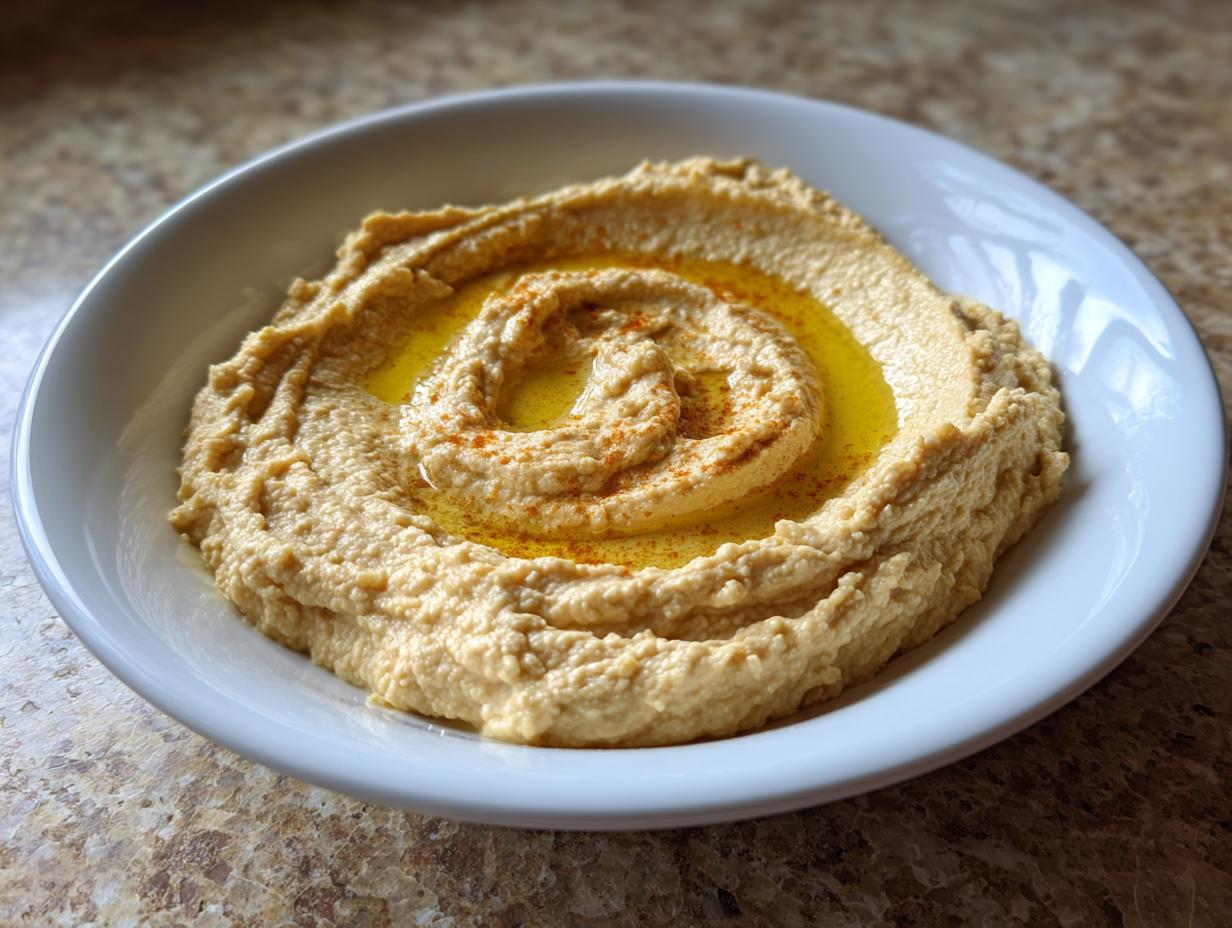
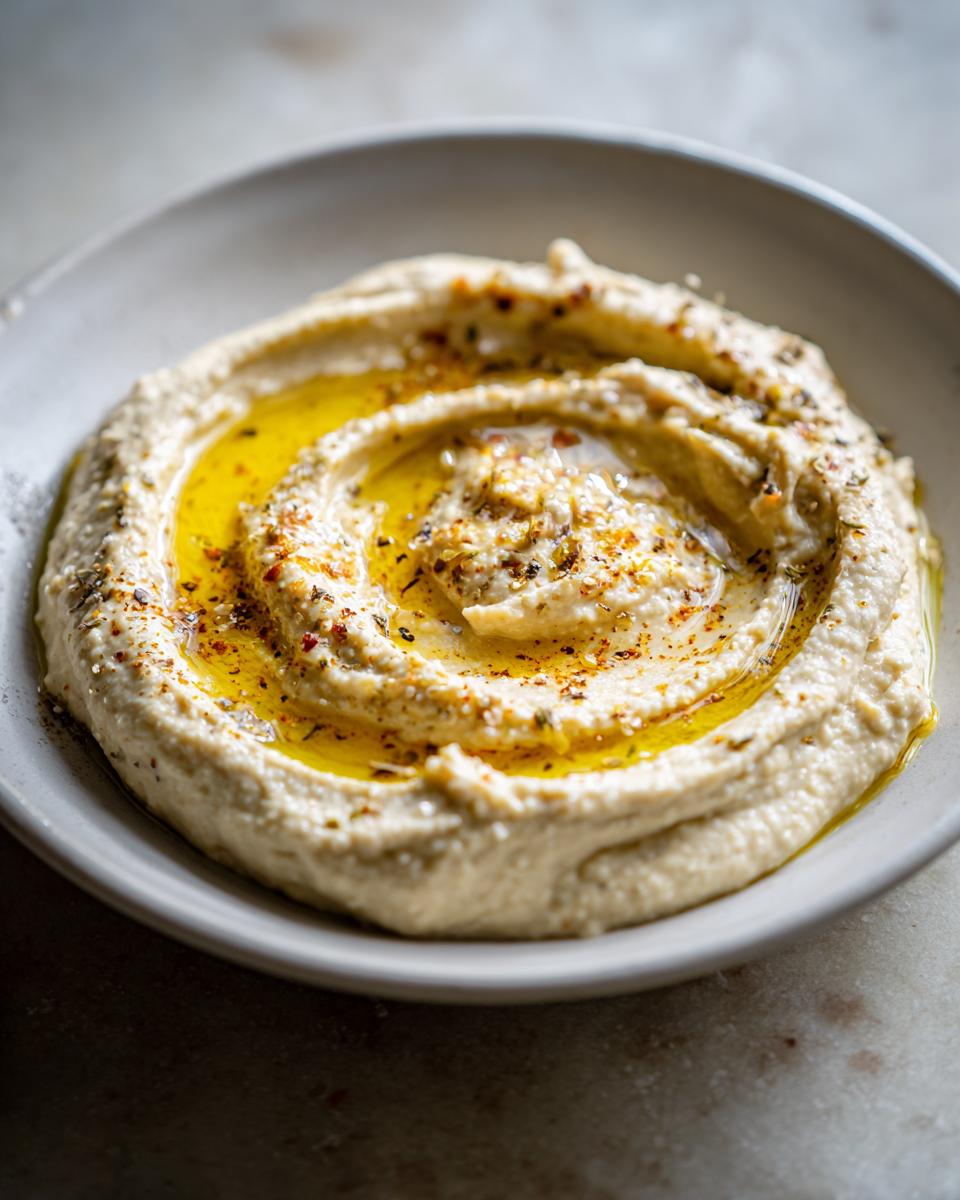
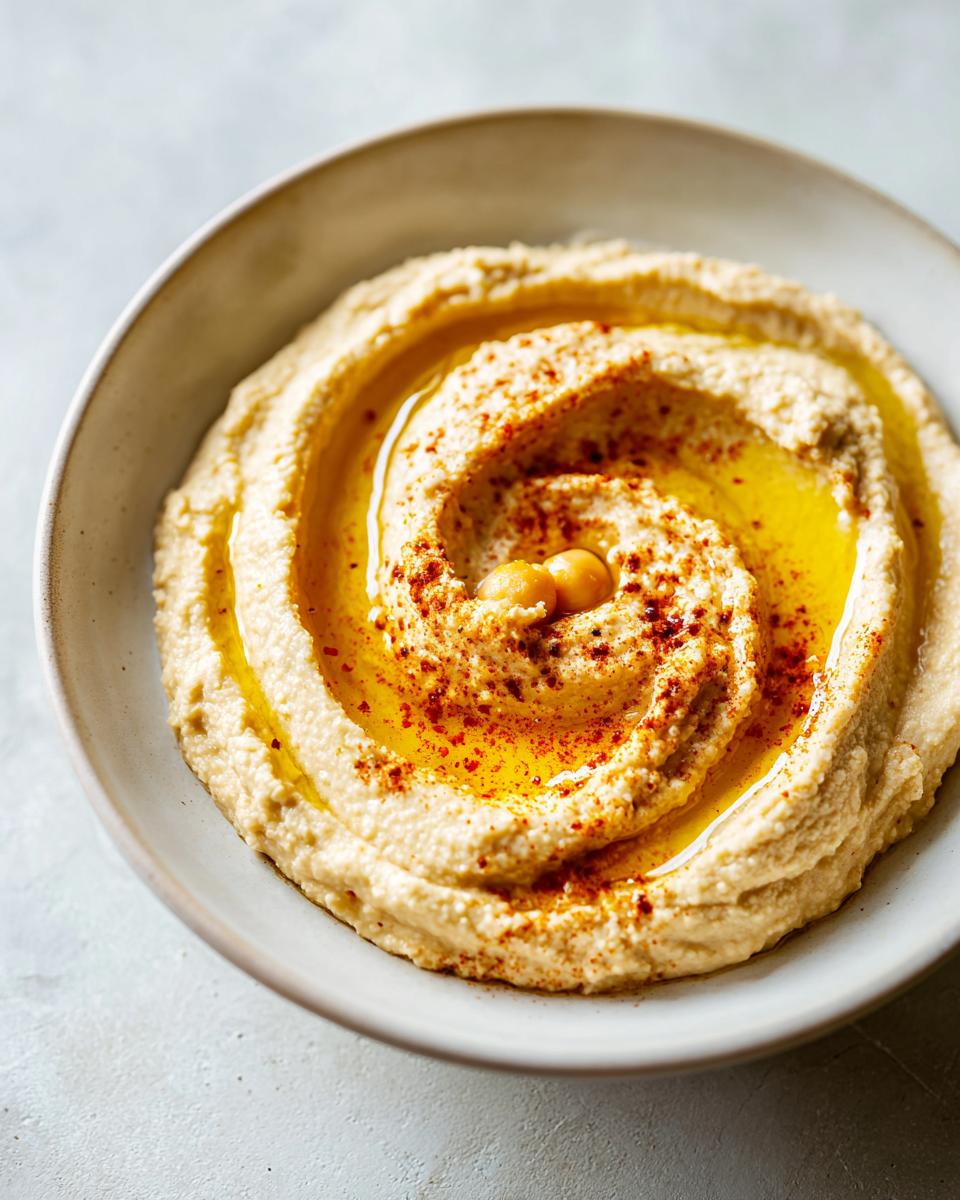
And finally, presentation counts! This **Homemade Hummus Recipe** deserves a good dressing up. Once you scoop it into your serving bowl, that final drizzle of high-quality olive oil is essential. It seals the surface and adds flavor. After the oil, dust it lightly with smoked paprika for color, maybe some toasted pine nuts or a pinch of cumin. It makes the dip scream ‘freshly made.’ If you love plating up beautiful dishes, you should definitely check out these fresh plates recipes for inspiration!
Serving Suggestions for Homemade Hummus Recipe
Now that you have this incredibly silky **Homemade Hummus Recipe** ready to go—which, remember, took only ten minutes!—we have to talk about how to present this beauty. The presentation is half the fun, especially since this dip is always a guaranteed crowd-pleaser. You need things for dipping, obviously!
My absolute favorites are warmed pita triangles, slightly crispy pita chips, and a colorful assortment of raw veggies. Think crisp carrots, crunchy bell peppers in every color, and maybe some cucumber slices. It looks so much better when you have a rainbow on the platter!
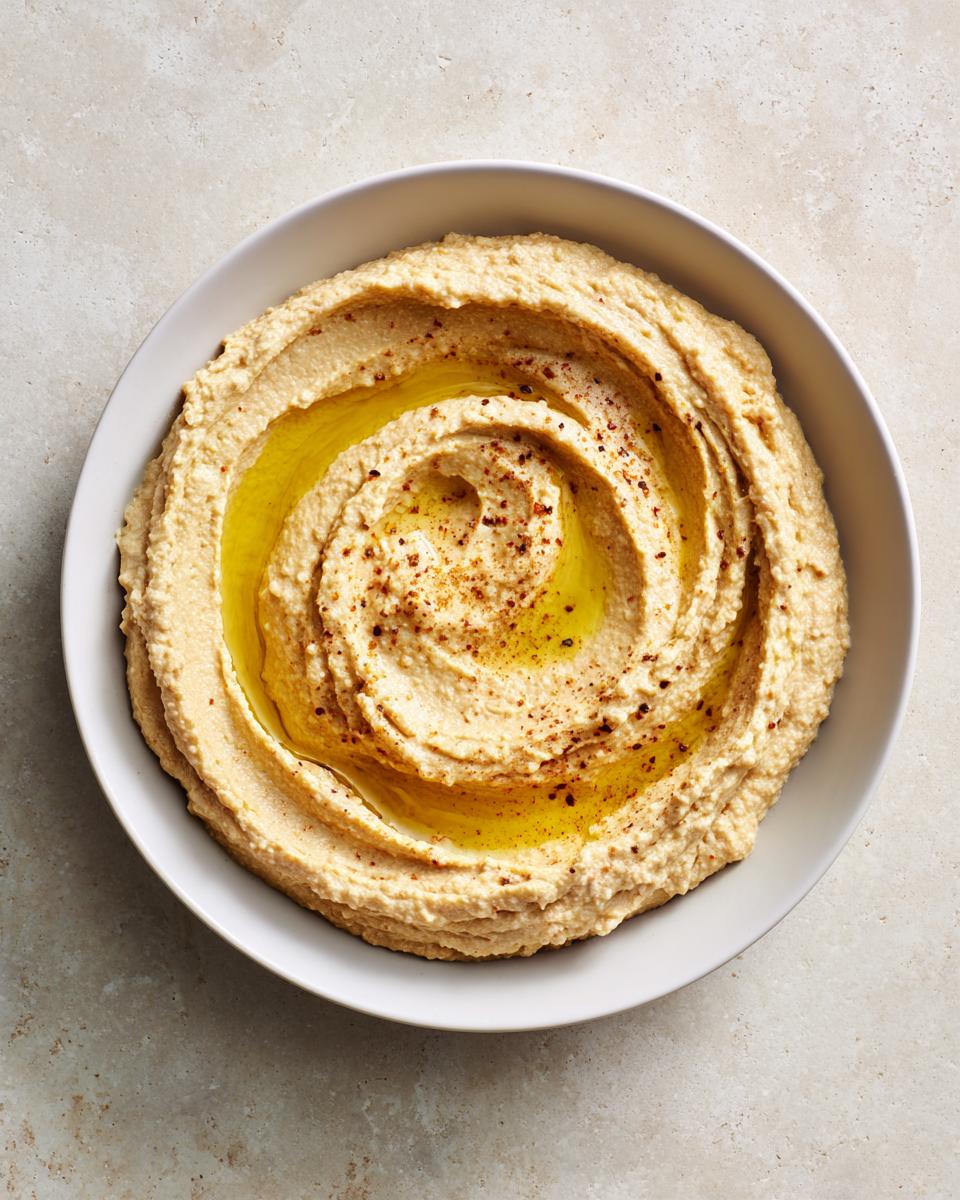
Don’t forget the garnish we talked about; that finishing touch really sells it. A good dusting of smoked paprika and a sprinkle of toasted pine nuts or even some chopped fresh parsley makes this homemade dip look professional. If you need more ideas for snacks that make everyone happy, take a peek at these crowd-pleasing appetizers and snacks!
Seriously, you’ll feel like a fancy restaurant chef just by adding a little olive oil swirl and some color on top of your 10-minute work!
Storage and Reheating for Homemade Hummus Recipe
One of the best things about this **Homemade Hummus Recipe** is that it actually tastes even better the next day once the flavors have had time to really marry together! You want to store any leftovers right away in a truly airtight container. I find that if I leave it sitting out too long, the top layer gets a little dry and crusty, and we don’t want that.
In the fridge, a good batch of this fresh hummus lasts beautifully for about four to five days. Because we didn’t cook anything, it’s fresh, but that also means it will stiffen up as it gets colder. Don’t panic if it looks rock hard when you pull it out on day three!
To revive that beautiful, smooth texture, it just needs a tiny bit of help. Take out whatever amount you want to serve, put it in a clean bowl, and then stir in just a splash—and I mean a tiny splash—of cold water. Slowly mix it in with a spoon. It only takes a minute for that water to loosen everything up and bring back that creamy, just-made feel. Alternatively, a tiny drizzle of fresh lemon juice works wonders to perk up the flavor if it seems a little muted after refrigeration.
You can also give it a quick 30-second blitz in the food processor if you’re feeling fancy, but usually, just a good stir with a little water fixes everything right up. I think the key is only taking out what you need, so the main container stays happy in the colder part of the fridge.
Frequently Asked Questions About Homemade Hummus Recipe
I always get so many questions after I post this, which just shows how popular this dip is! People always want to tweak recipes, and that’s fine, but you need to know the ground rules for this **Homemade Hummus Recipe**. I’ve pulled together the most common things I hear so you can troubleshoot before you even start blending.
Can I make this without tahini?
Oh, this is the big one! If you try to make hummus without tahini (that creamy sesame paste), what you end up with is basically mashed chickpeas. Tahini is what gives hummus its signature slightly earthy, nutty flavor and its incredible richness. Trust me, the texture will be all wrong if you skip it. If you absolutely cannot find it, you could try substituting it with a spoonful of cashew butter or sunflower seed butter, but it won’t be traditional hummus. If you’re looking for other healthy ideas, take a look at some fresh healthy recipes for inspiration!
How do I make this spicy?
If you like things with a little kick, you’ve got tons of easy options here that work perfectly with this **Homemade Hummus Recipe**. You can blend in a couple of tablespoons of jarred roasted red peppers along with a pinch of cayenne pepper during the processing stage. That gives it a smoky heat! My favorite way, though, is just blending in a spoonful of high-quality harissa paste right at the end. It adds spice and a gorgeous reddish swirl on top when you dress it with oil.
Can I use dried chickpeas instead of canned in this Homemade Hummus Recipe?
Yes, you totally can! Using dried chickpeas actually results in even *better* hummus because you have full control over their texture, and they often have less sodium. However, this takes planning, not ten minutes. You have to soak the dried chickpeas overnight (or use the quick-soak method) and then simmer them until they are super, super soft—so soft they practically dissolve when you press them between your fingers.
When using dried, make sure to save that cooking liquid! That leftover liquid is gold; it’s like super-powered aquafaba. You’ll use that instead of plain cold water when you’re blending to get the smoothest result possible for your homemade chickpea dip.
Why is my finished hummus slightly bitter?
Bitterness usually comes from one of two places in a **Homemade Hummus Recipe**. First, if you didn’t rinse and drain your canned chickpeas well, sometimes that canning liquid residue can leave a metallic taste. Always rinse them! Second, and this is more common, if your tahini is old or wasn’t stirred well before measuring, the thick, dark stuff at the bottom of the jar can be quite acrid. Always give that tahini jar a good, vigorous stir before you measure it out to ensure you’re getting the good, creamy part.
Estimated Nutritional Information for Homemade Hummus Recipe
Okay, while I’m not a dietitian, I know everyone wants to know what they’re scooping up, especially when spreading this amazing **Homemade Hummus Recipe** on everything we own! These numbers are based on using the standard amount of chickpeas and olive oil listed in the recipe for about a 1/4 cup serving size.
Just remember, these are estimations. If you go heavy on the olive oil drizzle at the end or use a super oily tahini, these numbers are going to shift a little bit! This is just to give you a good baseline when you’re planning your snacking.
- Serving Size: 1/4 cup
- Calories: around 150
- Total Fat: about 10 grams
- Protein: 5 grams
- Carbohydrates: 12 grams
- Fiber: 4 grams
- Sugar: only 1 gram (that’s just natural sugar from the chickpeas!)
- Cholesterol: 0 mg (Naturally!)
See? It’s a fantastic, filling dip loaded with fiber and healthy fats from that yummy tahini and olive oil. It’s seriously one of the best appetizers you can put out because it checks so many boxes and satisfies everyone. I always feel good serving this **Homemade Hummus Recipe** because it’s packed with real ingredients and not a bunch of preservatives!
Share Your Homemade Hummus Recipe Experience
Alright, you’ve made it! You’ve successfully blended up the creamiest, freshest batch of hummus your kitchen has ever seen. Now, this part of the recipe posting is always my favorite—hearing from YOU! I put my heart into making this **Homemade Hummus Recipe** the best version out there, and I seriously want to know how it turned out for you.
Please, don’t be shy! If you followed the steps and this dip knocked your socks off, leave me a rating right below. Five stars would make my day, but even a quick note saying, “I used smoked paprika, and my family loved it!” is amazing feedback!
I live for seeing how everyone enjoys their creations. Do you stick to just pita bread, or are you dipping everything in sight—like roasted sweet potatoes or carrots? Tell me your best serving suggestions! If you snap a picture of that beautifully garnished bowl, tag me on social media! I love browsing through all your beautiful food photos. If you want to see what else I’m cooking up, check out the main blog page for more easy recipes!
It feels good knowing that my little secret for fresh dip is now part of your routine. Happy dipping, everyone, and thanks for trying out my favorite **Homemade Hummus Recipe**!
PrintHomemade Hummus Recipe
A simple recipe for making fresh hummus at home using basic ingredients.
- Prep Time: 10 min
- Cook Time: 0 min
- Total Time: 10 min
- Yield: About 1.5 cups 1x
- Category: Appetizer
- Method: Food Processing
- Cuisine: Middle Eastern
- Diet: Vegan
Ingredients
- 1 (15-ounce) can chickpeas, rinsed and drained
- 1/4 cup tahini
- 2 tablespoons fresh lemon juice
- 1 clove garlic, minced
- 2 tablespoons olive oil, plus extra for serving
- 1/4 teaspoon salt
- 2–4 tablespoons cold water
Instructions
- Place the rinsed chickpeas, tahini, lemon juice, garlic, olive oil, and salt into a food processor.
- Process the mixture until it becomes a thick paste. Scrape down the sides as needed.
- With the food processor running, slowly add the cold water, one tablespoon at a time, until the hummus reaches your desired smooth consistency.
- Taste and adjust salt or lemon juice if necessary.
- Transfer the hummus to a serving bowl. Drizzle with extra olive oil before serving.
Notes
- For creamier hummus, remove the skins from the chickpeas before processing.
- If you do not have a food processor, a high-powered blender can work, but you may need more liquid.
Nutrition
- Serving Size: 1/4 cup
- Calories: 150
- Sugar: 1
- Sodium: 180
- Fat: 10
- Saturated Fat: 1.5
- Unsaturated Fat: 8.5
- Trans Fat: 0
- Carbohydrates: 12
- Fiber: 4
- Protein: 5
- Cholesterol: 0
Keywords: hummus, homemade, chickpea dip, tahini, vegetarian, vegan, appetizer, dip