Okay, so Halloween is basically my *favorite* time of year for baking, and what’s more festive than something a little spooky? Forget those complicated cakes with all the fancy piping – my go-to for a killer Halloween spread has always been these awesome Creepy Deviled Eggs! Seriously, they look amazing, taste even better, and are ridiculously easy to whip up. I remember one year, I threw a party and made a whole platter of these, and they were gone in like, ten minutes! People couldn’t get enough of how cute and delicious they were.
Why You’ll Love These Creepy Deviled Eggs
Seriously, these little guys are the stars of any Halloween party! Here’s why:
- Super Easy to Make: Even if you’re a total beginner, you can whip these up!
- Festive & Fun: They look SO spooky and get everyone in the Halloween spirit.
- Crowd Pleaser: Who doesn’t love deviled eggs? These are always a hit!
- Quick Prep: You can get them made and decorated in no time.
- Deliciously Classic: They taste just like your favorite deviled eggs, but with a creepy twist!
- So Versatile: Perfect for parties, school lunches, or even just a spooky snack.
Essential Ingredients for Creepy Deviled Eggs
Alright, let’s talk about what you’ll need to make these spooky little delights. Because, honestly, the magic is in the simple stuff done just right! I always find that using good quality ingredients really makes a difference, even in something as straightforward as deviled eggs.
Here’s your shopping list:
- 12 large eggs, ready to be boiled and peeled
- 1/2 cup of your favorite mayonnaise – I usually go for a full-fat one for the best texture!
- 1 tablespoon of tangy Dijon mustard
- 1/4 teaspoon of salt, just to wake up the flavors
- A tiny pinch of black pepper, because, well, eggs!
- 1/4 cup of finely chopped dill pickles – these give it that little zing and crunch!
- 1/4 cup of finely chopped onion – shallots work great too if you want something a bit milder
- A dusting of paprika for that classic deviled egg color (and extra creepiness!)
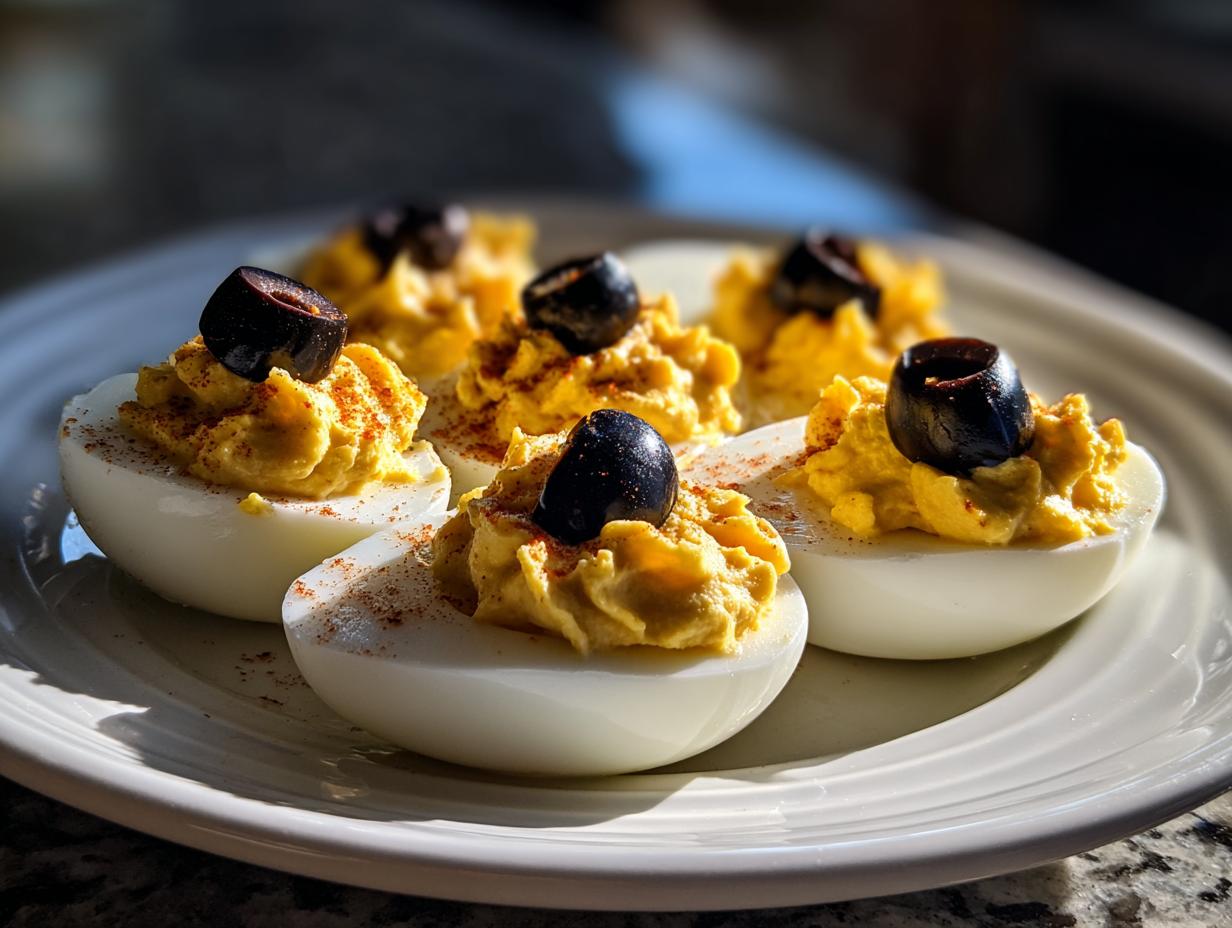
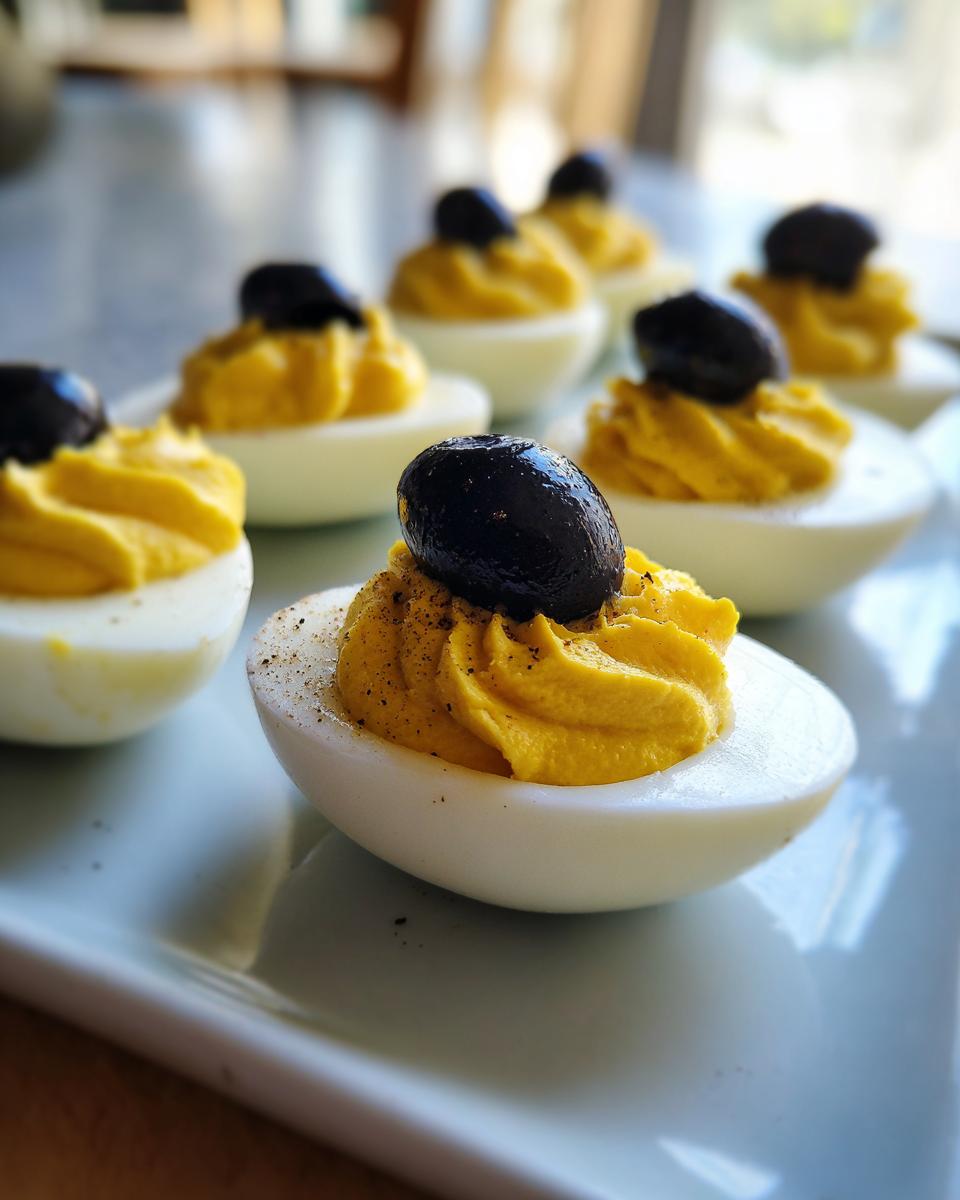
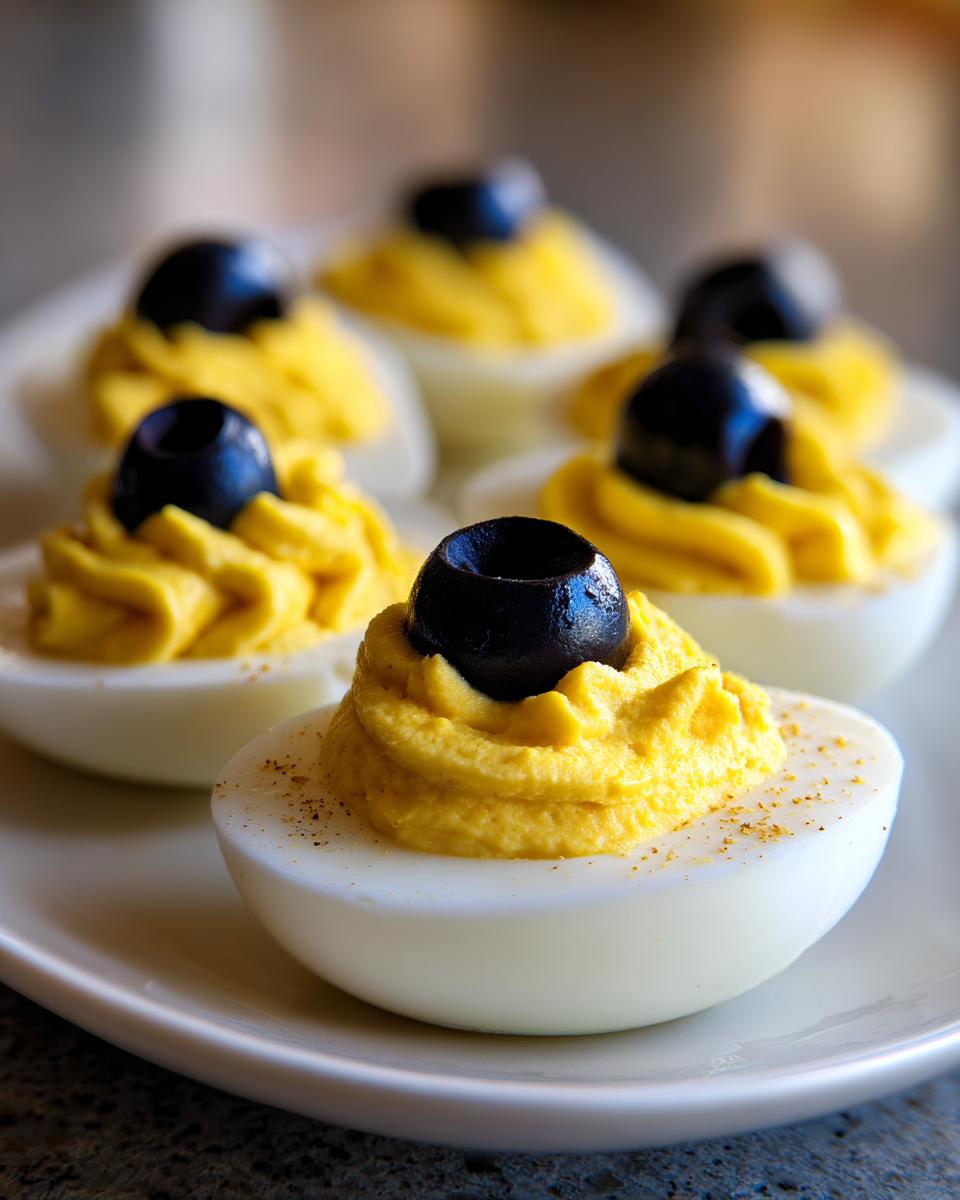
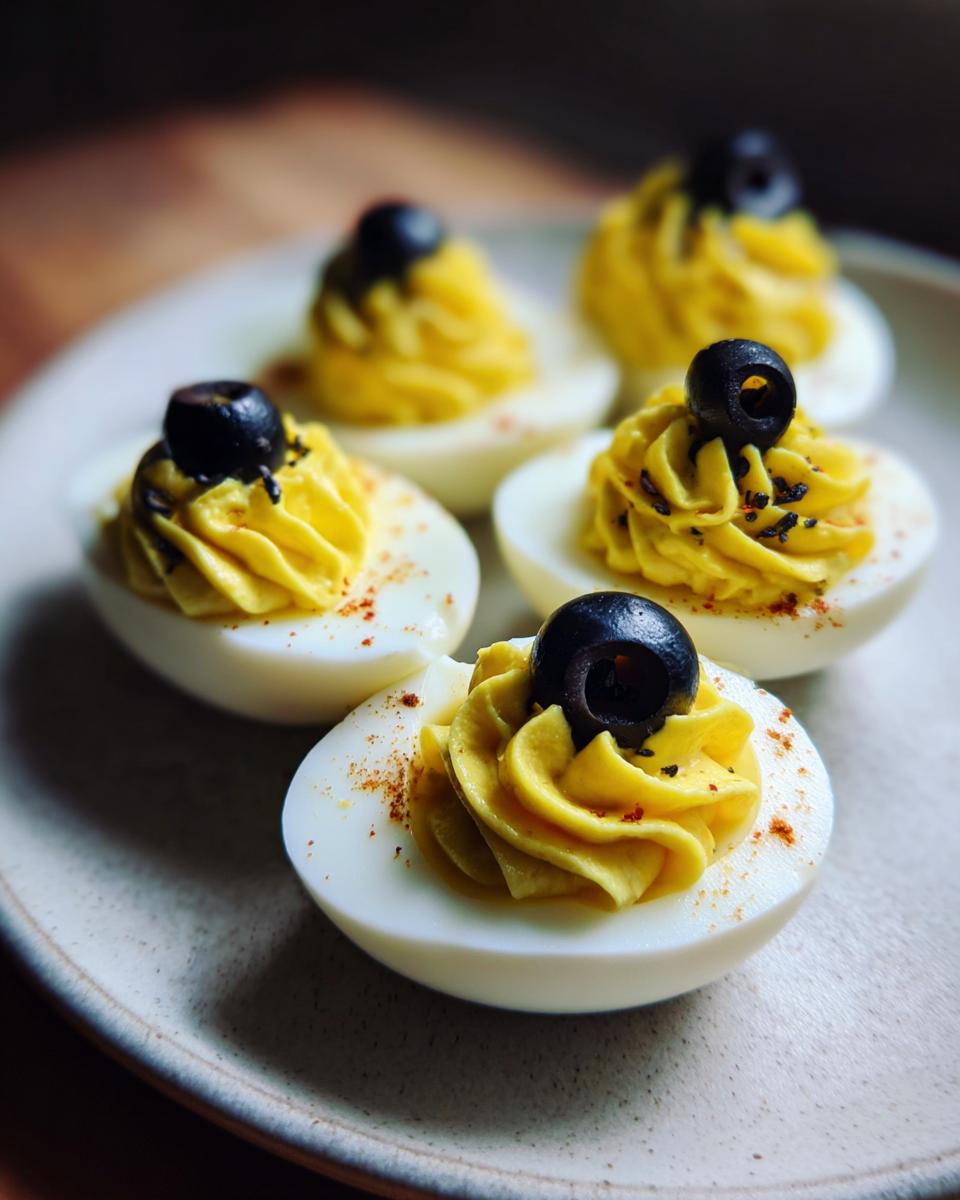
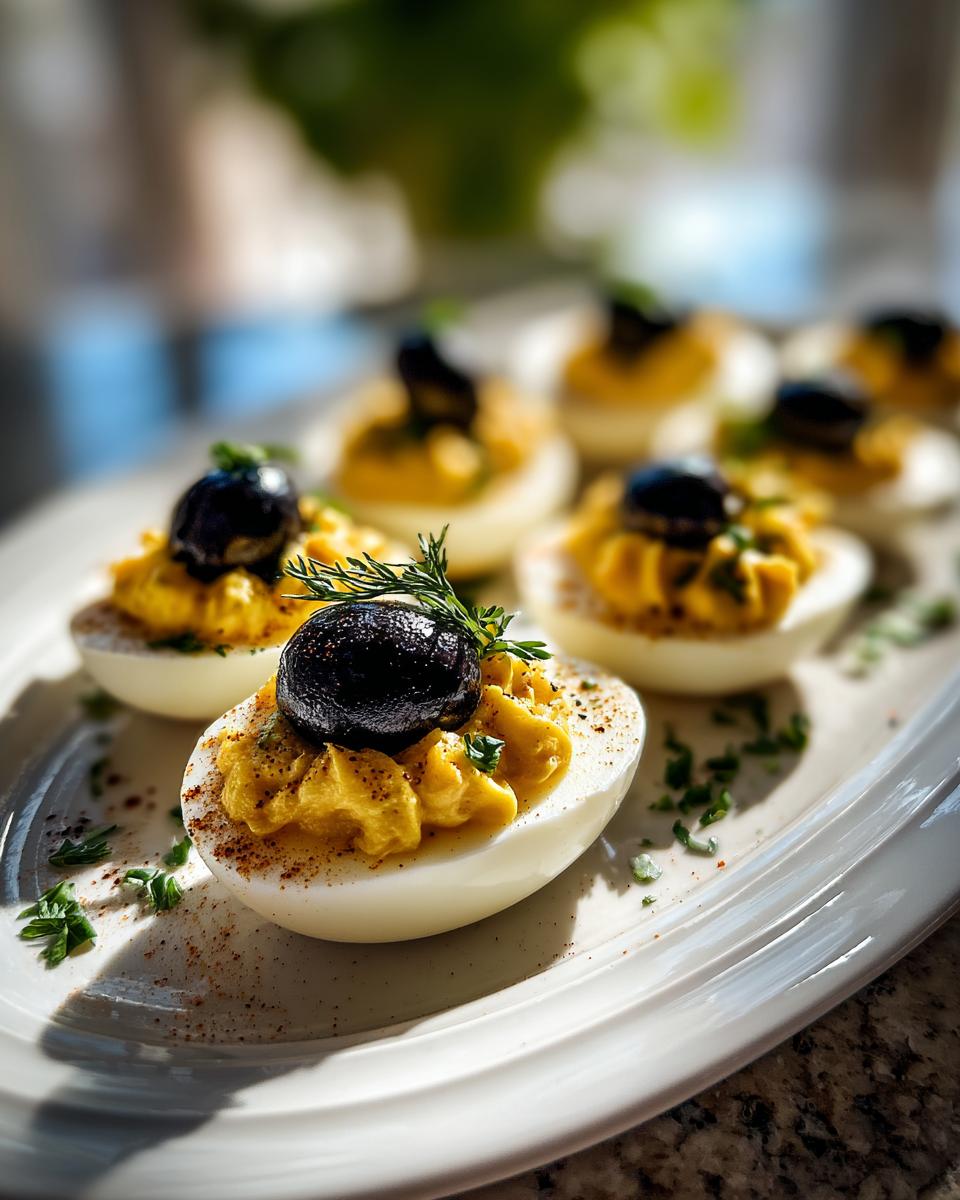
- And our stars for decoration: Black olives! You’ll need some for slicing to make those spooky eyes.
Crafting Your Creepy Deviled Eggs: Step-by-Step
Okay, let’s get down to the spooky business of making these incredible Creepy Deviled Eggs! It’s really not complicated, just a few simple steps and then you get to have all the fun with the decorating. My grandma always said the secret is to take your time, especially when you’re prepping the eggs, so they look nice and neat. For some extra visual inspiration, you can even peek at how creative people get with food art for Halloween or even spooky pasta recipes to get your creative juices flowing!
Preparing the Egg Whites
First things first, you need to get those hard-boiled eggs ready. After they’ve cooled, you’re going to carefully slice each one in half lengthwise. The trick to a perfect cut? Use a sharp knife and go slowly! Then, gently scoop out those bright yellow yolks into a separate bowl. You want to keep those little white cradles as intact as possible so they can hold all that delicious filling.
Making the Spooky Yolk Filling
Now for the yummy part! Take those mashed yolks and grab your fork. Mash them up really well until they’re nice and smooth. Then, just stir in the mayonnaise, that Dijon mustard for a little kick, the salt, and pepper. Mix it all up until it’s super creamy and dreamy. This is where you stir in your finely chopped pickles and onion for that extra bit of flavor and texture. Trust me, if you want it *extra* smooth, you can press the yolks through a sieve before you mix them in. It makes a world of difference!
Assembling and Decorating Your Creepy Deviled Eggs
Once your filling is perfect, it’s time to bring these eggs to life! Spoon or pipe that glorious yolk mixture back into those waiting egg white halves. Don’t be shy – fill ’em up! Now for the really fun part: the decorating! Grab your black olives and slice them up. You can make little spider eyes right on top of the filling – it’s so easy and SO creepy! Or get creative and make little spiders or spooky faces. A little dusting of paprika over the top finishes them off perfectly.
Tips for Perfect Creepy Deviled Eggs
Okay, so you’ve got the basics down, but let me give you a few of my favorite secrets to make these Creepy Deviled Eggs absolutely *perfect* every single time. It’s all about those little touches that take them from good to spooktacular!
First off, for the *best* hard-boiled eggs that peel like a dream, I swear by the ice bath method I use for all my egg recipes. After boiling, plunge them straight into ice water. It stops the cooking and makes peeling SO much easier – no more frustrating bits left behind! If your filling seems a little too thick, just stir in a tiny splash more mayonnaise or even a teaspoon of the pickle juice – it makes it super smooth and pipeable. And while olives are classic for those creepy eyes, don’t be afraid to get creative! You could use tiny dots of cream cheese with a caper for the pupil, or even thin strips of chives to make little spider legs. It’s all about having fun! You can even check out some of my other fun Halloween ideas, like these Halloween brownies or mini ghost pizzas, for even more party inspiration!
Ingredient Notes and Substitutions for Creepy Deviled Eggs
When you’re making these spooky treats, sometimes you might not have *exactly* what the recipe calls for, and that’s totally okay! For the pickles, if you’ve only got sweet pickle relish handy, it’ll work in a pinch, just maybe reduce the mayo a smidge if it’s super wet. And Dijon mustard gives it that nice tang, but if you’re out, a little bit of regular yellow mustard with a tiny drop of Worcestershire sauce can give you a similar vibe. It’s all about making it work with what you’ve got in your kitchen!
Making Ahead and Storing Your Creepy Deviled Eggs
You know, the beauty of these Creepy Deviled Eggs is you can totally get a head start on your Halloween party prep! It saves so much stress on the big day. You can absolutely make the yolk filling a day in advance. Just pop it into an airtight container and keep it in the fridge. When you’re ready to assemble, carefully scoop or pipe the filling into your prepared egg white halves. If you want to make them completely ahead, assemble them, cover them tightly with plastic wrap (press it down gently over the eggs so they don’t dry out), and keep them chilled. They’re usually best enjoyed within a day or two!
Common Questions About Creepy Deviled Eggs
Got questions? I’ve got answers! People always ask me about making these spooky little guys, and I love sharing what I know. For more fun Halloween ideas, you can always check out what’s trending on Pinterest’s Halloween section!
Can I make the filling ahead of time?
Oh yes! You totally can make the yolk filling a day in advance. Just pop it in an airtight container in the fridge. It keeps wonderfully!
What are other ways to decorate these deviled eggs?
Besides olives for eyes, try using finely snipped chives for little spider legs, or tiny slivers of pimento or red pepper for a creepy “bloodshot” look. Get creative!
How long do Creepy Deviled Eggs last in the refrigerator?
Typically, these spooky deviled eggs are best enjoyed within 1 to 2 days when stored covered tightly in the fridge.
Nutritional Information for Creepy Deviled Eggs
Now, if you’re curious about the nitty-gritty, here’s a rough idea of the nutritional info for a serving of two of these creepy little guys. Keep in mind this is just an estimate, you know? It can totally change depending on your mayo brand or if you add any extra spicy bits. But generally, they’re a pretty tasty, protein-packed appetizer!
Share Your Spooky Creations!
I would absolutely LOVE to see how your Creepy Deviled Eggs turned out! Did you make little spider eggs, or something even spookier? Share your pics and tell me all about your Halloween party creations in the comments below, or even check out my about page for more baking fun!
PrintCreepy Deviled Eggs

Spooky deviled eggs perfect for Halloween parties.
- Prep Time: 20 min
- Cook Time: 15 min
- Total Time: 35 min
- Yield: 24 halves 1x
- Category: Appetizer
- Method: Boiling
- Cuisine: American
- Diet: Vegetarian
Ingredients
- 12 large eggs
- 1/2 cup mayonnaise
- 1 tablespoon Dijon mustard
- 1/4 teaspoon salt
- 1/8 teaspoon black pepper
- 1/4 cup finely chopped pickles
- 1/4 cup finely chopped onion
- Paprika for dusting
- Black olives for decoration
Instructions
- Place eggs in a saucepan and cover with cold water. Bring to a boil, then remove from heat, cover, and let stand for 10-12 minutes.
- Drain eggs and plunge into ice water to stop the cooking. Peel eggs when cool.
- Cut each egg in half lengthwise. Remove the yolks and place them in a small bowl.
- Mash the yolks with a fork. Add mayonnaise, Dijon mustard, salt, and pepper. Mix until smooth.
- Stir in chopped pickles and onion.
- Spoon or pipe the yolk mixture back into the egg white halves.
- Decorate each deviled egg with black olive slices to resemble spider eyes or other creepy designs.
- Dust lightly with paprika.
Notes
- For a smoother filling, press the yolks through a sieve before mixing.
- You can add a pinch of cayenne pepper for a little heat.
- Chill the deviled eggs for at least 30 minutes before serving.
Nutrition
- Serving Size: 2 halves
- Calories: 90
- Sugar: 1g
- Sodium: 100mg
- Fat: 7g
- Saturated Fat: 2g
- Unsaturated Fat: 5g
- Trans Fat: 0g
- Carbohydrates: 1g
- Fiber: 0g
- Protein: 4g
- Cholesterol: 100mg
Keywords: deviled eggs, Halloween, appetizer, party food, spooky, creepy, eggs